Using Coffee Grounds for Liquid Fertilizer
Quick Answer
- Coffee grounds are a nitrogen-rich addition to your garden.
- You can steep grounds in water to create a liquid fertilizer.
- Use about 1-2 cups of used coffee grounds per gallon of water.
- Let it steep for at least 24 hours, or longer for a stronger brew.
- Dilute the coffee fertilizer with plain water before applying to plants.
- Apply to the soil around plants, not directly on the leaves.
- This is best for leafy green vegetables and acid-loving plants.
For a readily available and effective option, consider a high-quality liquid fertilizer designed to provide essential nutrients.
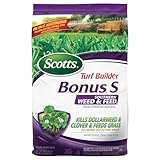
- Kills dollarweed, clover and other listed lawn weeds
- Feeds grass to crowd out future weeds
- Builds strong, deep grass roots to strengthen against heat and drought
- Not for use on Bermudagrass
- Only for use on St. Augustinegrass (including Floratam), centipede, zoysia and carpetgrass lawns
Who This Is For
- Gardeners looking for a free, natural fertilizer.
- Home composters who have a surplus of used coffee grounds.
- Plant enthusiasts wanting to give their greenery a nitrogen boost.
What to Check First
Brewer Type and Filter Type
The type of coffee maker you use and the filter material can impact how much you can reuse the grounds. Drip coffee makers with paper filters are common. These grounds are generally good to go. French presses or pour-over methods might leave more oils. Some people worry about the acidity, but once brewed and used, it’s usually not an issue for most plants.
Water Quality and Temperature
Tap water is usually fine for this purpose. If your tap water is heavily chlorinated, letting it sit out for a few hours can help the chlorine evaporate. The temperature of the water used for steeping doesn’t need to be exact. Room temperature or slightly cool water works well. You’re not brewing coffee here, just extracting nutrients.
Grind Size and Coffee Freshness
Used coffee grounds are what you want. Fresh grounds have more volatile compounds. For fertilizer, older is actually better. The grind size doesn’t matter much for steeping. Whether it’s fine espresso grounds or coarser French press grounds, they’ll all release their nutrients.
Coffee-to-Water Ratio
A good starting point is about 1 to 2 cups of used coffee grounds for every gallon of water. This gives you a nice, balanced nitrogen infusion. Too many grounds might make the mixture too concentrated. Too few, and you might not get much benefit. It’s better to start with less and make a second batch if needed.
Cleanliness/Descale Status
Make sure your coffee brewing equipment is clean. You don’t want mold or bacteria from old coffee residue getting into your fertilizer mix. Rinse out your coffee maker or French press thoroughly. Clean containers for steeping are also important. A clean start means a healthier fertilizer for your plants.
Step-by-Step: Brewing Your Coffee Ground Fertilizer
Here’s how to whip up a batch. It’s pretty straightforward.
1. Gather your used coffee grounds.
- What to do: Collect grounds from your morning brew. You can let them dry out a bit if you’re not using them right away, but it’s not strictly necessary.
- What “good” looks like: A decent pile of damp, dark brown grounds. No mold.
- Common mistake: Using grounds that have gone moldy.
- How to avoid it: Use fresh grounds or dry them before storing if you won’t use them for a day or two.
2. Find a suitable steeping container.
- What to do: Grab a clean bucket, a large jug, or even a clean trash can. Something that can hold a gallon or more.
- What “good” looks like: A clean, food-grade or previously clean container.
- Common mistake: Using a container that previously held chemicals or is dirty.
- How to avoid it: Always wash your steeping container thoroughly with soap and water.
When preparing your fertilizer, ensure you have the right tools; a good set of gardening supplies can make the process much easier.

- Modular Design: Vego Garden raised bed kits feature an innovative modular design, which means you can assemble a kit into various configurations that fit any backyard or garden space in a 9-in-1 kit, you can build one of 9 possible configurations to fit your garden plans
- Better Material: We have combined a Zinc, Magnesium, and Aluminum coated steel with our award-winning and USDA approved AkzoNobel paint to develop a new material which we call VZ 2.0. The first material of its kind is 100% safe, eco friendly, with a long 20+ year life. VZ 2.0’s exceptional performance has been verified at the Texas A&M National Corrosion & Materials Reliability Lab
- Easier and Safer Installation: No construction knowledge is required with our easy to use raised bed kits, which only require you to assemble the materials and tighten the fasteners; our beds feature an oval design with no sharp corners, along with heavy duty rubber edging to cover the edges providing protection from injury
- Healthier Roots and Less Bending Down: At 17", the higher depth allows plenty of room for root systems to develop, better water drainage, and soil quality. It also eases the strain of bending down, one primary benefit of gardening in raised beds is that you don’t have to bend down quite as far when tending, weeding, or harvesting your plants
- Complete System: Vego Garden has aimed to create unified gardening systems that start outside, in your garden, and extend all the way into your day-to-day today life. The team continues to develop more products that enhance the Vego experience, such as cover system, worm composters, arched trellis and wall trellis and so on. Beyond the physical product, education and community are an integral part of the Vego Garden system, we will continue to strive for these values from design to customer
3. Add coffee grounds to the container.
- What to do: Dump your collected grounds into the clean container.
- What “good” looks like: Grounds settled at the bottom or floating.
- Common mistake: Packing the grounds down too tightly.
- How to avoid it: Just let them fall in naturally. No need to press them.
4. Add water.
- What to do: Pour in your water. Aim for that 1-2 cups of grounds per gallon ratio.
- What “good” looks like: Water covering the grounds.
- Common mistake: Using too much water, making the fertilizer too weak.
- How to avoid it: Measure your grounds and water, or eyeball it carefully based on the ratio.
5. Stir the mixture.
- What to do: Give everything a good stir to make sure the grounds are saturated.
- What “good” looks like: A muddy-looking liquid with grounds dispersed.
- Common mistake: Not stirring enough, leaving dry pockets of grounds.
- How to avoid it: Stir vigorously for about 30 seconds.
6. Let it steep.
- What to do: Cover the container loosely and let it sit. 24 hours is a good minimum. Longer is fine.
- What “good” looks like: The water will likely turn a darker brown, and the smell will be earthy.
- Common mistake: Steeping for too short a time.
- How to avoid it: Be patient. At least 24 hours is key.
7. Strain the liquid.
- What to do: Pour the steeped liquid through a fine-mesh sieve, cheesecloth, or an old T-shirt into another clean container.
- What “good” looks like: A mostly clear, dark brown liquid. Most grounds are removed.
- Common mistake: Not straining well, leaving too many grounds in the liquid.
- How to avoid it: Strain twice if needed, or use a finer straining material.
8. Dilute the fertilizer.
- What to do: Mix your strained coffee liquid with an equal amount of plain water. A 1:1 ratio is standard.
- What “good” looks like: A lighter brown, less concentrated liquid.
- Common mistake: Applying the concentrated brew directly to plants.
- How to avoid it: Always dilute. This prevents root burn.
9. Apply to your plants.
- What to do: Water your plants with the diluted fertilizer, pouring it around the base of the plant.
- What “good” looks like: Moist soil around the plant roots.
- Common mistake: Pouring directly onto leaves or stems.
- How to avoid it: Target the soil near the roots.
10. Dispose of leftover grounds.
- What to do: The leftover grounds can go into your compost bin or be spread directly on the soil.
- What “good” looks like: Grounds that are not moldy.
- Common mistake: Throwing away the nutrient-rich solids.
- How to avoid it: Compost them or use them as a soil amendment.
Common Mistakes (and What Happens If You Ignore Them)
| Mistake | What It Causes | Fix |
|---|---|---|
| Using moldy coffee grounds | Introduces harmful fungi to your soil and plants. | Always check grounds for mold before steeping; dry or discard if moldy. |
| Not straining the liquid well | Grounds can clog sprayers, attract pests, or smother delicate plant roots. | Strain through a fine sieve, cheesecloth, or an old, clean T-shirt. Repeat if necessary. |
| Applying undiluted fertilizer | Can burn plant roots due to high concentration of nutrients or acidity. | Always dilute the coffee liquid with plain water, typically a 1:1 ratio, before applying. |
| Pouring fertilizer on plant leaves | Can cause leaf burn or attract pests/diseases to the foliage. | Water the soil directly around the base of the plant, targeting the root zone. |
| Using too many grounds | Can make the fertilizer too strong, potentially harming plants. | Start with a 1:2 ratio (grounds to water) and adjust in future batches if needed. |
| Steeping for too short a time | Less nutrient extraction, resulting in a weaker fertilizer. | Steep for at least 24 hours. Longer steeping (up to a few days) can yield a stronger brew. |
| Using dirty equipment or containers | Can introduce unwanted bacteria or mold to your fertilizer. | Thoroughly wash all containers, strainers, and tools with soap and water before use. |
| Applying too frequently | Can lead to over-fertilization, causing nutrient imbalances in the soil. | Use sparingly, perhaps once every 2-4 weeks during the growing season, depending on plant needs. |
| Using fresh, unbrewed grounds | Can contain compounds that might inhibit seed germination or plant growth. | Always use used, brewed coffee grounds. The brewing process neutralizes most of these inhibiting compounds. |
| Storing the liquid fertilizer too long | Can lead to spoilage, mold growth, or loss of nutrient potency. | Use within a week or two. If it smells off or looks cloudy, it’s best to discard and make a fresh batch. |
Decision Rules
Here are some simple guidelines for using your coffee ground fertilizer.
- If your plants are looking a bit yellow and leafy, then use coffee ground fertilizer because it’s rich in nitrogen, which promotes green growth.
- If you have acid-loving plants like blueberries or azaleas, then coffee ground fertilizer is a great choice because it can slightly lower soil pH.
- If you are growing vegetables, then apply this fertilizer to leafy greens like spinach and kale more often than root vegetables.
- If you have a new seedling, then dilute the fertilizer even more (e.g., 1:2 or 1:3 coffee to water) because young plants are more sensitive.
- If your soil is compacted, then consider mixing the used coffee grounds directly into the soil (after steeping) rather than just using the liquid, as it can help improve soil structure.
- If you have a lot of used grounds, then make a larger batch of fertilizer, but remember to dilute it properly before use.
- If you notice any signs of root burn (wilting, browning leaf tips) after applying, then you likely used it too concentrated or too often, so dilute more next time or skip a few applications.
- If you’re unsure about your plant’s specific needs, then start with a weaker dilution and observe your plant’s response before increasing strength or frequency.
- If you have a lot of leftover liquid that you can’t use immediately, then it’s best to discard it after a week or two to prevent spoilage rather than risk using a degraded product.
- If your plants are already receiving a balanced commercial fertilizer, then use coffee ground fertilizer as a supplement, not a replacement, to avoid over-fertilizing.
FAQ
Can I use fresh coffee grounds?
It’s best to use used coffee grounds. Fresh grounds can be too acidic and may contain compounds that inhibit plant growth. Brewing neutralizes these.
How often should I fertilize with coffee grounds?
Generally, once every 2-4 weeks during the growing season is sufficient. Watch your plants; over-fertilizing can be detrimental.
Will this make my soil more acidic?
Brewed coffee grounds are close to neutral pH. While some think they’re highly acidic, their effect on soil pH is usually minimal, especially when diluted.
Can I just spread the used grounds on my garden?
Yes, you can! Used grounds are a great soil amendment. They add organic matter and can help improve soil structure. Just don’t put them in thick layers, as they can crust over.
What plants benefit most from coffee fertilizer?
Leafy greens, vegetables like tomatoes and peppers, and acid-loving plants such as azaleas, rhododendrons, and blueberries tend to respond well.
What if my plants don’t like it?
Some plants might be sensitive. If you see negative reactions like wilting or leaf burn, stop using it and try a more diluted solution or a different fertilizer.
Can I use coffee grounds from flavored coffee?
It’s generally recommended to stick with plain coffee. Artificial flavorings or sweeteners might not be beneficial for your plants or soil.
Does the type of coffee filter matter?
For the liquid fertilizer, not really. Whether you used paper, metal, or no filter (like French press), the grounds are usable.
What This Page Does Not Cover (and Where to Go Next)
- Detailed analysis of specific nutrient content in coffee grounds.
- Using coffee grounds for pest control (though some anecdotal evidence exists).
- The effects of coffee grounds on specific soil microorganisms.
- Advanced composting techniques involving coffee grounds.
- Recipes for other homemade organic fertilizers.