Homemade Caramel Syrup for Your Coffee
Quick answer
- Use sugar, water, and butter for a classic caramel.
- Cook sugar slowly until it’s amber. Don’t rush it.
- Add butter and cream for richness.
- Cool it down before adding to your coffee.
- Store it in the fridge.
- Taste and adjust sweetness or thickness.
Who this is for
- Coffee lovers who want a custom sweet treat.
- Home cooks looking for a simple, rewarding recipe.
- Anyone tired of store-bought syrups with weird ingredients.
What to check first
Brewer type and filter type
This recipe is about the syrup, not the brew. But a good coffee makes the syrup shine. Whatever you use – drip, pour-over, French press – make sure it’s dialed in.
Water quality and temperature
For the syrup, filtered water is best. It won’t add any off-flavors. For brewing, use water just off the boil, around 200°F. That’s standard for most coffee.
Grind size and coffee freshness
Again, this is about the syrup. But fresh beans, ground right before brewing? That’s the ticket. A medium grind usually works for most drip brewers.
Coffee-to-water ratio
For the syrup, we’re talking sugar to liquid. A good starting point is a 1:1 ratio of sugar to water, but we’ll adjust. For coffee, aim for about 1:15 to 1:17 (coffee to water by weight).
Cleanliness/descale status
A clean coffee maker is non-negotiable. Scale buildup messes with temperature and flow. For the syrup, a clean pot is crucial. You don’t want burnt bits clinging to old gunk.
Step-by-step (how do you make caramel syrup for coffee)
1. Prep your ingredients. Get your sugar, water, and butter ready. Measure them out. You’ll want everything within reach.
- What good looks like: All ingredients are measured and sitting beside your stove. No scrambling later.
- Common mistake: Not measuring beforehand. This leads to fumbling with ingredients when the sugar is changing fast.
2. Combine sugar and water. Put the sugar and water in a clean, heavy-bottomed saucepan.
- What good looks like: Sugar and water are mixed together. It might look a bit cloudy.
- Common mistake: Using a pan that’s too small or thin. This can lead to uneven heating and scorching.
For best results, we recommend using a quality heavy-bottomed saucepan to ensure even heating and prevent scorching.
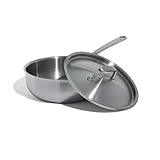
- Total Diameter: 10” | Cooking Surface Diameter: 7 | Height (with handle): 4.5” | Depth: 3.5” | Length (to end of handle): 18.25”
- Essential for Every Kitchen - The Made In Stainless Clad Sauce Pan is a must-have kitchen tool, offering maximum heat control, responsiveness, and versatility to elevate your cooking experience
- Superior Quality - Made from 5 layers of premium metal for professional-quality heat distribution
- Stay Cool Handle - Meticulously crafted to stay cool while cooking and fastened with stainless steel rivets for a lifetime of use
- Induction Cooktop Compatible - With a top layer of 430 stainless steel, these Stainless Clad Pots and Pans work effortlessly with any cooktop, including induction
3. Heat gently. Place the pan over medium heat. Stir only until the sugar is dissolved.
- What good looks like: You see no sugar crystals at the bottom. The liquid is clear.
- Common mistake: Stirring after the sugar dissolves. This can cause crystallization later.
4. Stop stirring and let it bubble. Once the sugar is dissolved, stop stirring. Let the mixture come to a boil and bubble away. Swirl the pan occasionally to ensure even cooking.
- What good looks like: A steady, rolling boil. The liquid starts to turn pale yellow.
- Common mistake: Stirring the boiling syrup. Again, this can cause crystallization.
5. Watch the color. Keep watching. The syrup will slowly turn a light amber, then a deeper caramel color. This is the crucial stage.
- What good looks like: A beautiful, even amber color. It should smell sweet and nutty.
- Common mistake: Walking away. This is where it goes from perfect caramel to burnt, bitter mess in seconds.
6. Remove from heat. As soon as it hits your desired amber color (think peanut butter cup wrapper), take the pan off the heat immediately.
- What good looks like: The color is exactly what you want. The bubbling might subside a bit.
- Common mistake: Leaving it on the heat too long. It will continue to cook and darken.
7. Carefully add butter. Slowly whisk in the butter. It will bubble up vigorously. Keep whisking until it’s fully incorporated.
- What good looks like: The bubbling calms down, and the butter is mixed in smoothly.
- Common mistake: Dumping all the butter in at once. This can cause a huge, uncontrolled boil-over.
8. Slowly add cream. Very carefully whisk in the heavy cream. It will steam and bubble. Whisk until smooth. If it seizes up, put it back on very low heat for a moment and whisk.
- What good looks like: A smooth, rich, liquid syrup. No lumps.
- Common mistake: Adding cold cream to hot syrup too fast. This can cause the syrup to harden.
9. Add vanilla (optional). Stir in a splash of vanilla extract if you like.
- What good looks like: Vanilla is mixed in evenly.
- Common mistake: Adding it too early when it might evaporate.
10. Cool completely. Let the syrup cool in the saucepan for at least 20-30 minutes. It will thicken as it cools.
- What good looks like: The syrup is warm but not scalding. It’s noticeably thicker than when it first came off the heat.
- Common mistake: Pouring hot syrup into your coffee. It can melt your mug or just be too hot.
11. Store it. Pour the cooled syrup into a clean, airtight container or jar.
- What good looks like: The syrup is safely stored, ready for its next use.
- Common mistake: Leaving it out on the counter. It needs refrigeration.
Common mistakes (and what happens if you ignore them)
| Mistake | What it causes | Fix |
|---|---|---|
| Using a dirty pot | Burnt bits, off-flavors, uneven cooking | Always use a clean, dry pot. |
| Stirring after sugar dissolves | Crystallization, gritty syrup | Stop stirring once dissolved; swirl the pan instead. |
| Using a thin-bottomed pan | Scorching, uneven caramelization | Use a heavy-bottomed saucepan for even heat distribution. |
| Rushing the sugar melting process | Uneven color, potential burning | Cook over medium heat, allowing sugar to dissolve and caramelize slowly. |
| Walking away during caramelization | Burnt, bitter syrup | Stay by the stove and watch the color constantly. |
| Adding butter or cream too quickly | Splattering, seizing, separation | Add slowly, whisking constantly, and be prepared for bubbling. |
| Adding cold cream to hot syrup | Syrup hardens, can break the emulsion | Warm the cream slightly or add it very gradually. |
| Not letting syrup cool before storing | Steam buildup, potential spoilage | Allow syrup to cool sufficiently before transferring to storage. |
| Using low-quality ingredients | Subpar flavor | Use good quality sugar, butter, and cream for the best taste. |
| Incorrectly measuring ingredients | Syrup too thin, too thick, or flavor off | Measure accurately for consistent results. |
Decision rules (simple if/then)
- If the sugar is not dissolving, then increase the heat slightly and stir gently because it needs more heat to dissolve.
- If the syrup starts to smell burnt, then remove it from the heat immediately because it’s already overcooked.
- If the syrup looks too thin after cooling, then you can try gently reheating it and simmering it for a few more minutes because it needs to reduce further.
- If the syrup looks too thick after cooling, then you can stir in a tablespoon of hot water or cream while gently reheating it because it needs more liquid.
- If the syrup is crystallizing, then you likely stirred it too much after the sugar dissolved, so try to salvage it by reheating and swirling carefully, or start over.
- If the butter is causing excessive splattering, then reduce the heat to low and continue whisking because the pan is too hot.
- If the cream makes the syrup seize, then place the pan back on very low heat and whisk continuously until smooth because it just needs a little more warmth to re-emulsify.
- If the syrup is too bitter, then it’s likely overcooked, and the best fix is to start again because bitterness is hard to mask.
- If you want a thinner syrup for drizzling, then add a little more cream or water when it’s almost done.
- If you want a thicker syrup for layering, then reduce the water slightly in the initial mix or simmer a bit longer.
FAQ
How long does homemade caramel syrup last?
Stored properly in an airtight container in the refrigerator, it should last for about 2-3 weeks. Always check for any signs of spoilage before using.
Can I make this without heavy cream?
Yes, you can substitute with half-and-half or even whole milk, but the texture and richness will be different. Using a higher fat content dairy generally yields a better caramel.
My syrup hardened when I added the cream. What happened?
This usually happens if the cream is too cold or added too quickly to very hot syrup. Gently reheat the mixture on low heat and whisk until smooth again.
Can I use a different type of sugar?
While granulated white sugar is standard, you could experiment with brown sugar for a molasses-like flavor, but it will affect the color and taste. Stick to white sugar for classic caramel.
Is it safe to make caramel syrup?
Yes, but be cautious. Hot sugar syrup is extremely hot and can cause severe burns. Always work carefully and keep kids and pets away from the stove.
How do I get a darker caramel color?
Cook the sugar mixture longer until it reaches a deeper amber or mahogany color before adding the butter and cream. Be very careful not to burn it.
Can I make this sugar-free?
This specific recipe relies on the chemical properties of sugar caramelization. Sugar-free versions would require different ingredients and methods, often using sugar substitutes and thickeners.
What’s the best way to store it?
Pour the cooled syrup into a clean, airtight glass jar or bottle and keep it in the refrigerator. This helps maintain freshness and prevents it from absorbing odors.
What this page does NOT cover (and where to go next)
- Advanced caramel techniques like making salted caramel or flavored caramels (e.g., adding spices).
- Recipes for using caramel syrup in baked goods or other desserts.
- Detailed explanations of the Maillard reaction and caramelization chemistry.
- Comparisons of different sweetener types for caramelization.
- Troubleshooting specific issues with advanced sugar work.