Homemade Caramel Syrup for Coffee
Quick answer
- Use a good quality saucepan.
- Stir frequently, especially at the start.
- Watch the color closely. Don’t burn it.
- Add liquid slowly and carefully. Steam is hot.
- Use a candy thermometer if you’re unsure.
- Store it in a clean, airtight container.
Who this is for
- Coffee lovers who want to upgrade their home brews.
- Anyone tired of store-bought syrups with weird ingredients.
- People who like to tinker in the kitchen and make their own stuff.
What to check first
Your Equipment
You need a heavy-bottomed saucepan. Stainless steel or cast iron is good. This helps heat evenly. A thin pan can burn the sugar fast. We’re going for smooth, not scorched.
For the best results, ensure you’re using a heavy-bottomed saucepan like this one to prevent scorching.
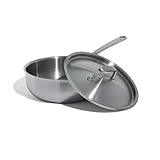
- Total Diameter: 10” | Cooking Surface Diameter: 7 | Height (with handle): 4.5” | Depth: 3.5” | Length (to end of handle): 18.25”
- Essential for Every Kitchen - The Made In Stainless Clad Sauce Pan is a must-have kitchen tool, offering maximum heat control, responsiveness, and versatility to elevate your cooking experience
- Superior Quality - Made from 5 layers of premium metal for professional-quality heat distribution
- Stay Cool Handle - Meticulously crafted to stay cool while cooking and fastened with stainless steel rivets for a lifetime of use
- Induction Cooktop Compatible - With a top layer of 430 stainless steel, these Stainless Clad Pots and Pans work effortlessly with any cooktop, including induction
Your Ingredients
Use good sugar. Granulated white sugar is standard. Some folks like brown sugar for a deeper flavor, but that changes the process a bit. Make sure your butter is softened and your cream is at room temperature. Cold stuff can seize the caramel.
Your Workspace
Clear the decks. Have everything ready before you start heating the sugar. You won’t have time to run for a whisk once things get going. Safety first, folks.
Step-by-step (how to make homemade caramel syrup for coffee)
1. Measure your ingredients. Get your sugar, water, butter, and cream measured out. Having everything prepped is key.
- What good looks like: All your ingredients are measured and within easy reach.
- Common mistake: Not measuring ahead. You’ll be scrambling later.
2. Combine sugar and water. Put the sugar and water in your saucepan. Stir until the sugar is mostly dissolved.
- What good looks like: A wet sand consistency. No dry sugar clumps.
- Common mistake: Over-stirring after this point. It can cause crystallization.
3. Heat the mixture. Place the saucepan over medium heat. Let it bubble and simmer. Don’t stir. Swirl the pan if needed.
- What good looks like: A steady simmer. The liquid is clearing up.
- Common mistake: Stirring the sugar syrup. This can make your caramel grainy.
4. Watch the color. Let the syrup cook until it turns a nice amber color. This can take 5-15 minutes. Use your eyes.
- What good looks like: A rich, golden-brown, like a copper penny.
- Common mistake: Walking away. Burnt sugar tastes awful.
5. Add the butter. Carefully whisk in the softened butter, a few pieces at a time. It will bubble up like crazy.
- What good looks like: The butter is fully incorporated, creating a smoother mixture.
- Common mistake: Dumping all the butter in at once. It can cause a violent reaction.
6. Add the cream. Slowly, slowly pour in the room temperature cream while whisking constantly. This is where things get steamy. Stand back.
- What good looks like: A smooth, emulsified sauce. No separation.
- Common mistake: Adding cold cream too fast. It can seize the caramel and make it hard.
7. Simmer briefly. Let the mixture simmer for another minute or two, whisking, until it’s smooth and slightly thickened.
- What good looks like: A cohesive sauce that coats the back of a spoon.
- Common mistake: Over-boiling. It can make the syrup too thick once cooled.
8. Remove from heat. Take the pan off the burner. Let it cool for a few minutes.
- What good looks like: The bubbling subsides.
- Common mistake: Trying to bottle it immediately. It’s molten lava.
9. Add vanilla (optional). Stir in vanilla extract if you like.
- What good looks like: Evenly distributed vanilla flavor.
- Common mistake: Adding it while it’s still super hot. Some flavor can evaporate.
10. Cool and store. Let the syrup cool completely before pouring it into a clean, airtight container.
- What good looks like: A thick, pourable syrup.
- Common mistake: Storing in a container that isn’t sealed. It can absorb odors.
Once cooled, pour your homemade syrup into clean, airtight storage containers to keep it fresh.

- #1 Brand Pick for Meal Prep Containers: Bentgo is the top pick for meal prep containers!* This 20-piece set includes 10 round 32 fl oz containers and 10 leak-proof twist-top lids, perfect for packing nutritious meals for the entire week while keeping food fresh and ready to enjoy anytime.
- Leak-Proof, Twist-Top Lids: Keep meals fresh and mess-free with airtight, leakproof lids. Perfect for soups, overnight oats, and more, they lock in freshness and prevent spills. Lids are stackable, and containers nest together to save space and keep your kitchen organized.
- Heat, Freeze, and Clean with Ease: These durable deli containers are microwave, freezer, and dishwasher safe, making meal prep a breeze. Perfect for storing and freezing broths, soups, and liquids, they’re also great for reheating leftovers. Simply remove the lid when microwaving for hassle-free meals!
- Durable, Reusable & Eco-Friendly: Say goodbye to single-use plastics. Crafted from food-safe materials free of PFAS and BPA, these long-lasting meal prep containers are built to withstand daily use. Their stackable, space-saving design ensures easy storage and keeps your kitchen organized.
- What You Get: 10 cylinder food containers, 10 twist-top lids, and caring customer support.
Common mistakes (and what happens if you ignore them)
| Mistake | What it causes | Fix |
|---|---|---|
| Not prepping ingredients | Scrambling, burning sugar, uneven texture | Measure everything before you start. |
| Stirring sugar syrup too early | Crystallization, grainy caramel | Only stir to dissolve sugar; then swirl the pan. |
| Burning the sugar | Bitter, acrid taste | Watch the color like a hawk; reduce heat if it darkens too fast. |
| Adding cold butter/cream | Seizing, hard clumps, separation | Ensure butter is softened and cream is room temperature. |
| Adding cream too quickly | Splattering, steam burns, uneven texture | Pour cream in <em>slowly</em> while whisking constantly. |
| Over-boiling after adding cream | Syrup becomes too thick when cooled | Simmer only briefly until smooth; let it thicken as it cools. |
| Not using a heavy-bottomed pan | Hot spots, uneven heating, burnt patches | Use stainless steel or cast iron; medium heat is your friend. |
| Storing in an unsealed container | Syrup absorbs fridge odors, spoils faster | Use a clean jar with a tight-fitting lid. |
| Using stale or low-quality ingredients | Off-flavors, poor texture | Fresh butter, good cream, and decent sugar make a big difference. |
| Not cleaning the pan properly | Leftover caramel can burn and ruin next batch | Soak the pan in hot water; a little vinegar can help dissolve residue. |
Decision rules (simple if/then)
- If the sugar mixture looks like it’s darkening too fast, then reduce the heat immediately because you risk burning it.
- If the caramel seizes up when you add the cream, then whisk vigorously and gently warm it over low heat to try and re-emulsify it because the temperature shock was too great.
- If your syrup is too thin after cooling, then you can gently reheat it and simmer for a few more minutes to evaporate more water because thickness comes from water content.
- If your syrup is too thick after cooling, then you can thin it down with a little warm water or cream because you can always add more liquid.
- If you see sugar crystals forming on the side of the pan, then try to brush them down with a wet pastry brush because they can spread and ruin the batch.
- If you’re unsure about the color, then use a candy thermometer because they give a more objective reading than just sight. Aim for around 340-350°F for hard crack, but for syrup, you’ll stop much earlier, around 320-330°F before adding liquids.
- If the syrup tastes bitter, then you’ve likely burned it, and it’s best to start over because the bitterness won’t go away.
- If the syrup separates, then try whisking it vigorously while gently reheating it because sometimes it just needs a little encouragement to come back together.
- If you want a darker, more complex flavor, then let the sugar get a shade darker before adding butter and cream, but be extra careful not to burn it because darker caramel is closer to burning.
- If you’re making caramel for the first time, then stick to the basic recipe and don’t try adding flavorings until you nail the technique because mastering the caramel itself is the priority.
If you’re unsure about the color, a candy thermometer can be a lifesaver for achieving the perfect caramel stage.
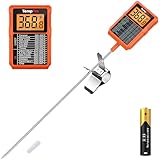
- 【Backlit 90° Rotating Display】The large 90-degree rotating screen enables effortless angle adjustment for optimal visibility, while the backlight ensures precise food temperature readings even in dimly lit environment
- 【More Accurate Reading】Food thermometer delivers precise temperature readings in 1 second with an accuracy of ±0.9 ℉, making it much faster and more reliable than traditional analog thermometers
- 【Easier to Clean】With IPX5 rated waterproof design, this kitchen thermometer probe cleans up in seconds, just rinse it under running water with no worries
- 【Durable to Use】Candy thermometer digital includes 1 AAA battery, made of sturdy plastic and food-grade stainless steel, features large capacity that enables long-lasting usage without requiring frequent battery replacement
- 【Temperature Chart】Featuring a printed temperature reference chart, this cooking thermometer covers a wide range from -58°F to 572°F, making it ideal for candy making, frying oil, meat, baking and liquids
FAQ
How long does homemade caramel syrup last?
Stored properly in an airtight container in the refrigerator, it should last for about 2-3 weeks. Always check for any signs of spoilage before using.
Why is my caramel grainy?
This usually happens if sugar crystals form and don’t dissolve properly. Stirring the sugar syrup too much after it starts boiling or having undissolved sugar on the pan’s sides can cause this.
Can I use different types of sugar?
Yes, but it changes the flavor and color. Brown sugar adds a molasses note and a deeper color but can be trickier to work with due to the molasses content.
My caramel is too thick. What do I do?
Gently reheat the syrup and whisk in a tablespoon or two of warm water or cream until it reaches your desired consistency. Remember it will thicken more as it cools.
My caramel is too thin. What do I do?
Reheat the syrup over low heat and let it simmer gently for a few minutes, stirring occasionally, to allow some of the water to evaporate. Be careful not to over-reduce it.
Is it safe to add the cream when the sugar is hot?
Yes, but you must do it carefully. The hot sugar mixture will bubble up aggressively when the cooler cream is added. Add it slowly and whisk constantly, and stand back to avoid steam burns.
Can I make this vegan?
You can try substituting the butter with a vegan butter stick and the heavy cream with full-fat coconut milk or a commercial vegan creamer. Results may vary.
What’s the best way to store it?
Pour the cooled syrup into a clean glass jar or bottle with a tight-fitting lid. Store it in the refrigerator.
What this page does NOT cover (and where to go next)
- Advanced caramel techniques like making caramel candy or brittle.
- Specific brand recommendations for ingredients.
- Detailed troubleshooting for every possible sugar-related disaster.
- Using caramel syrup in baked goods beyond coffee drinks.
- The science behind sugar crystallization and caramelization.