Simple Recipe for Homemade Coffee Hard Candy
Quick Answer
- Boil sugar, corn syrup, and water to 300°F (hard crack stage).
- Stir in strong brewed coffee and flavorings.
- Pour onto a greased baking sheet or into molds.
- Let cool completely before breaking or unmolding.
- Store in an airtight container to prevent stickiness.
- Enjoy your homemade coffee candy!
Who This Is For
- Anyone craving a sweet coffee fix.
- DIY candy makers looking for a new challenge.
- Coffee lovers who appreciate unique treats.
What to Check First
Ingredients and Equipment
Make sure you have all your ingredients ready to go. This includes sugar, corn syrup, water, strong coffee, and any flavorings. You’ll also need a heavy-bottomed saucepan, a candy thermometer, a greased baking sheet or candy molds, and heat-resistant spatulas. Having everything measured and within reach is key for candy making.
For best results, consider using a heavy-bottomed saucepan to ensure even heat distribution and prevent scorching.
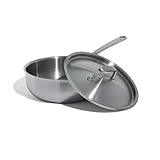
- Total Diameter: 10” | Cooking Surface Diameter: 7 | Height (with handle): 4.5” | Depth: 3.5” | Length (to end of handle): 18.25”
- Essential for Every Kitchen - The Made In Stainless Clad Sauce Pan is a must-have kitchen tool, offering maximum heat control, responsiveness, and versatility to elevate your cooking experience
- Superior Quality - Made from 5 layers of premium metal for professional-quality heat distribution
- Stay Cool Handle - Meticulously crafted to stay cool while cooking and fastened with stainless steel rivets for a lifetime of use
- Induction Cooktop Compatible - With a top layer of 430 stainless steel, these Stainless Clad Pots and Pans work effortlessly with any cooktop, including induction
Your Coffee
The type and strength of your coffee will directly impact the candy’s flavor. Use a strongly brewed coffee or even a coffee concentrate. Instant coffee granules can also work, but ensure they dissolve completely. Don’t use weak coffee; you want that bold coffee taste to shine through.
Heat Source and Thermometer
A reliable stove and a good candy thermometer are non-negotiable. You need to hit that precise 300°F (150°C) mark for hard crack stage. If your thermometer is off, your candy will be too soft or burnt. Practice with water if you’re unsure about your thermometer’s accuracy.
A reliable candy thermometer is crucial for achieving the precise temperature needed for hard crack stage. This one is highly rated for accuracy.
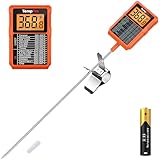
- 【Backlit 90° Rotating Display】The large 90-degree rotating screen enables effortless angle adjustment for optimal visibility, while the backlight ensures precise food temperature readings even in dimly lit environment
- 【More Accurate Reading】Food thermometer delivers precise temperature readings in 1 second with an accuracy of ±0.9 ℉, making it much faster and more reliable than traditional analog thermometers
- 【Easier to Clean】With IPX5 rated waterproof design, this kitchen thermometer probe cleans up in seconds, just rinse it under running water with no worries
- 【Durable to Use】Candy thermometer digital includes 1 AAA battery, made of sturdy plastic and food-grade stainless steel, features large capacity that enables long-lasting usage without requiring frequent battery replacement
- 【Temperature Chart】Featuring a printed temperature reference chart, this cooking thermometer covers a wide range from -58°F to 572°F, making it ideal for candy making, frying oil, meat, baking and liquids
Step-by-Step: Brewing Your Coffee Candy
1. Combine Sugars and Water: In a heavy-bottomed saucepan, combine 2 cups of granulated sugar, 2/3 cup of light corn syrup, and 2/3 cup of water. Stir until the sugar is mostly dissolved.
- What “good” looks like: A clear liquid mixture with minimal undissolved sugar crystals.
- Common mistake: Not dissolving sugar enough. This can lead to crystallization later. Stir gently until dissolved, then stop stirring.
Using a good quality corn syrup is essential for preventing crystallization and achieving the perfect texture in your hard candy.

- Berry Boogie Blend: Made with real strawberry puree, raspberry puree, blackberry puree, & cranberry concentrate, this flavored syrup makes every bite a party! Add to pancakes, waffles, crepes, or french toast.
- Versatile & Vibrant: Use in drinks to jazz up lemonades, teas, cocktails, or as syrup for pancakes and waffles. Finally a mixed berries flavored pancake syrup & drink syrup with bold fruity sweetness!
- Real Fruit, No Corn Syrup: Crafted with premium fruit puree and no high fructose corn syrup, this gourmet syrup delivers the natural sweetness of your favorite berries in every rich, delicious drop.
- From Breakfast to Beverages: Whether you're topping pancakes, waffles, or french toast, or stirring into drinks, this is your go-to fruit syrup for flavored syrups for lemonade and other tasty sips.
- Groovy in a Glass: Packaged in bright syrup bottles, this breakfast syrup is the perfect syrup for pancakes and waffles, and one of the tastiest flavored syrups for lemonade or your next fruity drink.
2. Boil to 240°F (Soft Ball Stage): Place the saucepan over medium-high heat. Clip your candy thermometer to the side of the pan, ensuring the tip is submerged in the syrup but not touching the bottom. Let the mixture boil without stirring.
- What “good” looks like: A steady, rolling boil. The thermometer is climbing.
- Common mistake: Stirring the syrup while it’s boiling. This can cause sugar crystals to form and ruin the texture. Resist the urge!
3. Add Coffee and Continue Boiling: Once the syrup reaches 240°F (121°C), carefully stir in 1/2 cup of strong brewed coffee (cooled slightly) or 2 tablespoons of instant coffee granules dissolved in 1/2 cup of hot water. Stir just enough to incorporate.
- What “good” looks like: The coffee is fully mixed into the syrup.
- Common mistake: Adding hot coffee to boiling syrup. This can cause a rapid boil-over. Let the coffee cool a bit first.
4. Boil to 300°F (Hard Crack Stage): Continue boiling the mixture, watching the thermometer closely. Do NOT stir. You are aiming for 300°F (150°C). This is the critical “hard crack” stage.
- What “good” looks like: The thermometer steadily reaches 300°F. The syrup will be a light amber color.
- Common mistake: Over-boiling. Going past 300°F will burn the sugar and make the candy bitter. Under-boiling will result in sticky candy.
5. Add Flavorings (Optional): Once the target temperature is reached, immediately remove the pan from the heat. Carefully stir in 1 teaspoon of vanilla extract and 1/2 teaspoon of coffee extract, if using. Work quickly as the syrup will start to cool.
- What “good” looks like: The extracts are evenly distributed.
- Common mistake: Adding extracts too early or stirring too vigorously. This can cause splattering and reduce flavor potency.
6. Pour the Syrup: Carefully pour the hot syrup onto a greased baking sheet lined with parchment paper, or into lightly greased candy molds. Work in a well-ventilated area; the steam can be intense.
- What “good” looks like: A thin, even layer of syrup or neatly filled molds.
- Common mistake: Pouring too slowly or unevenly. This can lead to irregular shapes and thicknesses. Be decisive.
7. Cool and Harden: Let the candy cool completely at room temperature. This can take anywhere from 30 minutes to a couple of hours, depending on thickness and ambient temperature. Do not refrigerate, as this can make it sticky.
- What “good” looks like: The candy is hard and brittle. You should be able to snap it easily.
- Common mistake: Touching or moving the candy before it’s fully set. This can cause dents and uneven hardening. Patience is key.
8. Break or Demold: Once hardened, break the candy into pieces by hand or with a mallet. If using molds, gently flex the sheet to release the candies.
- What “good” looks like: Cleanly broken pieces or easily released candies.
- Common mistake: Trying to break it too soon. It will be gooey. Wait until it’s fully hardened.
9. Store Properly: Store your coffee hard candy in an airtight container at room temperature. You can place parchment paper between layers to prevent sticking.
- What “good” looks like: Candy that stays hard and separate.
- Common mistake: Leaving it exposed to air. Humidity is the enemy of hard candy.
Common Mistakes (and What Happens If You Ignore Them)
| Mistake | What it Causes | Fix |
|---|---|---|
| Not dissolving sugar fully | Grainy texture, candy may crystallize | Stir gently until dissolved before boiling; avoid stirring during boiling. |
| Stirring while boiling | Sugar crystallization, gritty candy | Resist stirring once the boil begins. |
| Using weak coffee | Bland, uninspired candy flavor | Use strong brewed coffee or concentrate for bold taste. |
| Adding coffee too hot | Rapid boil-over, potential burns | Let coffee cool slightly before adding to boiling syrup. |
| Over-boiling (past 300°F) | Burnt sugar flavor, bitter candy | Watch thermometer closely and remove from heat immediately at 300°F. |
| Under-boiling (below 300°F) | Soft, sticky candy that won’t harden | Ensure you reach the hard crack stage (300°F). |
| Pouring syrup too slowly | Uneven thickness, difficult to break | Pour quickly and decisively onto the prepared surface. |
| Not letting candy cool completely | Gooey, unmanageable candy | Wait until fully hardened at room temperature before breaking or demolding. |
| Storing candy exposed to air | Sticky, soft candy due to humidity absorption | Store in an airtight container immediately after cooling. |
| Using a dirty saucepan | Off-flavors, potential crystallization | Ensure all equipment is clean and free of residue. |
| Not greasing molds/sheet sufficiently | Candy sticks, hard to remove | Use a good quality cooking spray or oil on molds and parchment paper. |
| Adding flavorings too early | Flavor can evaporate during boiling | Add extracts only after removing the pan from the heat. |
Decision Rules
- If your candy is still sticky after cooling for 2 hours, then it was likely under-boiled because the sugar syrup didn’t reach the hard crack stage.
- If your candy tastes burnt, then it was likely over-boiled because the temperature went too high.
- If your candy has a gritty texture, then sugar crystals likely formed during boiling, often from stirring too much.
- If you see large sugar crystals forming on the sides of the pan, then the pan wasn’t clean or sugar was agitated too much.
- If the candy is difficult to break, then it might not have cooled completely or was under-boiled.
- If you want a stronger coffee flavor, then use a more concentrated coffee or add a touch of coffee extract.
- If you want a less sweet candy, you can’t really adjust the sugar ratio much in hard candy, but you can balance it with a hint of salt or a touch of strong espresso.
- If you’re worried about splattering, then wear long sleeves and heat-resistant gloves.
- If you don’t have a candy thermometer, then this recipe is not recommended because precise temperature is crucial.
- If your candy is clumping together in storage, then the container isn’t airtight or there’s too much humidity.
FAQ
How do I get a smooth texture?
Achieve a smooth texture by ensuring all sugar is dissolved before boiling and by avoiding stirring the syrup once it starts to boil. Clean equipment also helps prevent unwanted crystallization.
Can I use decaf coffee?
Yes, you can use decaf coffee if you prefer. The caffeine won’t impact the candy-making process, but you might want to use a strongly brewed decaf for the best flavor.
What kind of corn syrup should I use?
Light corn syrup is standard for hard candy recipes. It helps prevent crystallization and gives the candy its smooth, chewy-yet-brittle texture.
Is it safe to make candy at home?
Yes, but always exercise caution. Molten sugar is extremely hot and can cause severe burns. Use a reliable thermometer, wear appropriate clothing, and keep children and pets away from the cooking area.
How long does homemade coffee hard candy last?
When stored properly in an airtight container at room temperature, homemade coffee hard candy can last for several weeks. Humidity is its biggest enemy.
Can I add other flavors?
Absolutely! Vanilla, a touch of cinnamon, or even a hint of chocolate extract can complement the coffee flavor. Add them once the candy is off the heat.
What if my candy is too hard to break?
If it’s too hard to break, it might have been boiled a little too high. You can try gently heating the back of a baking sheet with a kitchen torch for a few seconds, or carefully tap it with a mallet.
Why does my candy stick to my teeth?
This usually means it was under-boiled. The syrup didn’t reach the hard crack stage and remains a bit too soft.
What This Page Does Not Cover (and Where to Go Next)
- Advanced candy-making techniques like pulled or filled candies.
- Specific recipes for sugar-free or vegan coffee hard candy.
- Detailed troubleshooting for advanced crystallization issues.
- Pairing coffee candy with specific coffee drinks.
- The science behind sugar crystallization.