Troubleshooting a Slow Keurig Coffee Maker
Quick answer
- A Keurig brewing slowly is often due to a clogged water needle, mineral buildup, or a stale coffee pod.
- Check for blockages in the water reservoir and the piercing mechanism.
- Ensure you are using the correct water-to-coffee ratio for your brew size.
- Regular descaling is crucial for maintaining optimal brewing speed.
- A worn-out pump or heating element can also cause slow brewing, but these are less common.
- Always use filtered or bottled water to minimize mineral deposits.
What this problem usually is (and is not)
- A slow Keurig typically means the water isn’t flowing through the machine at its usual pace. This is often a sign of a blockage or buildup somewhere in the system.
- It’s usually not a sign that your machine is about to completely fail, but rather that it needs a bit of maintenance.
- This problem is generally solvable with simple cleaning and descaling procedures.
- It is not typically an electrical fault, but rather a mechanical or maintenance issue.
- The issue is usually related to the water path, not the coffee itself, although the coffee pod can contribute.
- This guide focuses on common issues for US models using standard K-Cup pods.
Likely causes (triage list)
Water Flow Issues
- Clogged Water Needle: Coffee grounds or mineral deposits can block the needle that pierces the K-Cup. Check the needle assembly for visible obstructions and clean it.
- Mineral Buildup (Scale): Over time, minerals from tap water can accumulate in the heating element and water lines, restricting flow. Descaling is the primary solution here.
- Blocked Water Reservoir: Debris or sediment at the bottom of the reservoir or within the inlet valve can impede water intake. Inspect the reservoir and its connection point.
Coffee and Filter Issues
- Stale or Damaged K-Cup: A K-Cup that has been compromised can sometimes create a vacuum or prevent proper water flow. Try a fresh, undamaged pod.
- Incorrect Coffee Grind (for non-K-Cup users): If you use a reusable filter with your own grounds, too fine a grind can clog the filter. Ensure you’re using a medium grind suitable for drip coffee.
Machine Setup and Maintenance
- Loose Water Reservoir: If the reservoir isn’t seated properly, it can affect water intake. Ensure it’s firmly in place.
- Machine Needs Descaling: This is a very common cause for slow brewing across many Keurig models. The internal components get coated with mineral deposits.
- Old or Failing Pump: The water pump is responsible for moving water through the machine. If it’s old or starting to fail, it may struggle to push water effectively, leading to slow brews.
If you suspect your Keurig’s pump is old or failing, consider looking into Keurig replacement parts to potentially fix the issue.
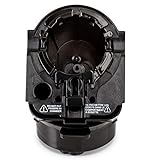
- Designed for all Keurig 2.0 models such as K200, K225, K250, K300, K325, K350, K400, K425, K450, K500, K525, K550, K600, K650, K675. Perfectly compatible with keurig 2.0 model coffee machine.
- Made from high quality materials, 100% BPA free plastic, Helping produce the best brews you ever had!
- Part 1, 2 and 3 for all Keurig 2.0 Models (Full Assembly)
- Remove side sticker and insert full assembly into Brewing Chamber
- We provide a 1-year warranty, Feel free to contact us if there are any problems with the item, we will replace at no charge to you
Fix it step-by-step (brew workflow)
1. Unplug the Keurig: For safety, always start by unplugging your coffee maker from the power outlet.
- What “good” looks like: The machine is completely de-energized and safe to handle.
- Common mistake: Forgetting to unplug the machine, leading to potential electric shock or damage.
2. Remove and Empty Water Reservoir: Detach the water reservoir from the Keurig. Empty any remaining water.
- What “good” looks like: The reservoir is completely empty and clean.
- Common mistake: Not emptying the reservoir fully, which can lead to stale water issues or make cleaning harder.
3. Clean the Water Reservoir: Wash the reservoir with mild soap and warm water. Rinse thoroughly.
- What “good” looks like: The reservoir is free of any residue or debris.
- Common mistake: Using harsh chemicals or abrasive scrubbers that can damage the plastic.
4. Inspect and Clean the Water Needle: Locate the needle assembly where the K-Cup is inserted. Use a straightened paperclip or a dedicated Keurig cleaning tool to carefully poke into the small holes of the needle to dislodge any clogs.
- What “good” looks like: The needle appears clear and you can see through its openings.
- Common mistake: Forcing the paperclip too hard, which can bend or break the needle. Be gentle.
5. Clean the K-Cup Holder: Remove the K-Cup holder and clean it under running water. Check the bottom for any accumulated coffee grounds.
- What “good” looks like: The holder is free of coffee grounds and debris.
- Common mistake: Not removing the entire K-Cup holder assembly, missing grounds trapped underneath.
6. Perform a Descale Cycle (if needed): If you haven’t descaled recently or suspect mineral buildup, follow your Keurig’s descaling instructions. This typically involves filling the reservoir with a descaling solution (or a vinegar-water mixture, check your manual) and running multiple brew cycles without a K-Cup.
- What “good” looks like: The descaling solution runs through the machine, flushing out mineral deposits.
- Common mistake: Using plain water instead of a descaling solution, which won’t effectively remove mineral buildup. Always check your specific model’s manual for descaling recommendations.
7. Rinse After Descaling: After the descaling cycle, empty the reservoir and run several full cycles with fresh water to rinse out any residual descaling solution.
- What “good” looks like: The water runs clear and there’s no lingering smell of the descaling solution.
- Common mistake: Skipping the rinse cycles, which can affect the taste of your coffee.
8. Reassemble and Refill: Place the clean K-Cup holder back into the machine. Ensure the water reservoir is securely seated. Fill it with fresh, preferably filtered water.
- What “good” looks like: All components are correctly in place and the reservoir is filled to the desired level.
- Common mistake: Not ensuring the reservoir is properly locked into place, leading to leaks or poor water intake.
9. Test Brew: Plug the machine back in. Insert a K-Cup and run a brew cycle.
- What “good” looks like: The coffee brews at a normal pace, with a steady stream.
- Common mistake: Immediately assuming the problem is fixed without testing, or using a stale K-Cup for the test.
10. Troubleshoot Further (if still slow): If the brew is still slow, try a different K-Cup. If that doesn’t help, the issue might be more internal, potentially with the pump or heating element.
- What “good” looks like: You’ve ruled out common external issues and can identify if the problem persists.
- Common mistake: Continuing to force the machine or brew with a suspected internal issue, which could cause more damage.
Prevent it next time
- Descale Regularly: Follow your Keurig’s manual for recommended descaling frequency (often every 3-6 months, depending on water hardness).
- Use Filtered Water: Employ filtered or bottled water in your reservoir to significantly reduce mineral buildup.
- Clean Reservoir Weekly: Wash the water reservoir with soap and water at least once a week.
- Inspect Needle Periodically: Check the water needle for clogs before brewing if you notice any slowdown.
- Use Fresh K-Cups: Always use K-Cups that are within their expiration date and have intact packaging.
- Don’t Overfill Reservoir: Fill the reservoir only to the maximum line to prevent potential overflow or issues with water intake.
- Check K-Cup Seating: Ensure the K-Cup is properly seated in the holder before closing the lid.
- Basic Safety: Always unplug the machine before any cleaning or maintenance.
Common mistakes (and what happens if you ignore them)
| Mistake | What it causes | Fix |
|---|---|---|
| Not descaling regularly | Mineral buildup restricts water flow, leading to slow brews and poor taste. | Perform a descaling cycle as recommended by your Keurig’s manual. |
| Using unfiltered tap water | Increased mineral deposits in the machine, accelerating clogs and scale. | Switch to using filtered or bottled water in the reservoir. |
| Forcing a clogged needle with a paperclip | Bending or breaking the water needle, requiring machine repair or replacement. | Use gentle pressure and a proper cleaning tool; if clogged, try soaking the needle assembly in descaling solution. |
| Not cleaning the K-cup holder | Coffee grounds can accumulate and potentially clog drainage or affect flow. | Remove and clean the K-cup holder regularly under running water. |
| Using stale or damaged K-Cups | Inconsistent brewing, potential for grounds to enter the brew path. | Use fresh K-Cups and inspect them for damage before inserting. |
| Not ensuring the water reservoir is seated | Water intake issues, leading to the machine not brewing or brewing slowly. | Firmly press the reservoir into place until it clicks or is fully seated. |
| Using too fine a grind in a reusable filter | Clogs the filter, causing slow brewing or overflow. | Use a medium grind size appropriate for drip coffee makers. |
| Ignoring a consistently slow brew time | Can indicate a failing pump or heating element, potentially leading to failure. | Address the issue promptly; if cleaning doesn’t help, contact customer support or consider replacement. |
Decision rules (simple if/then)
- If the Keurig is brewing slower than usual, then check for visible clogs in the water needle.
- If the water needle is clear but brewing is still slow, then perform a descaling cycle because mineral buildup is a common cause.
- If you consistently use tap water, then descaling more frequently is recommended because tap water contains more minerals.
- If the brew speed improves after descaling, then continue to use filtered water to prevent future buildup.
- If a new K-Cup still brews slowly, then the issue is likely with the machine, not the pod.
- If the water reservoir is difficult to seat properly, then check for debris around the connection point or damage to the reservoir itself.
- If the machine makes unusual noises during brewing, then it could indicate a struggling pump, which may need service.
- If the brew is slow and the coffee is weak, then it’s a strong indicator of a flow restriction or insufficient water uptake.
- If the machine is very old and all cleaning steps fail, then it might be time to consider replacing the unit as internal components may have failed.
- If you are using a reusable filter and grounds, and it’s slow, then try a coarser grind because fine grinds clog easily.
FAQ
Q: How often should I descale my Keurig?
A: It depends on your water hardness and usage. Most manufacturers recommend descaling every 3-6 months. If you notice slow brewing or mineral deposits, it’s time to descale.
Q: Can I use vinegar to descale my Keurig?
A: Some older Keurig models and certain guides suggest a vinegar-water solution. However, many manufacturers now recommend specific Keurig descaling solutions for optimal results and to avoid potential damage or lingering odors. Always check your machine’s manual.
Q: Why is my Keurig brewing so slowly after I just descaled it?
A: If descaling didn’t help, re-inspect the water needle for any remaining clogs. Also, ensure the water reservoir is seated correctly and filled with fresh water. If the problem persists, the pump might be weakening.
Q: Does the type of K-Cup affect brewing speed?
A: Generally, no. However, a damaged or improperly sealed K-Cup could potentially create a slight vacuum or allow grounds to escape, affecting flow. Always use fresh, intact pods.
Q: My Keurig is making a loud grinding noise while brewing slowly. What could it be?
A: A loud noise often indicates the water pump is working harder than usual, possibly due to a clog or mineral buildup, or it may be nearing the end of its lifespan. Ensure all water pathways are clear and consider descaling.
Q: What’s the best way to clean the water needle?
A: Use a straightened paperclip or a specialized Keurig cleaning tool. Gently insert it into the needle’s opening(s) to dislodge any coffee grounds or mineral deposits. Be careful not to force it and bend the needle.
Q: Is it normal for my Keurig to take over a minute to brew?
A: A typical brew cycle for a Keurig should take around 1-2 minutes. If it consistently takes significantly longer, it’s a sign that something is restricting water flow and requires attention.
What this page does NOT cover (and where to go next)
- Specific troubleshooting for models other than standard US Keurig K-Cup brewers (e.g., K-Cafe, K-Elite, commercial models).
- Detailed repair instructions for internal components like pumps or heating elements.
- Information on advanced brewing techniques or non-K-Cup brewing methods beyond basic reusable filter use.
- Warranty claims or contacting specific customer support for your Keurig model.
If your Keurig continues to brew slowly after following these steps, consult your user manual for model-specific advice, or contact the manufacturer’s customer support. You may also want to research replacement options if your machine is older or if repairs are not feasible.