DIY Face Scrub Recipes Without Coffee or Sugar
Quick answer
- You can absolutely make effective face scrubs without coffee or brown sugar.
- Oatmeal, yogurt, and finely ground nuts like almonds are excellent bases.
- Baking soda offers gentle exfoliation and can help with acne.
- Honey provides antibacterial properties and moisture.
- Fruit enzymes from ingredients like papaya or pineapple can offer chemical exfoliation.
- Always patch test new recipes on a small area of skin.
Who this is for
- Individuals looking for gentle, natural exfoliation for their skin.
- People who want to avoid the texture or potential mess of coffee grounds or sugar.
- Those seeking to create custom skincare with readily available pantry ingredients.
What to check first
Brewer type and filter type
While this article focuses on DIY face scrubs, it’s important to note that for coffee brewing, the type of brewer and filter significantly impacts the final cup. Drip machines use paper filters, French presses use metal filters, and pour-overs can use either. The fineness of the grind needs to match the filter type to prevent grounds from passing through or clogging the filter.
Water quality and temperature
For brewing coffee, water quality is paramount. Using filtered or spring water is recommended to avoid off-flavors from tap water. The ideal brewing temperature is typically between 195°F and 205°F. Water that is too cool will result in under-extraction, while water that is too hot can scorch the grounds, leading to bitterness.
Grind size and coffee freshness
The grind size for coffee is critical and depends on the brewing method. For espresso, a very fine grind is needed, while a coarse grind is best for French press. Freshly ground coffee beans offer the best flavor. Coffee is best used within a few weeks of roasting, and grinding just before brewing maximizes aroma and taste.
Coffee-to-water ratio
A common starting point for coffee brewing is a ratio of 1:15 to 1:18 (coffee to water by weight). For example, 20 grams of coffee to 300-360 grams of water. Adjusting this ratio can significantly alter the strength and flavor of your brew.
Cleanliness/descale status
Regular cleaning of coffee makers is essential for good taste and machine longevity. Mineral buildup (scale) can affect water temperature and flow, leading to poor extraction and potentially damaging the machine. Descaling typically involves running a vinegar or descaling solution through the machine, followed by several rinse cycles with fresh water. Check your brewer’s manual for specific cleaning and descaling instructions.
Step-by-step (brew workflow)
Prepare Your Workspace
What to do: Clear a clean, dry surface. Gather all your chosen ingredients and any necessary tools like bowls, spoons, and measuring cups.
What “good” looks like: A tidy area with everything within easy reach, minimizing the chance of spills or contamination.
Common mistake: Rushing this step and having to stop mid-process to find something.
How to avoid it: Lay out everything you’ll need before you start mixing.
Measure Your Base Ingredient
What to do: Select your primary exfoliant base (e.g., finely ground almonds, oatmeal, baking soda). Measure the desired amount. A good starting point is 2-3 tablespoons.
What “good” looks like: The correct amount of your chosen base, measured accurately.
Common mistake: Using too much of a potent ingredient, leading to over-exfoliation.
How to avoid it: Start with the recommended amounts and adjust in future batches.
For a gentle base, consider using finely ground oatmeal. You can find high-quality colloidal oatmeal online, which is excellent for soothing the skin.
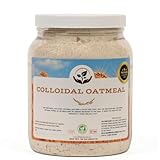
- 100% Natural Skin Relief – Made with pure colloidal oatmeal to calm irritated, dry, or eczema-prone skin without harsh chemicals.
- Dermatologist‑Trusted Relief – 100% natural, fragrance‑free colloidal oatmeal shown to calm eczema, psoriasis, bug bites & rashes.
- Ultra-Fine for Maximum Absorption – Finely milled to hydrate and relieve dryness fast—perfect for bath soaks, facial masks, even DIY soaps.
- Safe for All Ages & All Skin Types – Baby-, adult-, and eczema‑safe; no additives or preservatives—pure gentleness.
Add Your Liquid/Binder
What to do: Incorporate a liquid or binder to create a paste. Options include plain yogurt, honey, aloe vera gel, or a gentle oil like jojoba or sweet almond oil. Add about 1-2 teaspoons at a time.
What “good” looks like: A thick, spreadable paste that holds together without being too runny or too dry.
Common mistake: Adding too much liquid at once, making the scrub too watery.
How to avoid it: Add liquids slowly and mix thoroughly until you reach the desired consistency.
Incorporate Active Ingredients (Optional)
What to do: If using, add ingredients like finely ground rice powder for brightening, turmeric for anti-inflammatory properties, or a drop of essential oil (e.g., lavender for calming).
What “good” looks like: Evenly distributed additions that enhance the scrub’s benefits.
Common mistake: Adding too many active ingredients, which can irritate the skin or make the scrub unstable.
How to avoid it: Stick to one or two active ingredients per batch until you know how your skin reacts.
Mix Thoroughly
What to do: Stir all ingredients together until they are well combined and form a uniform consistency.
What “good” looks like: A smooth, homogenous paste with no dry pockets or clumps of individual ingredients.
Common mistake: Under-mixing, leading to uneven exfoliation or inconsistent application.
How to avoid it: Ensure you scrape the sides and bottom of the bowl while mixing.
Assess Consistency
What to do: Check if the scrub is the right consistency for application. It should be thick enough to stay on your skin but not so dry that it crumbles.
What “good” looks like: A smooth, malleable paste that is easy to spread.
Common mistake: The scrub is too dry and abrasive, or too wet and drips.
How to avoid it: If too dry, add a tiny bit more liquid; if too wet, add a bit more of your dry base.
Patch Test (Crucial Step)
What to do: Apply a small amount of the scrub to an inconspicuous area of your skin, like behind your ear or on your inner wrist. Wait 24 hours.
What “good” looks like: No redness, itching, burning, or adverse reaction.
Common mistake: Skipping the patch test and causing a widespread skin reaction.
How to avoid it: Always perform a patch test before applying any new DIY product to your face.
Apply to Clean Skin
What to do: Once the patch test is clear, gently apply the scrub to your clean, damp face.
What “good” looks like: Even application to the desired areas, avoiding the delicate eye and lip areas.
Common mistake: Applying to dry skin, which can be too harsh.
How to avoid it: Ensure your skin is damp to allow the scrub to glide more easily.
Gentle Exfoliation
What to do: Using light, circular motions, gently massage the scrub over your face for about 30-60 seconds. Do not scrub hard.
What “good” looks like: A feeling of gentle buffing, not stinging or pulling.
Common mistake: Scrubbing too hard, which can cause micro-tears in the skin and irritation.
How to avoid it: Let the ingredients do the work; your fingers should move smoothly over the skin.
Rinse Thoroughly
What to do: Rinse your face completely with lukewarm water. Ensure all scrub residue is removed.
What “good” looks like: Clean skin with no lingering product.
Common mistake: Not rinsing thoroughly, leaving behind residue that can clog pores.
How to avoid it: Splash water on your face multiple times, gently wiping away any remaining scrub.
Pat Dry and Moisturize
What to do: Gently pat your face dry with a clean towel. Follow up immediately with your favorite moisturizer.
What “good” looks like: Soft, smooth, hydrated skin.
Common mistake: Forgetting to moisturize after exfoliating, which can leave skin feeling tight or dry.
How to avoid it: Apply moisturizer while your skin is still slightly damp to lock in hydration.
Common mistakes (and what happens if you ignore them)
| Mistake | What it causes | Fix |
|---|---|---|
| Using coarse or unevenly ground ingredients | Micro-tears in the skin, redness, irritation, inflammation | Use finely ground ingredients like oatmeal, rice powder, or finely ground nuts. Ensure consistency. |
| Scrubbing too hard | Skin irritation, redness, increased sensitivity, breakouts | Use gentle, circular motions and let the ingredients do the work. Focus on light pressure. |
| Applying to dry skin | Harshness, dryness, potential for micro-tears | Always apply scrubs to clean, damp skin. |
| Not patch testing | Allergic reactions, widespread irritation, burning | Always test on a small, inconspicuous area of skin first. |
| Using too much of an active ingredient (e.g., baking soda) | Over-exfoliation, dryness, compromised skin barrier | Start with small amounts and gradually increase if needed. Monitor skin’s reaction. |
| Using expired or contaminated ingredients | Skin infections, breakouts, irritation | Use fresh, clean ingredients and store your DIY scrubs properly. |
| Leaving the scrub on for too long | Skin irritation, dryness, potential for chemical burns (with certain ingredients) | Follow recommended application times (usually 30-60 seconds of gentle massage). |
| Not rinsing thoroughly | Clogged pores, dullness, potential for breakouts | Ensure all product is removed with lukewarm water. |
| Skipping moisturizer after exfoliating | Dryness, tightness, dehydration, compromised skin barrier | Always follow exfoliation with a hydrating moisturizer. |
| Using ingredients that are too acidic for your skin type | Burning, stinging, increased photosensitivity | Research ingredient properties and choose based on your skin’s sensitivity. |
Decision rules (simple if/then)
- If your skin is sensitive, then use finely ground oatmeal or rice powder as your base because these are very gentle exfoliants.
- If you have oily or acne-prone skin, then consider adding a small amount of baking soda or yogurt because these can help absorb excess oil and have mild antibacterial properties.
- If you are looking for brightening, then add finely ground turmeric or rice powder because these ingredients are known for their skin-brightening effects.
- If you want a hydrating scrub, then use honey or plain yogurt as your binder because they are known for their moisturizing and soothing properties.
- If you have dry skin, then avoid ingredients like lemon juice or strong essential oils because these can be too drying or irritating.
- If your skin reacts negatively to a scrub, then discontinue use immediately and rinse with cool water because this indicates an ingredient is not suitable for your skin.
- If you are making a scrub with fruit enzymes (like papaya or pineapple), then use it immediately after making it because these enzymes can degrade over time and lose effectiveness.
- If you are unsure about an ingredient’s effect, then do a patch test first because this is the safest way to determine compatibility with your skin.
- If your scrub feels too dry and abrasive, then add a little more of your liquid binder because this will help it spread more smoothly and reduce harshness.
- If your scrub feels too watery and drippy, then add a bit more of your dry base ingredient because this will thicken it to a more manageable consistency.
- If you want to add a scent, then use a drop of skin-safe essential oil like lavender or chamomile because these are generally well-tolerated and can offer additional benefits.
- If you want to make a scrub for body use, then you can use slightly coarser ingredients like finely ground almonds or even a small amount of brown sugar because the skin on the body is generally less sensitive than facial skin.
FAQ
Can I use regular sugar instead of brown sugar?
Yes, you can use regular granulated sugar, but it might be a bit coarser. For a gentler scrub, consider using superfine granulated sugar or grinding regular sugar finer yourself.
How often should I use a DIY face scrub?
For most skin types, using a gentle DIY scrub once or twice a week is sufficient. Over-exfoliation can damage your skin barrier, so listen to your skin.
How long do homemade face scrubs last?
If made with fresh ingredients and no preservatives, it’s best to use them within a week and store them in an airtight container in the refrigerator. Scrubs with honey or yogurt may last a bit longer.
What if my skin feels tight after using a scrub?
This usually means you need to moisturize immediately. Apply a good quality moisturizer while your skin is still slightly damp to lock in hydration and prevent dryness.
Can I use this scrub on my lips?
A very gentle scrub made with fine ingredients like oatmeal or superfine sugar can be used on the lips. However, avoid anything too abrasive or with strong active ingredients.
What are some good ingredients for sensitive skin?
Finely ground oatmeal, plain yogurt, honey, and aloe vera gel are excellent choices for sensitive skin due to their soothing and non-irritating properties.
Can I add essential oils? If so, which ones?
Yes, you can add a drop or two of skin-safe essential oils like lavender, chamomile, or tea tree oil. Always dilute them properly and perform a patch test, as some essential oils can be irritating.
What’s the difference between physical and chemical exfoliation?
Physical exfoliants (like fine grounds or baking soda) work by manually sloughing off dead skin cells. Chemical exfoliants (like fruit enzymes or mild acids) dissolve the bonds holding dead skin cells together. This article focuses primarily on physical exfoliation.
What this page does NOT cover (and where to go next)
- Specific recipes for targeted skin concerns (e.g., acne, hyperpigmentation) – research ingredients known for those issues.
- The science of skin cell turnover and exfoliation – explore dermatology resources for in-depth information.
- Preserving DIY skincare products for extended shelf life – look into natural preservatives and formulation techniques.
- Professional spa treatments for exfoliation – consult with a licensed esthetician for professional services.