Simple Frozen Mocha Coffee Recipe
Quick answer
- Blend frozen coffee cubes with milk, chocolate syrup, and a sweetener.
- Use strong, cold-brewed coffee for the best flavor.
- Adjust sweetness and chocolate to your liking.
- Add a splash of vanilla extract for an extra kick.
- Top with whipped cream and chocolate shavings if you’re feeling fancy.
- This is a quick way to get your mocha fix without a fancy machine.
Who this is for
- Anyone craving a sweet, icy coffee treat at home.
- Busy folks who need a fast dessert or pick-me-up.
- Coffee lovers who want to experiment beyond a hot cup.
What to check first
Brewer type and filter type
For this recipe, you don’t need a specific brewer. The coffee is the base. If you’re making the coffee to freeze, whatever you use is fine. A drip machine, French press, or even instant coffee can work. Just make sure it’s brewed strong.
Water quality and temperature
Use good-tasting water. If your tap water is funky, it’ll taste funky in your mocha. For the frozen cubes, it needs to be cold before freezing. For the blend, cold milk is best.
Grind size and coffee freshness
If you’re brewing fresh coffee to freeze, a medium grind works well for most drip machines. Freshly ground beans always win. Stale coffee just won’t have that punch.
Coffee-to-water ratio
Brew your coffee stronger than you normally would. Think about a 1:10 ratio (coffee to water) for brewing, then maybe even double that if you’re using instant. You want that coffee flavor to cut through the sweet stuff.
Cleanliness/descale status
Make sure your blender is clean. No one wants yesterday’s smoothie flavor in their mocha. It’s a simple step, but crucial.
Step-by-step (brew workflow)
1. Brew Strong Coffee: Brew a pot of coffee, making it stronger than usual.
- What “good” looks like: A concentrated, flavorful coffee that isn’t watered down.
- Common mistake: Brewing it weak. This leads to a watery, bland frozen mocha. Avoid by using more coffee grounds or less water.
2. Cool the Coffee: Let the brewed coffee cool down completely.
- What “good” looks like: Room temperature or chilled coffee.
- Common mistake: Pouring hot coffee into the ice cube tray. This can crack trays and won’t freeze efficiently. Wait for it to cool.
3. Pour into Ice Cube Trays: Fill your ice cube trays with the cooled, strong coffee.
- What “good” looks like: Evenly filled trays.
- Common mistake: Overfilling. This can lead to messy spills when frozen. Leave a little room.
For perfectly shaped coffee cubes, consider using durable silicone ice cube trays. They make popping out the frozen coffee a breeze!
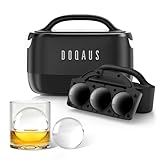
- ✅ Achieve Bar-Quality Clarity with Directional Freezing: Stop settling for cloudy, bubble-filled ice. Our clear ice cube maker utilizes advanced physics to push impurities away, creating 3 crystal-clear spheres and 4 cubes per cycle. It is the secret weapon for the home mixologist wanting presentation-ready drinks without expensive machinery.
- ✅ Preserve Complex Flavors with Slow Dilution: Designed for the purist, this whiskey ice cubes mold produces dense, 2.5-inch ice that melts 40% slower than standard ice. Enjoy your single malt or bourbon chilled but undiluted, ensuring the aromatic profile remains distinct from the first sip to the last.
- ✅ Effortless Release with Premium Hybrid Design: Unlike rigid plastic trays that crack, our flexible silicone ice ball maker mold ensures smooth removal. The non-stick material lets you pop out perfect shapes instantly, making drink preparation seamless for relaxing solo evenings or busy gatherings.
- ✅ Versatile 2-in-1 Capacity for Entertaining: Hosting a cocktail night? This round ice cube mold creates 7 pieces simultaneously, catering to different glass styles. Whether serving an Old Fashioned (sphere) or a Negroni (cube), you will have the right ice shape ready for every guest's preference.
- ✅ The Sophisticated Choice for Gifting: More than just a standard ice mold, this clear ice system is an essential upgrade for any wet bar. Packaged to impress, it creates a tangible experience, making it an ideal gift for fathers, partners, or enthusiasts who value the ritual of a perfectly poured drink.
4. Freeze Solid: Place the trays in the freezer until the coffee is completely frozen.
- What “good” looks like: Hard, solid coffee cubes.
- Common mistake: Not freezing long enough. Soft cubes will melt too fast in the blender. Give them at least 4-6 hours, or overnight.
5. Gather Other Ingredients: Get your milk, chocolate syrup, sweetener (optional), and vanilla extract ready.
- What “good” looks like: Everything within reach.
- Common mistake: Forgetting an ingredient until you’re halfway through blending. Have it all laid out.
6. Add Coffee Cubes to Blender: Place your frozen coffee cubes into the blender.
- What “good” looks like: A good amount of cubes filling about half to two-thirds of the blender.
- Common mistake: Overfilling the blender. This makes it hard to blend and can strain the motor. Start with a reasonable amount.
7. Add Milk: Pour in your milk of choice (dairy or non-dairy). Start with about 1 cup per batch.
- What “good” looks like: Enough liquid to help the blender get going, but not so much that it dilutes the flavor.
- Common mistake: Adding too much milk initially. You can always add more if it’s too thick.
8. Add Chocolate Syrup: Drizzle in your chocolate syrup. Start with 2-3 tablespoons.
- What “good” looks like: A rich chocolate swirl.
- Common mistake: Not enough chocolate. This results in a less-than-mochy taste. Don’t be shy.
9. Add Sweetener (Optional): Add sugar, simple syrup, or your preferred sweetener if desired.
- What “good” looks like: Just enough to balance the bitterness and chocolate.
- Common mistake: Adding too much sweetener. You can always add more, but you can’t take it out. Taste as you go.
10. Add Vanilla Extract (Optional): A splash (about 1/2 teaspoon) enhances the flavors.
- What “good” looks like: A subtle aroma and depth.
- Common mistake: Skipping it. It really does make a difference.
11. Blend Until Smooth: Blend on high speed until the mixture is smooth and creamy.
- What “good” looks like: A thick, consistent, frosty beverage with no ice chunks.
- Common mistake: Not blending long enough. This leaves you with a chunky, unappetizing drink. Be patient.
12. Serve and Enjoy: Pour into a glass. Top with whipped cream and chocolate shavings if you like.
- What “good” looks like: A delicious, refreshing frozen mocha.
- Common mistake: Letting it sit too long. It will melt. Drink it right away.
Common mistakes (and what happens if you ignore them)
| Mistake | What it causes | Fix |
|---|---|---|
| Using hot coffee for cubes | Cracked ice trays, inefficient freezing | Let coffee cool completely before freezing. |
| Brewing weak coffee for cubes | Watery, bland frozen mocha | Brew coffee stronger than usual; use more grounds or less water. |
| Not freezing cubes solid | Chunky, melted drink, poor texture | Freeze for at least 4-6 hours, or overnight, until cubes are hard. |
| Overfilling the blender | Strained blender motor, uneven blending | Fill blender about halfway to two-thirds full with coffee cubes. |
| Adding too much milk initially | Diluted flavor, less like a frozen treat | Start with less milk; add more gradually if needed for blending. |
| Not enough chocolate syrup | Lacks classic mocha flavor, tastes more like coffee | Be generous with the chocolate syrup; taste and adjust. |
| Over-sweetening | Cloyingly sweet, masks coffee and chocolate | Start with less sweetener; taste and add more as needed. |
| Not blending long enough | Icy chunks, poor texture, inconsistent drink | Blend until completely smooth and creamy; scrape down sides if necessary. |
| Letting the finished drink sit | Melts into a watery mess | Serve and drink immediately after blending. |
| Using stale coffee for cubes | Flat, uninspired coffee flavor | Use fresh coffee beans or grounds for the best taste. |
| Not cleaning the blender | Unwanted flavors in your mocha | Wash blender thoroughly after each use. |
| Using ice cubes instead of coffee cubes | Just an iced coffee with chocolate, not a mocha | Make sure to use frozen coffee cubes as the base. |
Decision rules (simple if/then)
- If your coffee cubes are melting too fast, then add more frozen coffee cubes because you need more frozen mass.
- If your mocha is too thick to blend, then add a splash more milk because the liquid helps the blades move.
- If your mocha is not chocolatey enough, then add more chocolate syrup because that’s the key ingredient.
- If your mocha is too bitter, then add a little more sweetener because it balances out the coffee and chocolate.
- If your blender is struggling, then stop and stir the mixture with a spoon because you might have too many ice chunks clumped together.
- If you want a stronger coffee flavor, then use less milk in the blend because more coffee concentrate means more flavor.
- If you’re out of chocolate syrup, then use cocoa powder and sweetener because it’s a decent substitute in a pinch.
- If you want a richer flavor, then add a tiny splash of heavy cream or half-and-half because fat adds richness.
- If you prefer a less sweet drink, then reduce the amount of chocolate syrup and sweetener because sweetness is adjustable.
- If you’re making this for kids, then use decaf coffee cubes and less syrup because they might be sensitive to caffeine and sugar.
- If the texture is too icy, then blend a little longer or add a tablespoon of milk or a bit of xanthan gum (if you have it) because that helps create a smoother consistency.
FAQ
How do I make coffee strong enough for frozen cubes?
Brew your coffee with a higher coffee-to-water ratio. For example, if you usually use 2 tablespoons of coffee per 6 oz of water, try using 3 or 4. You want it concentrated.
Can I use instant coffee?
Yes, you can. Dissolve instant coffee granules in a small amount of hot water to make a strong concentrate, then let it cool before freezing. The flavor might be slightly different than brewed coffee.
What kind of milk is best?
Whole milk will give you the creamiest result. However, almond milk, oat milk, or soy milk work well too. Use whatever you prefer.
How much chocolate syrup should I use?
Start with about 2-3 tablespoons per serving and adjust to your taste. Some people like a strong chocolate flavor, others prefer it more subtle.
Can I make this ahead of time?
You can make the coffee cubes ahead of time and store them in a freezer bag. However, the blended drink is best enjoyed immediately, as it will melt.
What if I don’t have a high-powered blender?
You might need to blend in batches or stop and stir more often. Let the cubes thaw for a minute or two before blending if your blender struggles.
Can I add other flavors?
Absolutely! A dash of peppermint extract, a sprinkle of cinnamon, or even a bit of caramel sauce can add a nice twist.
How sweet should it be?
This is totally up to you. Start with a moderate amount of sweetener and chocolate syrup, then taste and add more if needed.
What this page does NOT cover (and where to go next)
- Detailed explanations of different coffee brewing methods for making the base coffee.
- Nutritional information or calorie counts for specific ingredient combinations.
- Advanced blender techniques or troubleshooting for specific blender models.
- Recipes for homemade chocolate syrup or whipped cream.
- Other iced coffee drink variations like iced lattes or cold brew floats.