Making Ice Cream Using Coffee Creamer Recipe
Quick answer
- Yes, you can make ice cream using coffee creamer.
- It’s a quick and easy way to get a frozen treat.
- Expect a softer, more scoopable texture than traditional ice cream.
- Flavor will be heavily influenced by your coffee creamer choice.
- You’ll need a few other common kitchen staples.
- It’s more of a “no-churn” frozen dessert than true ice cream.
Who this is for
- Anyone craving a sweet treat fast.
- Campers or folks without a full ice cream maker.
- Those who have coffee creamer on hand and want to use it up.
This recipe is perfect for those who don’t have a traditional ice cream maker, offering a delicious frozen treat with minimal fuss. If you’re looking for an alternative to a bulky ice cream maker, this method is a fantastic choice.
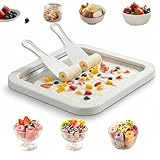
- Ice Cream Roll Tray for Home Use Designed for making rolled-style ice cream at home. Can be used with various liquid dessert mixtures such as milk-based or fruit-based recipes.
- Manual Operation, No Power Needed Requires pre-freezing before use. Pour the prepared mixture onto the cold surface and scrape with the included tools. No electrical components involved.
- Stainless Steel Freezing Plate Tray is made of stainless steel intended for food contact. The cold surface helps freeze mixtures during preparation for repeated use.
- Includes Tray and Scrapers Set includes one freezing plate and two scrapers. Tray size is approximately 9 x 7 inches. Suitable for preparing multiple servings in one session.
- Simple Structure and Cleaning Consists of a flat freezing plate and handheld tools only. Hand wash after use. Compact form allows for standard kitchen storage.
What to check first
Brewer type and filter type
This is about making ice cream, not brewing coffee. So, your brewer and filter type don’t really matter here. Unless you’re planning to somehow infuse coffee into the creamer ice cream. Which is a whole other ballgame.
Water quality and temperature
Again, not a coffee brewing task. So, water quality and temperature are irrelevant for this recipe. Unless you’re using water to clean your blender, then fresh and clean is always good.
Grind size and coffee freshness
This is for making ice cream from coffee creamer. Not for brewing coffee. So, grind size and freshness are not applicable. Unless, again, you’re adding actual coffee grounds. Which, I wouldn’t recommend for this simple recipe.
Coffee-to-water ratio
This recipe doesn’t use coffee grounds or water in the main mix. The “coffee” part comes from the creamer’s flavor. So, this ratio is a non-factor.
Cleanliness/descale status
This is important. Make sure your blender or food processor is clean. And your freezer containers are too. Nobody wants funky flavors in their dessert. Give them a good wash and rinse.
Step-by-step (brew workflow)
This isn’t a brew workflow, but a dessert-making one. Let’s call it the “creamer churn” workflow.
1. Gather your ingredients. You’ll need a carton of coffee creamer (about 16 oz), a can of sweetened condensed milk (14 oz), and your desired flavorings (vanilla extract, cocoa powder, fruit puree, etc.).
- What “good” looks like: Everything is ready to go. No scrambling mid-mix.
- Common mistake: Forgetting a key ingredient. Always double-check.
2. Chill your mixing bowl and beaters (if using a mixer). This helps everything get cold faster.
- What “good” looks like: A frosty bowl.
- Common mistake: Skipping this. It just makes the process take longer.
3. Pour the coffee creamer into the chilled bowl.
- What “good” looks like: The creamer is in the bowl, ready for the next step.
- Common mistake: Spilling it. Creamer can be slippery.
4. Add the sweetened condensed milk.
- What “good” looks like: Both liquids are in the bowl.
- Common mistake: Not scraping all the condensed milk out. It’s thick and sticky.
5. Add your flavorings. For example, a teaspoon of vanilla extract. Or a couple of tablespoons of cocoa powder.
- What “good” looks like: The add-ins are in the bowl.
- Common mistake: Going overboard with flavorings. Start small, you can always add more.
6. Whisk or blend until combined. If using a hand mixer, start on low. If using a whisk, just go for it. You want it smooth.
- What “good” looks like: No streaks of condensed milk or creamer. Just a uniform liquid.
- Common mistake: Not mixing enough. You’ll get weird pockets of unmixed ingredients.
7. Pour the mixture into a freezer-safe container. An airtight container is best.
- What “good” looks like: All the liquid is in the container, ready for freezing.
- Common mistake: Using a container that isn’t airtight. This leads to freezer burn.
8. Cover the container tightly.
- What “good” looks like: No air can get in.
- Common mistake: Leaving it uncovered. See above.
9. Freeze for at least 6 hours, or until firm. Overnight is even better.
- What “good” looks like: A solid, scoopable frozen dessert.
- Common mistake: Trying to scoop it too early. It’ll be soupy.
10. Scoop and serve! Let it sit out for a few minutes if it’s too hard to scoop.
- What “good” looks like: Delicious frozen treat in your bowl.
- Common mistake: Eating it straight from the freezer when it’s rock solid. Patience, grasshopper.
Common mistakes (and what happens if you ignore them)
| Mistake | What it causes | Fix |
|---|---|---|
| Not chilling the bowl/beaters | Longer freezing time, less fluffy texture. | Chill bowl and beaters for at least 15-20 minutes. |
| Using a non-airtight container | Freezer burn, icy texture, off-flavors. | Use a container with a tight-fitting lid or press plastic wrap directly on the surface. |
| Not mixing ingredients thoroughly | Uneven texture, pockets of unmixed creamer/milk. | Blend or whisk until completely uniform. |
| Adding too much liquid flavoring (like juice) | Ice crystals, soupy texture, won’t freeze solid. | Use concentrated flavorings or reduce liquid ingredients. |
| Freezing for too short a time | Soupy, un-frozen dessert. | Freeze for at least 6 hours, preferably overnight. |
| Using a flavored creamer that clashes | Unpleasant taste combination. | Stick to complementary flavors or neutral creamers. |
| Not scraping out all condensed milk | Less sweetness and richness. | Use a spatula to get every last bit. |
| Over-whipping (if using a mixer) | Can sometimes incorporate too much air, affecting texture. | Mix until just combined; don’t go crazy. |
| Adding solid mix-ins too early | They can sink or freeze into hard chunks. | Fold in solid mix-ins like chocolate chips in the last hour of freezing. |
Decision rules (simple if/then)
- If you want a firmer texture, use less creamer and more condensed milk because condensed milk has more sugar and fat, which inhibit ice crystal formation.
- If your mixture seems too thin after mixing, add a little more condensed milk because it will help thicken it as it freezes.
- If you want a richer flavor, use a full-fat coffee creamer because higher fat content generally leads to a creamier result.
- If you’re adding fruit puree, make sure it’s thick; if it’s too watery, it will make your ice cream icy because excess water forms ice crystals.
- If you’re using a very sweet creamer, consider reducing the amount of condensed milk slightly because you don’t want it to be overwhelmingly sweet.
- If you don’t have sweetened condensed milk, you could try whipping heavy cream and folding in sugar, but it’s not the same and won’t yield the same no-churn texture.
- If you want to avoid freezer burn, always ensure your container is sealed tightly because air is the enemy of frozen desserts.
- If your creamer is already flavored (like hazelnut or caramel), use that as your primary flavor and add complementary notes because building on an existing flavor is easier.
- If you’re in a hurry, this recipe is your friend because it requires no cooking and minimal active time.
- If you want a truly dairy-free version, you’ll need to use a dairy-free creamer and find a dairy-free condensed milk alternative, which can be tricky.
FAQ
Can I use any kind of coffee creamer?
Yes, you can use any flavor of coffee creamer. Just be mindful that the creamer’s flavor will be the dominant taste in your frozen dessert. Vanilla, French vanilla, or even caramel creamers work well as a base.
What’s the difference between this and real ice cream?
This is a no-churn frozen dessert. Traditional ice cream usually involves churning to incorporate air and break up ice crystals, creating a smoother texture. This method relies on the fat and sugar content to create a softer, scoopable consistency without churning.
How long does it take to freeze?
It typically needs at least 6 hours in the freezer to become firm enough to scoop. For the best texture, freezing it overnight is recommended.
Can I add mix-ins like chocolate chips or cookie dough?
Absolutely! Fold in your desired mix-ins during the last hour of freezing. If you add them too early, they might sink to the bottom or freeze into very hard chunks.
My mixture is too hard to scoop. What do I do?
Let the container sit on the counter for 5-10 minutes to soften slightly. This allows the ice crystals to relax a bit, making it easier to scoop.
Is this healthy?
This is a dessert, so it’s best enjoyed in moderation. It’s made with sweetened condensed milk and coffee creamer, which are high in sugar and fat.
Can I make it vegan?
You’ll need to use a dairy-free coffee creamer and find a vegan sweetened condensed milk alternative. Some specialty stores carry these options.
What this page does NOT cover (and where to go next)
- Making actual dairy-based ice cream from scratch using an ice cream maker.
- Advanced ice cream techniques like tempering eggs or using stabilizers.
- Recipes for sorbets or other frozen fruit-based desserts.
- Detailed nutritional analysis of coffee creamer-based desserts.
- How to troubleshoot specific texture issues beyond common mistakes.