How To Turn On Your Jura Coffee Maker
Quick Answer
- Press the main power button. It’s usually on the side or back.
- Look for an indicator light. It shows the machine is getting power.
- Wait for the startup sequence. This takes a minute or two.
- Check the display. It should show a ready message.
- If nothing happens, check the power cord and outlet.
- Consult your specific model’s manual for exact button placement.
Who This Is For
- New Jura owners. Just unboxed your fancy machine? This is for you.
- Anyone who’s moved their Jura. Sometimes things get unplugged or settings change.
- Folks who haven’t used their Jura in a while. A quick refresher never hurts.
If you’re new to the world of automatic espresso, a Jura coffee maker is a fantastic investment for delicious coffee at home. This guide will help you get yours powered up in no time.
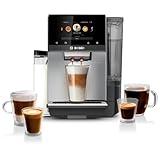
- SIMPLIFY AT-HOME COFFEE BREWING: Whether you're in the mood for a latte macchiato, cappuccino, or espresso, the large touchscreen display makes it easy to make and personalize each drink
- ULTIMATE PERSONALIZATION: Adjust the strength, size, and milk ratio, and even aroma to your exact liking
- CONVENIENCE THROUGH REMOTE BREWING: Use the Home Connect app to control your espresso machine from the couch or as you're heading home, and discover 35plus delicious beverages
- EASY TO MAINTAIN: Combined cleaning and descaling program to minimize maintenance time, plus a step-by-step guide to easily clean and descale, with Calc'n Clean
- WHAT'S IN THE BOX: Bosch VeroCafe 800 Series Fully Automatic Espresso and Coffee Machine TQU60307, Mavea Water Filter, Mavea Water Filter Insertion Aid, Microfiber Cloth, Welcome Kit, Milk Adapter, Integrated Milk Container, User Manual, Water Hardness Test Strip
What to Check First
Brewer Type and Filter Type
Your Jura is an automatic espresso machine. It has built-in grinders and brewing units. No separate filters like a drip coffee maker here. But, it might have a water filter cartridge inside. Make sure that’s installed correctly if you use one.
Your Jura is a sophisticated automatic coffee maker, designed to handle everything from grinding beans to brewing your perfect cup. Unlike simpler drip machines, it has integrated components for a seamless experience.

- 12-CUP DURALIFE GLASS CARAFE: The sturdy 12-cup* carafe has measurement markings for accurate filling and an easy-grip handle for comfortable pouring.*Cup equals approximately 5 ounces (varies by brewing technique).
- SNEAK-A-CUP FEATURE TO PREVENT DRIPS: This feature temporarily stops the flow of coffee so you can pour your first cup before brewing ends without making a mess.
- EASY-VIEW WATER WINDOW: The front-facing window shows you the exact amount of water that will turn into coffee.
- DIGITAL CONTROLS WITH RUBBERIZED FEEL: Large, rubberized buttons give you full control of the coffeemaker, and the easy-read screen displays the clock, brew time, and programming options.
- QUICKTOUCH PROGRAMMING WITH AUTO SHUTOFF: Easily program the 24-hour auto brew feature so you can wake up to a fresh pot of coffee or whenever you desire. 2-Hour Auto Shutoff for added safety and peace of mind with every use.
Water Quality and Temperature
Always use fresh, cold water. Tap water is fine if it’s good quality. If yours tastes off, consider filtered water. The machine heats the water internally. You don’t need to pre-heat it.
Grind Size and Coffee Freshness
Jura machines have built-in grinders. They handle the grind for you. Use fresh, whole bean coffee. Pre-ground coffee loses flavor fast. Store your beans in an airtight container, away from light and heat.
To ensure your Jura performs at its best, always use fresh, whole bean coffee. You can find a wide range of high-quality beans and other essential coffee machine accessories to complement your brewing experience.

- K cup reusable fully fested for compatibility - The Cafe Save k cup reusable coffee filters work with K-Express Kmini, K-Classic, K-Elite, K-Latte, K-Cafe, K-Select, K-Compact, and Keurig 1.0 and 2.0 coffee machines.Breville K CUP, Mr. Coffee K CUP, Please see compatibility chart for full details of compatible models.(See full detailed list picture)
- NOT compatible with K-iced, K-Duo Plus, and all Multi-Stream Brewers: K-Supreme/Plus/Smart, K-Slim, K-Café, K-Brew Chill, K-Duo Hot & Iced. Using it with incompatible coffee makers may prevent the machine from closing properly.(See full detailed list picture)
- Eco-Friendly:Keurig reusable k cup is made of high-quality stainless steel and 100% BPA, lead, and DEHP free. You know ,paper filters need to cut down 1 billion trees every year,countless discarded plastic coffee capsules flow into the ocean, causing marine life to eat by mistake, and how much pain it brings to them! When using our reusable k-cup, you reduce the use of a large number of paper filters and plastic coffee capsules.(Contribute to the protection of the environment)
- Keurig reusable coffee pods design science: Coffee reusable k cup adopts one-piece design, tightly sealed top cover to prevent coffee overflow during use; 360-degree perforation on the bottom and side walls allows water to fully soak the coffee powder, optimize coffee extraction, and obtain a richer flavor The flavour ensures that delicious coffee is brewed, and the reusable k-cup filter is very useful for coffee lovers.
- Reusable k cups Health and safety -Stainless steel k cup reusable design, preserving the coffee natural oils and flavors entirely. Using stainless steel refillable K Cup brewing coffee, you will taste the great coffee you never have! These Reusable Coffee Pods keep coffee original, Dishwasher safe
Coffee-to-Water Ratio
The machine manages this automatically based on your drink selection. You can usually adjust strength and volume settings later. Don’t overfill the bean hopper.
Cleanliness/Descale Status
A clean machine makes good coffee. Jura machines have cleaning cycles. Check the display for any cleaning or descaling prompts. Running these regularly is key. A dirty machine can affect startup and performance.
Step-by-Step: Turning On Your Jura Coffee Maker
1. Locate the Power Button:
- What to do: Find the main power switch. It’s often on the back or side of the machine.
- What “good” looks like: You’ll feel a click when you press it.
- Common mistake: Trying to turn it on using the touchscreen or a brew button. Those are for after it’s powered up.
2. Connect to Power:
- What to do: Ensure the power cord is securely plugged into the machine and a working wall outlet.
- What “good” looks like: The machine should show some sign of life, like a light or a brief display flicker.
- Common mistake: Plugging it into a power strip that’s switched off. Always plug directly into the wall if possible.
3. Press the Power Button:
- What to do: Once plugged in, press the main power switch you located earlier.
- What “good” looks like: An indicator light should come on, and the display should illuminate.
- Common mistake: Holding the button down too long. A quick press is usually all that’s needed.
4. Initiate Startup Sequence:
- What to do: The machine will begin its internal startup process. This involves heating water and running self-checks.
- What “good” looks like: You might hear the grinder run briefly, pumps whirring, and see text scrolling on the display.
- Common mistake: Trying to select a drink during startup. You have to wait until it’s fully ready.
5. Wait for Ready Indicator:
- What to do: Be patient. This process can take a minute or two.
- What “good” looks like: The display will eventually show a “Ready” message or an idle screen, indicating it’s good to go.
- Common mistake: Assuming it’s ready too soon. Give it the full time it needs.
6. Check Water Tank:
- What to do: Make sure the water tank is filled with fresh water. The machine will prompt you if it’s low.
- What “good” looks like: The water level is above the minimum line.
- Common mistake: Forgetting to fill the tank after a long break.
7. Check Bean Hopper:
- What to do: Ensure there are fresh coffee beans in the hopper.
- What “good” looks like: Beans are visible in the hopper.
- Common mistake: Running the machine with an empty bean hopper. This can sometimes cause issues.
8. Initial Rinse (Optional but Recommended):
- What to do: Many Jura models suggest running a hot water or steam cycle after startup.
- What “good” looks like: Hot water dispenses from the spout.
- Common mistake: Skipping this step. It helps flush out any residual water and warms up the system.
Common Mistakes (and What Happens If You Ignore Them)
| Mistake | What it Causes | Fix |
|---|---|---|
| Not pressing the main power button | Machine remains off. No lights, no display. | Locate and press the physical power switch. |
| Using a faulty power outlet | Machine won’t turn on. Indicator lights may flicker or not appear at all. | Test the outlet with another device. Try a different outlet. |
| Plugging into a switched power strip | Machine doesn’t receive power if the strip is off. | Ensure the power strip is switched on, or plug directly into the wall. |
| Trying to brew during startup | Machine will likely ignore the command or display an error message. | Wait for the “Ready” indicator before selecting any drinks. |
| Skipping the startup sequence | Coffee quality might be compromised, or the machine might not function correctly. | Allow the machine to complete its full startup and heating cycle. |
| Not filling the water tank | Machine will prompt you to fill the tank or refuse to brew. | Fill the water tank with fresh, cold water. |
| Running with an empty bean hopper | Grinder may make noise but produce no coffee, potentially leading to errors. | Add fresh whole coffee beans to the hopper. |
| Ignoring cleaning/descaling prompts | Reduced performance, potential clogs, off-tasting coffee, and shorter lifespan. | Run the recommended cleaning or descaling cycle as prompted by the machine. |
| Using pre-ground coffee in the hopper | Grinder mechanism can get clogged; coffee quality will be poor. | Always use whole beans in the hopper. Use pre-ground for the bypass doser if your model has one. |
| Improperly seated water tank | Machine may not detect water and refuse to start or brew. | Remove and re-insert the water tank firmly until it clicks into place. |
Decision Rules
- If the display is blank after pressing the power button, then check the power cord connection and the wall outlet because the machine isn’t getting electricity.
- If there are no lights on the machine, then the main power switch is likely not engaged or the unit isn’t plugged in correctly because power isn’t reaching the internal components.
- If the machine starts up but immediately shows a “fill water tank” message, then the water tank is either empty or not seated properly because the sensor isn’t detecting water.
- If the machine makes grinding noises but no coffee comes out after startup, then the bean hopper is probably empty because there are no beans for the grinder to process.
- If the machine seems to take an unusually long time to reach the “Ready” state, then it might be in the middle of an internal heating or cleaning cycle, so be patient.
- If you see error codes on the display, then consult your Jura manual for that specific code because it indicates a particular issue that needs addressing.
- If the machine powers on but won’t brew any drinks, then check the water and bean levels first, as these are the most common reasons for a brewing interruption.
- If the machine powers on but the coffee is weak or tastes bad, then it’s likely time for a cleaning cycle, or the beans might be stale, because buildup or old beans affect flavor.
- If the machine powers on and seems to run through its startup, but the display is stuck on a single screen, then try turning it off and on again, and if it persists, check the manual for troubleshooting.
- If the machine powers on and the indicator light is on but nothing else happens, then there might be an internal issue, and you should check the manual or contact support.
FAQ
How long does it take for a Jura to start up?
It usually takes about 60 to 120 seconds. This includes heating the water and running self-checks.
Can I just plug it in and go?
No, you need to press the main power button after plugging it in. Then, wait for the startup sequence to finish.
What if my Jura doesn’t turn on at all?
First, ensure it’s plugged in securely to a working outlet. Then, double-check that the main power switch is pressed. If it still doesn’t respond, consult your manual.
Do I need to do anything special the very first time I turn it on?
Yes. After the initial power-up, you’ll often need to run a rinse cycle. Your manual will guide you through this first-time setup.
Why does my Jura make noise when I turn it on?
That’s normal. It’s the pump priming, the grinder running a quick check, and internal systems activating.
What does the indicator light mean?
Generally, a steady light means the machine is powered and ready. Flashing or different colored lights usually indicate a status, like heating or an error. Check your manual for specifics.
Is it okay to leave my Jura plugged in all the time?
Most Jura machines are designed to be left plugged in. They have energy-saving modes. Just remember to press the main power button to fully shut them down if you’re going away for an extended period.
My Jura screen is flashing, what should I do?
Flashing screens usually mean the machine needs attention. It could be a prompt to fill water, empty the grounds container, or run a cleaning cycle. Look for accompanying text messages.
What This Page Does Not Cover (And Where to Go Next)
- Detailed cleaning and descaling procedures. (Check your manual for specific cycles and solutions.)
- Programming custom drink settings. (This involves navigating the machine’s menu system.)
- Troubleshooting specific error codes. (Each code has a dedicated meaning and solution in the manual.)
- Advanced maintenance like cleaning the brew unit. (This is a separate, more involved process.)
- Connecting your Jura to Wi-Fi or smart home systems. (Refer to the connectivity section of your manual.)