How To Program Your Drew Barrymore Coffee Maker
Quick answer
- Unplug and replug the maker to reset.
- Press the “Program” or “Auto Brew” button.
- Use the “Hour” and “Minute” buttons to set the desired brew time.
- Press “Program” again to confirm.
- Ensure the brew basket is loaded and water reservoir is full the night before.
- Check your specific model’s manual for exact button names and sequences.
Who this is for
- Anyone who wants their coffee ready when they wake up.
- Busy folks who need a streamlined morning routine.
- New owners of a Drew Barrymore coffee maker looking to use its features.
If you’re new to the world of automated mornings, a Drew Barrymore coffee maker is a fantastic starting point. We recommend the Drew Barrymore coffee maker (ASIN B0F991MDQT) for its ease of use and reliable performance.
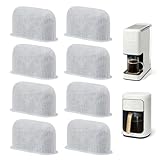
- 【Designed for drew barrymore & beautiful coffee maker】Enjoy barista-level coffee at home with our high-quality replacement filters, designed exclusively for Drew Barrymore & beautiful coffee makers. Engineered for a perfect, hassle-free fit, these filters ensure smooth, flavorful coffee every time.
- 【Widely Compatible】: These Coffee Filters are not only Compatible with Drew Barrymore Coffee Maker, but also suitable for Cuisinart Coffee Maker, Keurig K-Cup Coffee Maker.
- 【Excellent filtering effect】Designed to eliminate impurities that can ruin your brew, our filters ensure your coffee tastes smooth, balanced, and exactly how it should. Because great coffee starts with great water.
- 【Easy to replace and maintain】Our replacement filters slide in in seconds, so you can keep your brewer running smoothly without the hassle. Because when maintenance is this easy, you can focus on what really matters: your next delicious cup.
- 【Extend the life of electrical appliances】Our water filter pods prevent scale and sediment from clogging your coffee maker, helping it run smoothly for years. Keep your appliance in peak condition—so you can savor every cup without worrying about costly repairs or replacements.
What to check first
Brewer type and filter type
Most Drew Barrymore coffee makers are standard drip machines. They usually use basket-style filters. Paper filters are common, but some models might come with a reusable mesh filter. Always check your manual to be sure. Using the wrong filter type can lead to grounds in your cup or a messy overflow.
Water quality and temperature
Tap water can have minerals that affect taste and build up in your machine. Filtered water is usually best for a cleaner cup. For programming, the temperature is set by the machine itself, so you don’t need to worry about that part of the equation. Just make sure the water you put in is fresh and cold.
Grind size and coffee freshness
The grind size for most drip machines is medium. Too fine, and you get bitter coffee and potential clogs. Too coarse, and it’ll be weak. Freshly ground beans make a world of difference. Pre-ground coffee loses flavor fast. Grind your beans right before brewing for the best results.
Coffee-to-water ratio
A good starting point is about 1-2 tablespoons of coffee grounds per 6 oz of water. For a full pot, that’s usually around 8-10 tablespoons. Experiment to find your sweet spot. Too much coffee makes it strong and potentially bitter; too little is just weak.
Cleanliness/descale status
If your machine isn’t brewing properly, it might just need a clean. Mineral buildup (scale) can clog the water lines. Follow the manufacturer’s instructions for descaling, usually involving vinegar or a descaling solution. A clean machine brews better and lasts longer.
Step-by-step (brew workflow)
1. Prepare the coffee maker: Ensure it’s plugged in. If you’re unsure about its current settings, unplugging it for 30 seconds and plugging it back in can reset it to a default state.
- What “good” looks like: The clock display lights up, showing the current time.
- Common mistake: Forgetting to plug it in. Avoid this by making sure the cord is securely in the outlet.
2. Access programming mode: Locate and press the “Program” or “Auto Brew” button. This button is usually clearly marked.
- What “good” looks like: The display might start flashing or show a specific icon indicating you’re in programming mode.
- Common mistake: Pressing the wrong button. Double-check the labels on your machine.
3. Set the brew hour: Use the “Hour” button to advance the hour to your desired wake-up time. Pay attention to AM/PM if your clock has that feature.
- What “good” looks like: The hour number on the display changes correctly as you press the button.
- Common mistake: Holding the button down too long and overshooting the hour. Press it in short bursts.
4. Set the brew minute: Use the “Minute” button to fine-tune the time to the exact minute you want your coffee to start brewing.
- What “good” looks like: The minute numbers on the display adjust accurately.
- Common mistake: Not being precise enough, leading to coffee brewing a few minutes earlier or later than planned.
5. Confirm the program: Press the “Program” or “Auto Brew” button again. This locks in your set time.
- What “good” looks like: A confirmation light might turn on, or the display will stop flashing and show the programmed time or return to the current time.
- Common mistake: Not confirming the setting, which means the auto-brew won’t engage.
6. Load the brew basket: Place a filter (paper or reusable) into the brew basket. Add your desired amount of coffee grounds.
- What “good” looks like: The filter is seated properly and the grounds are evenly distributed.
- Common mistake: Forgetting to put a filter in, or using too few/too many grounds.
7. Fill the water reservoir: Pour fresh, cold water into the reservoir up to the desired cup marking.
- What “good” looks like: The water level is clear and within the marked lines.
- Common mistake: Overfilling or underfilling the reservoir, which can lead to weak coffee or overflow.
8. Place the carafe: Ensure the carafe is correctly positioned on the warming plate.
- What “good” looks like: The carafe sits snugly and is ready to catch the brewed coffee.
- Common mistake: Not placing the carafe properly, meaning coffee will brew onto the warming plate.
9. Activate auto-brew: Some models require you to press a separate “Auto On” or “Brew” button after setting the program. Check your manual.
- What “good” looks like: A light indicates the auto-brew function is active.
- Common mistake: Assuming the programming itself is enough to start the auto-brew.
10. Wait for your coffee: The machine will now automatically start brewing at the programmed time.
- What “good” looks like: You wake up to the smell of fresh coffee.
- Common mistake: Expecting coffee instantly after programming. Remember, you set it for a future time.
Common mistakes (and what happens if you ignore them)
| Mistake | What it causes | Fix |
|---|---|---|
| Forgetting to set the clock correctly | Coffee brews at the wrong time, or not at all. | Set the current time accurately before programming. |
| Not confirming the program setting | The auto-brew function won’t activate. | Always press the “Program” button again after setting the time. Look for a confirmation light. |
| Using stale or incorrectly ground coffee | Weak, bitter, or sour coffee. Flavor is significantly diminished. | Use freshly roasted beans and grind them just before brewing. Use a medium grind. |
| Incorrect coffee-to-water ratio | Coffee is too strong/bitter (too much coffee) or too weak/watery (too little). | Start with 1-2 tbsp grounds per 6 oz water and adjust to your taste. |
| Not cleaning the machine regularly | Slow brewing, poor taste, mineral buildup, potential clogs. | Descale and clean your machine according to the manual at least monthly. |
| Using the wrong filter type | Grounds in your coffee, messy overflow, or poor extraction. | Use the filter type specified in your brewer’s manual (paper basket or reusable mesh). |
| Not filling the water reservoir | The machine won’t brew, or will only brew a small amount. | Ensure the reservoir is filled to the desired level before setting the program. |
| Leaving old grounds in the filter basket | Stale coffee residue contaminates fresh brew, leading to bad taste. | Always empty and rinse the brew basket after each use. |
| Incorrectly setting AM/PM | Coffee brews at the wrong part of the day (e.g., 8 PM instead of 8 AM). | Pay close attention to AM/PM indicators on the clock display when setting the time. |
Decision rules (simple if/then)
- If the clock display is blank, then plug in the coffee maker because it needs power to operate and program.
- If the coffee tastes weak, then add more coffee grounds because you might be using too little coffee for the amount of water.
- If the coffee tastes bitter, then reduce the amount of coffee grounds or check your grind size because too much coffee or a grind that’s too fine can cause bitterness.
- If the machine is brewing very slowly, then descale it because mineral buildup is likely impeding water flow.
- If you see grounds in your cup, then check your filter type and ensure it’s seated correctly because the wrong filter or a faulty one will let grounds pass through.
- If the auto-brew didn’t start, then confirm you pressed the “Program” button twice (once to set, once to confirm) because many machines require this final step.
- If your coffee tastes “off” or metallic, then clean the carafe and brew basket because residual oils and old coffee can affect flavor.
- If the programmed time is incorrect, then reset the clock and reprogram because the initial time setting was likely wrong.
- If the machine overflows, then ensure the carafe is properly in place and the water reservoir isn’t overfilled because both can cause overflow issues.
- If the coffee maker makes strange noises, then check for clogs or insufficient water because these can sometimes cause unusual sounds.
FAQ
How do I set the current time on my Drew Barrymore coffee maker?
First, make sure the maker is plugged in. Then, look for a “Clock” or “Set Time” button. You’ll likely use “Hour” and “Minute” buttons to adjust the time. Pressing a “Set” or “Clock” button again usually confirms it.
What does the “Program” button do?
The “Program” button is your gateway to automatic brewing. It allows you to set a specific time for your coffee maker to start brewing later. You’ll use it to enter the desired brew time and then confirm it.
My coffee maker isn’t turning on. What should I do?
The first thing to check is if it’s plugged into a working outlet. If it is, try unplugging it for about 30 seconds and plugging it back in. This can reset the electronics. If it still doesn’t power on, consult your manual or contact customer support.
How do I know if my program is set correctly?
Most coffee makers will have a small indicator light that turns on when the auto-brew program is active. The display might also show the programmed time or a special icon. Always check for this confirmation.
Can I program it to brew instantly?
No, the programming feature is for delayed brewing. If you want coffee now, you’ll need to manually start the brew cycle by pressing the “Brew” or “On” button. The program is for setting it up ahead of time.
What’s the best way to clean my coffee maker?
Regular cleaning involves washing the carafe and brew basket with soap and water. For deeper cleaning, you’ll need to descale it. This usually involves running a cycle with a vinegar-water solution or a commercial descaling product, followed by a few plain water cycles. Always check your manual for specific instructions.
How much coffee should I use for programmed brewing?
Use the same amount of coffee grounds you would for manual brewing. A general guideline is 1 to 2 tablespoons of grounds for every 6 ounces of water. Adjust this based on your strength preference.
My coffee tastes stale even when using fresh beans. Why?
This could be due to residual oils and grounds left in the machine from previous brews. Make sure to thoroughly clean the brew basket and carafe after every use. A deep descaling might also be necessary if buildup is significant.
What this page does NOT cover (and where to go next)
- Specific troubleshooting for error codes or unusual noises not related to programming. (Refer to your model’s manual or manufacturer support.)
- Detailed analysis of different coffee bean origins and their flavor profiles. (Explore coffee blogs or tasting guides.)
- Advanced brewing techniques like pour-over or French press. (Look for guides on those specific brewing methods.)
- Comparisons of various coffee maker brands and models. (Check consumer review sites or coffee equipment websites.)
- Electrical safety guidelines beyond basic plugging/unplugging. (Consult general appliance safety resources.)