Changing Cup Settings on Your Drew Barrymore Coffee Maker
Quick answer
- Access the settings menu by pressing and holding the “Brew” button.
- Navigate through options using the “+” and “-” buttons.
- Select “Cup Size” to adjust your brew volume.
- Confirm your selection by pressing “Brew” again.
- Always check your specific model’s manual for exact button sequences.
- If unsure, a simple factory reset can often clear settings.
Who this is for
- Anyone who just got a new Drew Barrymore coffee maker and wants to personalize their brew.
- Campers who need to adjust brew size for different mugs or thermoses.
- Home brewers looking to dial in their coffee-to-water ratio for perfect flavor.
If you’re looking to personalize your brew, the Drew Barrymore coffee maker (ASIN B0F991MDQT) offers intuitive cup settings to help you achieve the perfect flavor.
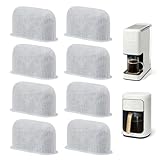
- 【Designed for drew barrymore & beautiful coffee maker】Enjoy barista-level coffee at home with our high-quality replacement filters, designed exclusively for Drew Barrymore & beautiful coffee makers. Engineered for a perfect, hassle-free fit, these filters ensure smooth, flavorful coffee every time.
- 【Widely Compatible】: These Coffee Filters are not only Compatible with Drew Barrymore Coffee Maker, but also suitable for Cuisinart Coffee Maker, Keurig K-Cup Coffee Maker.
- 【Excellent filtering effect】Designed to eliminate impurities that can ruin your brew, our filters ensure your coffee tastes smooth, balanced, and exactly how it should. Because great coffee starts with great water.
- 【Easy to replace and maintain】Our replacement filters slide in in seconds, so you can keep your brewer running smoothly without the hassle. Because when maintenance is this easy, you can focus on what really matters: your next delicious cup.
- 【Extend the life of electrical appliances】Our water filter pods prevent scale and sediment from clogging your coffee maker, helping it run smoothly for years. Keep your appliance in peak condition—so you can savor every cup without worrying about costly repairs or replacements.
What to check first
Brewer type and filter type
You’ve got a Drew Barrymore coffee maker, so it’s likely a drip style. Most use paper filters, but some might have a reusable mesh filter. Make sure you’re using the right one for your machine. Wrong filters can cause overflow or under-extraction. Check the filter basket; it’ll tell you what size you need.
Water quality and temperature
Good coffee starts with good water. If your tap water tastes funky, your coffee will too. Consider a simple water filter pitcher. For brewing temp, most machines aim for 195-205°F, which is prime extraction territory. If your coffee tastes weak or bitter, water temp could be a factor, though usually the machine handles this.
Grind size and coffee freshness
This is huge. For drip, aim for a medium grind, like coarse sand. Too fine, and you get bitter sludge. Too coarse, and it’s weak and sour. Freshly roasted beans, ground right before brewing, make a world of difference. Pre-ground stuff loses its punch fast.
Coffee-to-water ratio
This is where cup settings come in. A common starting point is 1:15 to 1:18 – that’s 1 gram of coffee to 15-18 grams of water. If your machine’s cup settings don’t match your preferred ratio, you might need to adjust how much coffee you add. For example, if you want 10 oz of coffee but the “10 oz” setting uses too little grounds, you might need to use the “12 oz” setting and stop it early, or adjust your coffee dose.
Cleanliness/descale status
Buildup is the enemy of good coffee. If your machine hasn’t been descaled in a while, it can affect brew temperature and flow. This leads to bitter or weak coffee. Most machines have a “clean” or “descale” indicator. If yours does, pay attention to it. A good vinegar or descaling solution run can work wonders.
Step-by-step (brew workflow)
1. Fill the water reservoir.
- What to do: Pour fresh, cold water into the reservoir up to the desired cup marking.
- What “good” looks like: The water level is clear and easy to read. You’re using filtered water if possible.
- Common mistake: Overfilling or underfilling. This messes with the cup setting and can cause overflow or weak coffee. Always check the lines.
2. Insert the filter.
- What to do: Place a new paper filter or ensure your reusable filter is clean and in place in the brew basket.
- What “good” looks like: The filter is seated properly, not creased or torn.
- Common mistake: Forgetting the filter or using the wrong size. This is a messy disaster waiting to happen.
3. Add coffee grounds.
- What to do: Measure your desired amount of coffee grounds and add them to the filter. Use your preferred ratio.
- What “good” looks like: Grounds are evenly distributed in the filter basket.
- Common mistake: Tamping down the grounds too much, or not adding enough. Even distribution is key for even extraction.
4. Select cup setting.
- What to do: Use the machine’s controls to select your desired brew volume (cup size).
- What “good” looks like: The display clearly shows your chosen cup size.
- Common mistake: Not verifying the selected size before brewing. You might end up with more or less coffee than you wanted.
5. Place the carafe.
- What to do: Position the carafe correctly on the warming plate.
- What “good” looks like: The carafe is snug and centered.
- Common mistake: Not seating the carafe fully. Some machines have a pause-and-brew feature that won’t activate if the carafe isn’t in place.
6. Start the brew cycle.
- What to do: Press the “Brew” button or equivalent to start the brewing process.
- What “good” looks like: The machine starts heating and dripping coffee.
- Common mistake: Accidentally hitting the wrong button or not pressing it firmly enough. Double-check before you walk away.
7. Monitor the brew.
- What to do: Watch the brewing process.
- What “good” looks like: Coffee is dripping steadily into the carafe.
- Common mistake: Leaving the machine unattended if you’re worried about overflow, especially with a new setup.
8. Brew completion.
- What to do: Wait for the brewing cycle to finish.
- What “good” looks like: The dripping stops, and the machine may beep or indicate completion.
- Common mistake: Pulling the carafe off too early, which might trigger the pause feature and stop brewing.
9. Serve and enjoy.
- What to do: Carefully remove the carafe and pour your coffee.
- What “good” looks like: Hot, delicious coffee.
- Common mistake: Pouring too quickly, which can lead to spills.
10. Clean up.
- What to do: Discard the used grounds and filter. Rinse the brew basket and carafe.
- What “good” looks like: Your machine is clean and ready for the next brew.
- Common mistake: Letting grounds sit in the filter basket or leaving the carafe unrinsed. This leads to stale odors and flavors.
Common mistakes (and what happens if you ignore them)
| Mistake | What it causes | Fix |
|---|---|---|
| Using tap water with off-flavors | Bitter, metallic, or generally unpleasant tasting coffee. | Use filtered water (pitcher or fridge filter). |
| Using pre-ground coffee | Stale, flat, or weak coffee. Lost aromatics and oils. | Buy whole beans and grind them just before brewing. |
| Incorrect grind size (too fine) | Over-extraction, leading to bitter, harsh, and muddy coffee. Clogged filter. | Adjust grinder to a medium setting (like coarse sand). Check manual for specific recommendations. |
| Incorrect grind size (too coarse) | Under-extraction, resulting in weak, sour, and watery coffee. | Adjust grinder to a finer setting. |
| Not cleaning the machine regularly | Mineral buildup (scale) affecting taste, brew temperature, and machine lifespan. | Use a descaling solution or vinegar/water mix per manual instructions regularly. |
| Ignoring the “Clean” or “Descale” light | Persistent taste issues and potential damage to heating elements. | Follow the descaling procedure outlined in your Drew Barrymore coffee maker’s manual. |
| Using the wrong filter type/size | Coffee grounds in your cup, overflow, or poor water flow. | Check your brewer’s manual or the filter basket for the correct size and type (paper vs. reusable). |
| Not rinsing the carafe immediately | Lingering coffee oils, leading to stale odors and off-flavors. | Rinse the carafe with hot water right after emptying. |
| Incorrect coffee-to-water ratio (too much coffee) | Over-extracted, strong, and potentially bitter coffee. | Reduce the amount of coffee grounds or increase the water volume (adjust cup setting if needed). |
| Incorrect coffee-to-water ratio (too little coffee) | Under-extracted, weak, and bland coffee. | Increase the amount of coffee grounds or decrease the water volume. |
| Not ensuring the carafe is seated properly | Brew cycle won’t start, or the pause-and-brew feature malfunctions. | Make sure the carafe is pushed all the way in, engaging the drip-stop mechanism if present. |
Decision rules (simple if/then)
- If your coffee tastes bitter, then check your grind size and make it coarser because too fine a grind over-extracts.
- If your coffee tastes sour, then check your grind size and make it finer because too coarse a grind under-extracts.
- If your coffee tastes weak, then check your coffee-to-water ratio and add more grounds or use less water because you might be under-extracting.
- If your coffee tastes too strong, then check your coffee-to-water ratio and use less grounds or more water because you might be over-extracting.
- If your machine is brewing slowly, then it’s time to descale because mineral buildup restricts water flow.
- If you see coffee grounds in your cup, then check your filter type and ensure it’s seated correctly because the wrong filter or a faulty seal will let grounds pass.
- If your coffee has an off-flavor, then try using filtered water because tap water impurities can significantly impact taste.
- If your brew cycle stops prematurely, then ensure the carafe is properly seated because many machines use this as a safety switch.
- If your coffee is lukewarm, then check the warming plate function and ensure the carafe is on it because the plate might be off or the carafe not making contact.
- If you’re unsure about a specific button sequence, then refer to your Drew Barrymore coffee maker’s manual because each model can have slight variations.
- If your coffee maker is making strange noises, then check for blockages in the water reservoir or brew basket because a clog can cause strain.
- If your coffee tastes stale, then ensure you’re using fresh beans and grinding them just before brewing because pre-ground coffee loses flavor quickly.
FAQ
How do I reset my Drew Barrymore coffee maker to factory settings?
Typically, you’ll need to unplug the machine for a minute, then plug it back in while holding down a specific button combination, often the “Brew” and “Program” buttons. Always consult your manual for the exact sequence.
Can I change the cup size mid-brew?
Generally, no. Once the brew cycle starts, the water volume is set. It’s best to select your desired cup size before pressing the brew button. If you need less coffee, you might have to stop the cycle early.
What does the “bold” setting do on my Drew Barrymore coffee maker?
The “bold” setting usually slows down the brew cycle slightly, allowing more contact time between the water and coffee grounds. This can result in a stronger, more robust flavor profile.
My coffee maker is leaking. What should I do?
First, check that the water reservoir is not overfilled and that the carafe is properly seated. If it continues to leak, inspect the brew basket and the area around the warming plate for any cracks or loose seals. Unplug it and check the manual.
How often should I descale my coffee maker?
This depends on your water hardness and how often you use the machine. A good rule of thumb is every 1-3 months, or whenever the “descale” indicator light comes on.
Can I use any mug with my Drew Barrymore coffee maker?
Most machines are designed to accommodate standard mugs. Check the height clearance under the brew spout. If you use very tall travel mugs, you might need to remove the drip tray or find a shorter carafe.
What’s the difference between a “cup” setting and fluid ounces?
Coffee maker “cups” are typically smaller than standard US measuring cups (about 5-6 oz instead of 8 oz). If your machine has specific fluid ounce settings, use those for more precise measurements. Otherwise, be aware that the “12 cup” setting might yield closer to 60 oz of coffee.
My coffee tastes weak even on the largest cup setting.
This could be a grind size issue, not enough coffee grounds, or a need to descale. Ensure you’re using the correct grind for drip coffee and your coffee-to-water ratio is appropriate.
What this page does NOT cover (and where to go next)
- Detailed troubleshooting for specific error codes displayed on your model. (Check your Drew Barrymore coffee maker’s manual for a full list of error codes and their solutions.)
- Advanced brewing techniques like pour-over or Aeropress methods. (Explore resources dedicated to manual coffee brewing.)
- Recommendations for specific coffee bean brands or roast levels. (Visit your local roaster or specialty coffee shops for personalized advice.)
- Information on coffee maker maintenance beyond basic cleaning and descaling. (Look for extended warranty or repair service information if needed.)
- Comparison of Drew Barrymore coffee makers with other brands or models. (Read reviews and comparison articles from reputable consumer product sites.)