Homemade Coffee Chocolate: A Delicious Treat Recipe
Quick answer
- Combine melted chocolate with finely ground coffee for an easy, flavorful confection.
- Use high-quality chocolate and freshly ground, finely powdered coffee for best results.
- Tempering the chocolate is optional but improves texture and shelf life.
- Experiment with different coffee roasts and chocolate percentages to find your favorite.
- Store homemade coffee chocolate in a cool, dry place to maintain freshness.
- This recipe is highly customizable with additions like nuts or spices.
Who this is for
- Home bakers and confectioners looking for a unique, caffeinated dessert.
- Coffee lovers who want to incorporate their favorite brew into a sweet treat.
- Anyone interested in making personalized gifts or party favors.
What to check first
Brewer type and filter type
For this recipe, you won’t be brewing coffee in the traditional sense. Instead, you’ll be using finely ground coffee directly in the chocolate. The “brewer type” here refers to your coffee grinder. A burr grinder is ideal for achieving a consistent, fine powder, similar to espresso grind or even finer. A blade grinder can work but might produce a less uniform grind.
Water quality and temperature
Water quality and temperature are not directly relevant for the coffee chocolate itself, as no water is used in the final product. However, if you are melting chocolate using a double boiler method, ensure your water does not come into contact with the chocolate, as this can cause it to seize. Maintain a gentle simmer for the water in the double boiler.
Grind size and coffee freshness
The grind size is crucial for coffee chocolate. You want a very fine, almost powdery grind. Coarse grounds will result in a gritty texture. Use freshly roasted and freshly ground coffee for the best flavor. Stale coffee will impart less aroma and a duller taste to your chocolate.
Coffee-to-water ratio
This concept is not applicable as you are not brewing coffee with water. Instead, you’ll be focusing on the coffee-to-chocolate ratio. Start with a conservative amount of coffee and adjust to your taste preferences. Too much coffee can make the chocolate bitter or overwhelmingly strong.
Cleanliness/descale status
Ensure all your equipment – bowls, spatulas, molds – are completely clean and dry. Any moisture can cause the chocolate to seize. There’s no descaling needed for this process, but general kitchen hygiene is important.
Step-by-step how to make coffee chocolate at home (brew workflow)
1. Prepare your workspace and ingredients.
- What to do: Gather all your tools (double boiler or microwave-safe bowl, spatula, molds or parchment paper, coffee grinder) and ingredients (chocolate, whole bean coffee).
- What “good” looks like: Everything is clean, dry, and within easy reach. Your chosen chocolate is high quality (e.g., baking chocolate bars, couverture).
- Common mistake and how to avoid it: Using wet utensils or bowls. Ensure everything is thoroughly dry to prevent the chocolate from seizing.
For the best results, use high-quality baking chocolate. This will ensure a smooth texture and rich flavor in your homemade coffee chocolate.

- [Looking for Delicious Milk Chocolate Wafers?] - Look no further than Merckens chocolate melts. With extensive experience in providing exceptional baking chocolate, Merckens is the premier choice for extraordinary milk chocolate melts.
- [Better Than Ordinary Wafers] – Our chocolate melting wafers have a rich milk chocolate flavor with superior quality for exceptional baking results. Unlike others, ours melt smoothly, set evenly, and provide consistent texture, shine, and taste. These chocolate wafers melts are ideal for desserts of any kind.
- [Easy Melting for Every Baker] - Our chocolate melts for dipping are incredibly easy to use. Simply melt the milk chocolate melting wafers in a double boiler or microwave to no more than 102F. No need to temper it like milk chocolate, just heat, use and let it cool.
- [Versatile Chocolate for Every Treat] - Perfect melting chocolate for dubai chocolate bar, chocolate-dipped strawberries to custom cake decorations and cake pops, giving every recipe a rich chocolate flavor and professional-quality finish.
- [Perfect Gift for Holiday Celebrations] – Share the joy of delicious homemade desserts this season. Our premium chocolate for melting makes an ideal gift for friends, family, and baking enthusiasts during Christmas, Thanksgiving, and special occasions.
2. Grind your coffee beans.
- What to do: Grind whole coffee beans to a very fine, almost powdery consistency.
- What “good” looks like: The coffee resembles espresso grind or finer, with no noticeable large particles.
- Common mistake and how to avoid it: Grinding too coarsely. This will result in a gritty texture in your chocolate. Grind in small pulses if using a blade grinder to avoid overheating the beans.
3. Chop your chocolate.
- What to do: Finely chop your chosen chocolate into small, uniform pieces.
- What “good” looks like: The chocolate pieces are roughly the same size, allowing for even melting.
- Common mistake and how to avoid it: Using large, uneven chunks. This leads to uneven melting and potential scorching.
4. Melt the chocolate.
- What to do: Use a double boiler or microwave. If using a double boiler, place chopped chocolate in a heatproof bowl over a saucepan with simmering water (water should not touch the bottom of the bowl). Stir gently until melted and smooth. If microwaving, heat in 15-30 second intervals, stirring well after each, until melted.
- What “good” looks like: The chocolate is smooth, glossy, and free of lumps. Its temperature is around 105-115°F for dark chocolate, or 90-100°F for milk/white chocolate (if tempering, follow specific tempering temperatures).
- Common mistake and how to avoid it: Overheating the chocolate. This can cause it to seize or burn. Melt slowly and gently.
5. Stir in the ground coffee.
- What to do: Once the chocolate is melted and smooth, remove it from the heat (if using a double boiler). Add the finely ground coffee, starting with a smaller amount (e.g., 1-2 tablespoons per 8 oz of chocolate) and mixing thoroughly.
- What “good” looks like: The coffee is evenly distributed throughout the chocolate, with no clumps.
- Common mistake and how to avoid it: Adding too much coffee initially. This can make the chocolate overly bitter. Add gradually and taste.
6. Optional: Temper the chocolate.
- What to do: If you desire a shiny, snappy chocolate that resists blooming, follow a tempering method (e.g., seeding method or tabling method). This involves heating, cooling, and reheating the chocolate to specific temperatures.
- What “good” looks like: The chocolate is at its correct working temperature, typically around 88-91°F for dark chocolate, and 86-88°F for milk/white chocolate.
- Common mistake and how to avoid it: Skipping tempering if you want a professional finish. Untempered chocolate will be dull, soft, and prone to blooming.
7. Pour into molds or spread onto parchment.
- What to do: Carefully pour the coffee chocolate mixture into silicone molds, or spread it thinly onto a sheet of parchment paper laid on a baking sheet.
- What “good” looks like: The chocolate fills the molds evenly or forms a uniform layer on the parchment.
- Common mistake and how to avoid it: Pouring too quickly or unevenly. Take your time to ensure a smooth finish.
Once your coffee chocolate mixture is ready, carefully pour it into silicone chocolate molds for perfectly shaped treats. If you don’t have molds, spreading it on parchment paper works too!
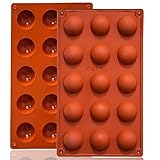
- 【 OVEN SAFE & FLEXIBLE SILICONE MOLD 】: Lerykin silicone molds are made of 100% Food Grade silicone, BPA free, Non-toxic, heat-resistant can withstand temperatures ranging from -40°F to +446°F (-40℃ to +230℃), it's safe for the oven, microwave oven, freezer, refrigerator & dishwasher.
- 【 QUICK RELEASE & NON-STICK 】: These flexible and durable semicircle silicone molds can be easily Released, after cooling , they JUST POP OUT with pressed finger. The reusable Lerykin silicone mold has a non-stick surface, and the chocolate can be easily removed from the mold completely without worrying about cracking or the recipe sticking to it.
- 【 EASY TO USE & DURABLE 】: Lerykin Flexible and durable Semi-circular silicone molds are easy to fill, Just fill your favorite recipe into the mold, and wait untill they are cooled completely, then turn it upside down, pop right out with a little push from the bottom, it is very easy to use and time saving. Besides these durable silicone molds are not easily deformed or torn.
- 【 MULTI-FUNCTIONAL USE 】 : Our food-grade silicone molds can be used for making cakes such as mousse, chocolate bombe, raindrop cake, ice cream cake, chiffon cake, muffin & dessert for example gumdrop, yogurt drop, gelatin drop, jelly, pudding, Bread, prepared food, even handmade soap, wax, resin dome and bath bomb.
- Lerykin focuses on kitchenware research and development. We are confident that we provide our customers with Healthy, Eco-friendly kitchenware & Best service last forever. You can rest assured that we sell the best silicone kitchenware on the market.
8. Tap and settle.
- What to do: Gently tap the molds or baking sheet on your counter several times to release any air bubbles.
- What “good” looks like: No visible air bubbles on the surface of the chocolate.
- Common mistake and how to avoid it: Skipping this step. Air bubbles can create imperfections in your finished chocolate.
9. Chill to set.
- What to do: Place the molds or baking sheet in the refrigerator for about 20-30 minutes, or until completely firm.
- What “good” looks like: The chocolate is hard and easily releases from the molds or snaps cleanly if on parchment.
- Common mistake and how to avoid it: Not chilling long enough. This can lead to soft, sticky chocolate that is hard to handle.
10. Unmold or break apart.
- What to do: Once fully set, carefully unmold the chocolate pieces or break the slab into desired sizes.
- What “good” looks like: Clean, crisp edges and a shiny surface (if tempered).
- Common mistake and how to avoid it: Forcing the chocolate out of molds before it’s set. This can cause breakage.
Common mistakes when you make coffee chocolate at home (and what happens if you ignore them)
| Mistake | What it causes | Fix |
|---|---|---|
| Using coarse coffee grounds | Gritty texture, unpleasant mouthfeel | Grind coffee to a very fine, powdery consistency. |
| Overheating chocolate during melting | Seizing (chocolate becomes thick and clumpy), burnt taste | Melt slowly over low heat (double boiler) or in short bursts (microwave); stir constantly. |
| Introducing water to melting chocolate | Seizing | Ensure all equipment is completely dry; use a double boiler carefully so no steam or water gets into the chocolate. |
| Using stale coffee beans | Dull, weak coffee flavor in the chocolate | Use freshly roasted and freshly ground coffee beans. |
| Adding too much coffee | Overly bitter or overpowering coffee flavor | Start with a small amount of coffee and add more gradually, tasting as you go. |
| Not tempering chocolate (if desired) | Dull finish, soft texture, prone to “bloom” (white streaks) | Follow a proper chocolate tempering method for a shiny, snappy result. |
| Not chilling chocolate sufficiently | Soft, sticky chocolate that is hard to handle and store | Chill in the refrigerator until completely firm, typically 20-30 minutes. |
| Using low-quality chocolate | Poor flavor, inferior texture, difficult to work with | Invest in good quality baking chocolate or couverture chocolate. |
| Unevenly chopped chocolate | Inconsistent melting, potential for scorching some parts | Chop chocolate into small, uniform pieces. |
| Not tapping molds/tray | Air bubbles trapped in the chocolate, creating imperfections | Gently tap molds or tray on the counter after pouring to release bubbles. |
Decision rules to make coffee chocolate at home
- If your chocolate becomes thick and clumpy while melting, then it has likely seized because moisture was introduced or it was overheated. There’s no easy fix; you might need to discard and restart.
- If your finished coffee chocolate is dull and soft, then you likely skipped tempering because tempering gives chocolate a glossy finish and a firm snap.
- If your coffee chocolate tastes gritty, then your coffee grounds are too coarse because fine grounds are essential for a smooth texture.
- If your coffee chocolate lacks a strong coffee flavor, then you might not have added enough ground coffee or your beans were stale because fresh, finely ground coffee provides the best aroma.
- If your chocolate is too bitter, then you’ve added too much coffee or used a very dark roast because both can contribute to bitterness. Reduce the coffee amount next time or try a lighter roast.
- If your chocolate is not setting firm, then it might not be chilled enough or the room temperature is too warm because chocolate needs to cool to solidify properly.
- If you want a professional-looking, shelf-stable chocolate, then you must temper the chocolate because tempering prevents blooming and provides a crisp texture.
- If you’re unsure about the coffee-to-chocolate ratio, then start with less coffee and add more because it’s easier to add flavor than to remove it.
- If you don’t have molds, then spread the chocolate on parchment paper because you can break it into bark pieces once set.
- If your chocolate tastes burnt, then you melted it too quickly or at too high a heat because chocolate is delicate and scorches easily.
FAQ
Q: Can I use instant coffee instead of ground beans?
A: While technically possible, instant coffee may not provide the same rich, authentic coffee flavor and aroma as freshly ground beans. It can also dissolve differently in the chocolate, potentially affecting texture. For the best result, stick to finely ground whole beans.
Q: What kind of chocolate is best for making coffee chocolate?
A: High-quality baking chocolate bars (couverture chocolate) are generally best. You can use dark, milk, or even white chocolate, depending on your preference. The quality of the chocolate significantly impacts the final taste and texture.
Q: How much coffee should I add to my chocolate?
A: This is largely a matter of personal taste. A good starting point is 1-2 tablespoons of finely ground coffee per 8 ounces of chocolate. You can adjust up or down from there based on your desired intensity.
Q: How should I store homemade coffee chocolate?
A: Store your coffee chocolate in an airtight container in a cool, dry place, away from direct sunlight and strong odors. If properly tempered, it can last for several weeks. Refrigeration is generally not recommended unless your kitchen is very warm, as it can cause condensation and affect the chocolate’s texture.
Q: Can I add other ingredients to my coffee chocolate?
A: Absolutely! This recipe is very versatile. Consider adding chopped nuts (like almonds or pecans), a pinch of sea salt, a dash of cinnamon, or even dried fruit for extra flavor and texture. Add these after incorporating the coffee but before pouring into molds.
Q: What is chocolate “bloom” and how can I prevent it?
A: Chocolate bloom refers to the grayish streaks or dull spots that can appear on the surface of chocolate. It’s caused by improper storage (temperature fluctuations) or not tempering the chocolate correctly. Tempering helps stabilize the cocoa butter crystals, preventing bloom and ensuring a shiny, snappy finish.
What this page does NOT cover (and where to go next)
- Advanced chocolate tempering techniques (e.g., tabling, using a tempering machine)
- Detailed information on different types of chocolate couverture
- Specific brand recommendations for coffee beans or chocolate
- Using coffee extracts or flavorings in chocolate
- How to make your own chocolate from scratch (bean-to-bar)
- Pairing coffee chocolate with specific beverages or foods