Homemade Coffee Flavored Chocolate Treats
Quick answer
- Use good quality coffee beans. Freshly ground is best.
- Choose chocolate you actually like. Dark chocolate works great.
- Infuse the coffee flavor directly into the chocolate or the liquid you add.
- Don’t overheat the chocolate. It’s a delicate dance.
- Experiment with different coffee-to-chocolate ratios.
- Consider adding a touch of espresso powder for a punch.
Who this is for
- Anyone who loves both coffee and chocolate. Seriously, who doesn’t?
- Home bakers looking to elevate their dessert game with a unique flavor.
- Busy folks who want a simple, impressive treat to whip up.
What to check first
Coffee Quality and Freshness
This is the foundation, man. If your coffee tastes stale or burnt, your treats will too.
- What to do: Grab some freshly roasted beans. Grind them right before you use them.
- What “good” looks like: A rich aroma when you open the bag and when you grind.
- Common mistake: Using pre-ground coffee that’s been sitting around. It loses its zing.
Chocolate Type
The chocolate is your canvas. Don’t skimp here.
- What to do: Pick a chocolate you enjoy eating on its own. Dark chocolate (60-70% cacao) is a classic for a reason. Milk chocolate can work, but the coffee flavor might get lost.
- What “good” looks like: Smooth melting, good flavor profile that complements coffee.
- Common mistake: Using cheap, waxy chocolate chips. They don’t melt well and taste meh.
Don’t skimp on your chocolate; using a good quality baking chocolate will elevate the taste and texture of your treats significantly.

- [Looking for Delicious Milk Chocolate Wafers?] - Look no further than Merckens chocolate melts. With extensive experience in providing exceptional baking chocolate, Merckens is the premier choice for extraordinary milk chocolate melts.
- [Better Than Ordinary Wafers] – Our chocolate melting wafers have a rich milk chocolate flavor with superior quality for exceptional baking results. Unlike others, ours melt smoothly, set evenly, and provide consistent texture, shine, and taste. These chocolate wafers melts are ideal for desserts of any kind.
- [Easy Melting for Every Baker] - Our chocolate melts for dipping are incredibly easy to use. Simply melt the milk chocolate melting wafers in a double boiler or microwave to no more than 102F. No need to temper it like milk chocolate, just heat, use and let it cool.
- [Versatile Chocolate for Every Treat] - Perfect melting chocolate for dubai chocolate bar, chocolate-dipped strawberries to custom cake decorations and cake pops, giving every recipe a rich chocolate flavor and professional-quality finish.
- [Perfect Gift for Holiday Celebrations] – Share the joy of delicious homemade desserts this season. Our premium chocolate for melting makes an ideal gift for friends, family, and baking enthusiasts during Christmas, Thanksgiving, and special occasions.
Liquid Ingredients (if applicable)
If your recipe calls for cream, milk, or butter, make sure they’re fresh.
- What to do: Use good quality dairy or non-dairy alternatives.
- What “good” looks like: Fresh, no off-smells or textures.
- Common mistake: Using old or spoiled liquids. Nobody wants that.
Recipe Clarity
Read the recipe through before you start.
- What to do: Understand the steps and what’s expected.
- What “good” looks like: A clear path from ingredients to finished product.
- Common mistake: Skipping steps or misinterpreting instructions, especially with tempering chocolate.
Step-by-step (how to make coffee flavored chocolate treats)
This is a general workflow. Specific recipes will vary.
1. Prepare Your Coffee:
- What to do: Grind your fresh coffee beans to a fine or medium-fine consistency, depending on your recipe. If infusing, you might use whole beans or coarse grounds.
- What “good” looks like: A fragrant pile of grounds.
- Common mistake: Grinding too coarse or too fine for the method. Too coarse won’t infuse well; too fine can make things muddy.
2. Infuse Coffee Flavor (Method 1: Direct Infusion):
- What to do: Gently heat a liquid (like cream or milk) with your coffee grounds or beans. Let it steep for a specific time, then strain thoroughly.
- What “good” looks like: A richly flavored liquid with no coffee particles.
- Common mistake: Boiling the liquid, which can scorch the coffee flavor and make it bitter.
3. Infuse Coffee Flavor (Method 2: Espresso Powder):
- What to do: Dissolve instant espresso powder directly into your melted chocolate or liquid ingredients.
- What “good” looks like: A smooth, evenly incorporated coffee flavor.
- Common mistake: Not dissolving the powder completely, leaving gritty bits.
For a quick and intense coffee flavor, consider using a high-quality espresso powder. It dissolves easily and provides a concentrated taste.

- Award-winning espresso powder - Named Best Espresso Powder by America's Test Kitchen. Premium Colombian coffee expertly roasted and finely ground for rich espresso flavor.
- Fine powder - Blends easily into batters, frostings, beverages, and recipes for consistent coffee flavor.
- Instant convenience - No brewing, grinding, or coffee grounds required.
- Versatile applications - Ideal for brownies, cakes, cookies, desserts, smoothies, mochas, and coffee creations.
- Rich espresso flavor - Adds deep coffee flavor with roasted notes that complement chocolate and baked goods.
4. Melt Your Chocolate:
- What to do: Use a double boiler or microwave on low power in short bursts, stirring frequently.
- What “good” looks like: Smooth, glossy, fully melted chocolate without any lumps.
- Common mistake: Overheating the chocolate, which can cause it to seize and become stiff or burnt. Patience is key here.
5. Combine Coffee and Chocolate:
- What to do: Gradually add your infused liquid or espresso powder mixture to the melted chocolate, stirring until fully incorporated.
- What “good” looks like: A uniform, smooth mixture with no separation.
- Common mistake: Adding cold liquid to hot chocolate too quickly, which can cause the chocolate to seize. Warm your infused liquid slightly if needed.
6. Add Other Ingredients:
- What to do: Stir in any other flavorings, sweeteners, or additions like nuts or dried fruit.
- What “good” looks like: Everything is evenly distributed.
- Common mistake: Overmixing, which can develop gluten if using flour, or introduce too much air.
7. Temper Chocolate (If Required):
- What to do: Follow your recipe’s specific tempering instructions (e.g., seeding, tabling). This gives chocolate a snap and shine.
- What “good” looks like: Chocolate that sets firm, has a glossy finish, and breaks cleanly.
- Common mistake: Not reaching the correct temperatures, leading to dull, soft chocolate that blooms (develops white streaks). This is a whole other skill, so check your recipe!
8. Pour and Set:
- What to do: Pour the mixture into prepared molds, onto a baking sheet lined with parchment paper, or into your desired shape.
- What “good” looks like: Evenly distributed mixture, ready to set.
- Common mistake: Pouring too thick or too thin without considering the final treat’s structure.
To create beautifully shaped treats, consider using silicone chocolate molds. They make unmolding easy and give a professional finish.
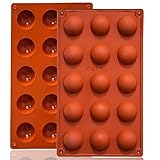
- 【 OVEN SAFE & FLEXIBLE SILICONE MOLD 】: Lerykin silicone molds are made of 100% Food Grade silicone, BPA free, Non-toxic, heat-resistant can withstand temperatures ranging from -40°F to +446°F (-40℃ to +230℃), it's safe for the oven, microwave oven, freezer, refrigerator & dishwasher.
- 【 QUICK RELEASE & NON-STICK 】: These flexible and durable semicircle silicone molds can be easily Released, after cooling , they JUST POP OUT with pressed finger. The reusable Lerykin silicone mold has a non-stick surface, and the chocolate can be easily removed from the mold completely without worrying about cracking or the recipe sticking to it.
- 【 EASY TO USE & DURABLE 】: Lerykin Flexible and durable Semi-circular silicone molds are easy to fill, Just fill your favorite recipe into the mold, and wait untill they are cooled completely, then turn it upside down, pop right out with a little push from the bottom, it is very easy to use and time saving. Besides these durable silicone molds are not easily deformed or torn.
- 【 MULTI-FUNCTIONAL USE 】 : Our food-grade silicone molds can be used for making cakes such as mousse, chocolate bombe, raindrop cake, ice cream cake, chiffon cake, muffin & dessert for example gumdrop, yogurt drop, gelatin drop, jelly, pudding, Bread, prepared food, even handmade soap, wax, resin dome and bath bomb.
- Lerykin focuses on kitchenware research and development. We are confident that we provide our customers with Healthy, Eco-friendly kitchenware & Best service last forever. You can rest assured that we sell the best silicone kitchenware on the market.
9. Chill or Set:
- What to do: Let the treats set at room temperature or in the refrigerator until firm.
- What “good” looks like: Firm, ready-to-handle treats.
- Common mistake: Refrigerating for too long, which can sometimes cause condensation and affect the texture or appearance.
10. Finish and Serve:
- What to do: Unmold, cut, or decorate your coffee-flavored chocolate treats.
- What “good” looks like: Delicious-looking treats ready to be enjoyed.
- Common mistake: Trying to handle or cut the treats before they are fully set.
Common mistakes (and what happens if you ignore them)
| Mistake | What it causes | Fix |
|---|---|---|
| Using stale coffee beans | Weak, flat, or bitter coffee flavor in your treats. | Use freshly roasted, high-quality beans. Grind them just before use. |
| Using cheap, waxy chocolate | Poor texture, dull appearance, and an unpleasant mouthfeel. | Opt for good quality chocolate bars or couverture chocolate. |
| Overheating chocolate during melting | Seized chocolate (stiff, grainy), burnt flavor, or dull finish. | Melt slowly over low heat (double boiler) or in short microwave bursts, stirring often. |
| Adding cold liquid to hot chocolate too fast | Chocolate seizes, becoming thick and lumpy. | Gently warm your infused liquid before adding it to the melted chocolate. Add it slowly. |
| Not straining infused liquid properly | Gritty texture or coffee grounds in your final product. | Use a fine-mesh sieve or cheesecloth to strain thoroughly. |
| Incorrect tempering of chocolate | Dull, soft chocolate that blooms (develops white streaks) and lacks snap. | Follow precise tempering instructions. Use a thermometer. Practice makes perfect. |
| Overmixing batter/ganache | Tough texture in baked goods, or can break the emulsion of a ganache. | Mix only until ingredients are just combined. |
| Not letting treats set completely | Soft, messy treats that fall apart when handled or cut. | Be patient. Allow adequate setting time at the correct temperature. |
| Using old or spoiled dairy | Unpleasant taste, off-smell, and potential food safety issues. | Always check expiration dates and sniff ingredients before use. |
| Incorrect coffee-to-chocolate ratio | Coffee flavor is too weak, too strong, or clashes with the chocolate. | Start with a recipe’s recommendation and adjust in future batches based on your taste. |
Decision rules (simple if/then)
- If your chocolate is seizing, then stop adding liquid and try to gently reheat it, stirring constantly.
- If your infused liquid tastes bitter, then it was likely heated too high or steeped too long.
- If your chocolate has white streaks (bloom), then it wasn’t tempered correctly or was stored improperly.
- If you want a more intense coffee flavor, then use finely ground espresso beans or high-quality instant espresso powder.
- If you’re using milk chocolate, then use a milder coffee roast to avoid overwhelming the chocolate.
- If you’re using dark chocolate, then a medium or dark roast coffee will likely pair well.
- If your recipe calls for tempering and you’re unsure, then stick to recipes that don’t require it for your first try.
- If the chocolate mixture seems too thick, then gently warm it slightly or add a tiny bit more warm liquid.
- If the chocolate mixture seems too thin, then let it cool slightly or add a bit more melted chocolate.
- If your treats are sticking to the mold, then ensure the mold is clean and dry, and consider a light spray of neutral oil if appropriate for the recipe.
- If you want a smoother texture, then ensure all ingredients are at a similar, moderate temperature before combining.
FAQ
Q: Can I use regular brewed coffee instead of infused liquid?
A: You can, but brewed coffee has a lot of water. You’d need to reduce it significantly to concentrate the flavor, or it might make your chocolate seize. Espresso powder or a cream infusion is usually easier.
Q: How do I get a strong coffee flavor without making it bitter?
A: Use good quality coffee and don’t over-extract or overheat it. Espresso powder is a great way to get a concentrated coffee taste without the bitterness of over-brewed coffee.
Q: What kind of coffee roast is best for chocolate treats?
A: It depends on the chocolate. Lighter roasts can offer brighter, fruitier notes that might be interesting with white or milk chocolate. Medium to dark roasts generally pair well with dark chocolate for a classic, robust flavor.
Q: Do I have to temper my chocolate?
A: Not always. For simple bark or fudge-like treats, untempered chocolate will set fine, though it might be dull and prone to blooming. For glossy, snappy bars or molded candies, tempering is essential.
Q: Can I add coffee liqueur to my chocolate treats?
A: Absolutely! Just be mindful of the alcohol content and how it affects the texture. You might need to adjust other liquids slightly.
Q: My chocolate seized. What happened?
A: Most likely, it got too hot, or a small amount of water got into it. Try adding a tablespoon of hot, not boiling, liquid (like cream) and stirring vigorously. Sometimes you can save it.
Q: How should I store coffee-flavored chocolate treats?
A: Store them in an airtight container in a cool, dry place. If they contain dairy or are very soft, refrigeration might be necessary, but let them come to room temp before eating for best flavor.
Q: Can I make vegan coffee chocolate treats?
A: Yes! Use good quality vegan dark chocolate and plant-based milks or creams for infusions. Ensure any other ingredients are also vegan.
What this page does NOT cover (and where to go next)
- Detailed tempering techniques for professional results. (Look for resources on chocolate tempering science.)
- Specific recipes for truffles, bars, or baked goods. (Search for “coffee truffle recipe” or “coffee chocolate chip cookie recipe.”)
- Advanced flavor pairings with coffee and chocolate. (Explore articles on food science and flavor profiles.)
- Troubleshooting very specific chocolate issues like bloom or fat separation beyond basic fixes. (Consult specialized confectionery guides.)