Fixing a Keurig Not Making a Full Pot
Quick answer
- Your Keurig might not be making a full pot due to a clogged water needle, mineral buildup, or an issue with the water reservoir.
- Check that the water reservoir is seated correctly and filled to the maximum line.
- Ensure the K-Cup pod is properly pierced and not obstructing the water flow.
- A simple descaling process can often resolve flow issues caused by mineral deposits.
- Verify that the brew strength and size settings haven’t been accidentally changed.
- If the problem persists, a more thorough cleaning of the needle assembly might be necessary.
What this problem usually is (and is not)
- This problem typically indicates a blockage or reduced water flow within the Keurig system.
- It is usually not a sign of a major electrical failure or a broken heating element.
- The issue is often resolvable with basic maintenance and cleaning steps.
- It’s important to distinguish between a machine not brewing at all and one that’s brewing, but not a full cup.
- This guide focuses on scenarios where coffee is dispensed, but the volume is less than expected.
- Always unplug your Keurig before attempting any internal cleaning or maintenance.
Likely causes (triage list)
Water Reservoir Issues:
- Reservoir not seated properly: Confirm the water reservoir is firmly clicked into place. A loose reservoir can prevent the machine from drawing enough water.
- Low water level: Ensure the reservoir is filled to at least the “Max Fill” line. The machine may stop brewing if it detects insufficient water.
Clogged Water Needle:
- Obstructed exit needle: The needle that pierces the K-Cup might be clogged with coffee grounds or sediment. You can often see this if you remove the K-Cup holder.
- Blocked entry needle: The needle that allows water into the K-Cup could also be blocked. This is harder to see directly but affects water intake.
Mineral Buildup (Scale):
- Internal water line blockage: Over time, mineral deposits from tap water can build up inside the Keurig’s internal tubing, restricting water flow. This is a common cause for reduced brew volume.
- Clogged pump: The pump responsible for moving water can become partially blocked by scale.
K-Cup Pod Issues:
- Improperly seated K-Cup: The K-Cup might not be pushed down fully, preventing the needles from piercing it correctly or creating a seal.
- Damaged K-Cup: A bent or torn K-Cup foil lid could cause grounds to clog the exit needle.
Machine Setup and Settings:
- Incorrect brew size selection: Double-check that you’ve selected the desired brew size (e.g., 8 oz, 10 oz).
- Brew strength setting: Some models have a brew strength option that might affect the perceived volume or extraction, though it’s less likely to cause a drastically reduced pot.
Fix it step-by-step (brew workflow)
1. Check Water Reservoir:
- What to do: Remove the water reservoir and ensure it’s clean. Reattach it firmly, making sure it clicks into place. Fill it to the “Max Fill” line.
- What “good” looks like: The reservoir sits securely on the base, and the water level is clearly above the minimum line.
- Common mistake: Not pushing the reservoir down firmly enough, leading to an incomplete seal and poor water draw. Always listen for a click.
2. Inspect K-Cup Holder:
- What to do: Remove the K-Cup holder assembly. Look for any visible coffee grounds or debris around the needles. Gently wipe them clean with a damp cloth.
- What “good” looks like: The holder is free of grounds, and the needles appear clear.
- Common mistake: Forcing a K-Cup into the holder or not cleaning out old grounds, which can impede needle function.
3. Clear the Exit Needle:
- What to do: With the K-Cup holder removed, locate the larger, bottom needle. Use a straightened paperclip or a designated Keurig cleaning tool to carefully poke into the needle’s opening. Gently twist and wiggle to dislodge any obstructions.
- What “good” looks like: The paperclip can be inserted and moved freely within the needle’s opening.
- Common mistake: Poking too aggressively, which can damage the needle. Be gentle and work the obstruction out.
If you’re having trouble clearing the exit needle, consider using a dedicated Keurig cleaning tool or replacement parts to ensure you don’t damage the existing needle.
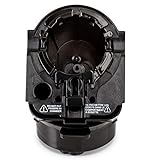
- Designed for all Keurig 2.0 models such as K200, K225, K250, K300, K325, K350, K400, K425, K450, K500, K525, K550, K600, K650, K675. Perfectly compatible with keurig 2.0 model coffee machine.
- Made from high quality materials, 100% BPA free plastic, Helping produce the best brews you ever had!
- Part 1, 2 and 3 for all Keurig 2.0 Models (Full Assembly)
- Remove side sticker and insert full assembly into Brewing Chamber
- We provide a 1-year warranty, Feel free to contact us if there are any problems with the item, we will replace at no charge to you
4. Clear the Entry Needle (if accessible):
- What to do: Some Keurigs allow access to the top needle. If yours does, use a paperclip to carefully clear any grounds from its opening.
- What “good” looks like: The top needle’s opening appears clear.
- Common mistake: Not all models have an easily accessible entry needle. If yours doesn’t, focus on the exit needle and descaling.
5. Run a Water-Only Brew:
- What to do: Place a mug on the drip tray. Without inserting a K-Cup, select your desired brew size and run a brew cycle.
- What “good” looks like: A steady stream of hot water fills the mug to the selected volume.
- Common mistake: Forgetting to remove the K-Cup if one was previously inserted, which can cause an incomplete cycle.
6. Perform a Descaling Cycle:
- What to do: Empty the water reservoir and pour in a descaling solution (either commercial or a 1:3 white vinegar to water ratio). Run a brew cycle with the descaling solution, discarding the liquid. Repeat with fresh descaling solution if necessary. Then, rinse by running 2-3 full reservoirs of fresh water through the machine.
- What “good” looks like: After descaling, the water flow during brew cycles is noticeably stronger and consistent.
- Common mistake: Not rinsing thoroughly after descaling with vinegar, which can leave a taste in your coffee. Always follow up with multiple fresh water brews.
7. Check Brew Size Settings:
- What to do: Consult your Keurig’s manual to ensure you are selecting the correct brew size (e.g., 8 oz, 10 oz, 12 oz). Some models have a “reset” function for settings.
- What “good” looks like: The machine is set to brew the volume you expect.
- Common mistake: Accidentally pressing a different size button or having a setting that reverted to a smaller brew.
8. Reassemble and Test Brew:
- What to do: Put the K-Cup holder back in. Insert a fresh K-Cup, ensuring it’s properly seated. Select your desired brew size and run a normal brew cycle.
- What “good” looks like: The Keurig brews a full, satisfying cup of coffee to your selected volume.
- Common mistake: Rushing the process and not allowing the machine to fully heat up or complete its brew cycle.
Prevent it next time
- Descale regularly: Aim to descale your Keurig every 3-6 months, or more often if you have hard water.
- Use filtered water: Using filtered or bottled water can significantly reduce mineral buildup.
- Store water properly: Keep the water reservoir clean and replace water daily. Don’t let water sit in the reservoir for extended periods.
- Clean K-Cup holder weekly: Remove and rinse the K-Cup holder weekly to prevent coffee ground buildup.
- Use correct coffee-to-water ratio: While Keurig uses pre-portioned pods, ensure you’re selecting the appropriate brew size for the pod.
- Check K-Cup integrity: Before inserting, ensure the K-Cup foil lid isn’t damaged.
- Perform needle cleaning: Gently clean the needles with a paperclip or cleaning tool monthly.
- Ensure proper placement: Always ensure the water reservoir is securely seated.
- Unplug when not in use: For safety and to prevent accidental brews.
- Follow manufacturer instructions: Refer to your specific Keurig model’s manual for detailed care recommendations.
Common mistakes (and what happens if you ignore them)
| Mistake | What it causes | Fix |
|---|---|---|
| Not descaling regularly | Reduced brew volume, slow brewing, potential machine damage, off-tasting coffee | Perform a descaling cycle using vinegar or a commercial descaler, followed by thorough rinsing. |
| Using unfiltered tap water | Accelerated mineral buildup (scale), leading to clogs and reduced flow | Switch to filtered or bottled water for brewing. |
| Forgetting to reseat the water reservoir | Machine won’t draw water, or brews inconsistently | Remove and firmly reattach the water reservoir, ensuring it clicks into place. |
| Not cleaning coffee grounds from needles | Blocked needles, leading to poor piercing and reduced water flow | Regularly inspect and clean the K-Cup holder and needles with a damp cloth or paperclip. |
| Inserting a damaged K-Cup | Grounds can clog needles or spill into the machine | Inspect K-Cups before use; discard any with torn foil lids. |
| Ignoring error messages | Machine may stop working entirely or produce poor results | Consult the Keurig manual for specific error codes and troubleshooting steps. |
| Using incorrect cleaning agents | Can damage internal components or leave harmful residue | Only use descaling solutions recommended by Keurig or a safe homemade solution (vinegar/water). Avoid harsh chemicals. |
| Not rinsing thoroughly after descaling | Vinegar or descaler taste in coffee | After descaling, run at least 2-3 full reservoirs of fresh water through the machine to flush out any residual cleaning solution. |
| Overfilling or underfilling the reservoir | Inconsistent brewing, or machine may not start | Fill the reservoir to the “Max Fill” line and ensure it’s not below the minimum operating level. |
| Not allowing the machine to heat up fully | Weak coffee, or brewing may not start | Wait for the “Ready” light or indicator before starting a brew cycle. |
Decision rules (simple if/then)
- If the brew volume is consistently low and you haven’t descaled in over 6 months, then descale the machine because mineral buildup is the most likely culprit.
- If the machine is not drawing any water, then check that the water reservoir is seated correctly and filled because a poor seal prevents water intake.
- If coffee grounds are visible around the K-Cup holder, then clean the K-Cup holder and needles because debris can obstruct water flow.
- If a water-only brew produces a full cup but a coffee brew does not, then the issue might be with the K-Cup itself or how it’s being pierced.
- If the problem started immediately after brewing a specific K-Cup, then try a different brand or type of K-Cup because that particular pod might be faulty.
- If the water flow is very weak even after descaling, then inspect the exit needle for a stubborn clog because it might require manual clearing.
- If the brew size setting seems to have changed on its own, then check your manual for how to reset brewing preferences because settings can sometimes revert.
- If the coffee tastes weak or watery, and the volume is correct, then check the grind size of the K-Cup (if using reusable pods) or the K-Cup freshness because this affects extraction.
- If the machine makes unusual noises during brewing, and the volume is low, then it could indicate a pump issue exacerbated by clogs, so descaling is a priority.
- If none of the above steps resolve the issue, and the machine is still under warranty, then contact Keurig customer support because there may be a mechanical defect.
FAQ
Q: How often should I descale my Keurig?
A: It’s recommended to descale your Keurig every 3 to 6 months. If you have very hard water, you may need to descale more frequently.
Q: Can I use vinegar to descale my Keurig?
A: Yes, a mixture of one part white vinegar to three parts water is a common and effective descaling solution. Always rinse thoroughly afterward.
Q: Why is my Keurig only brewing half a cup?
A: This is usually due to a clog in the water needle, mineral buildup restricting flow, or the water reservoir not being properly seated.
Q: What does it mean if my Keurig is blinking?
A: Blinking lights can indicate various things depending on the model, often meaning it’s heating, ready to brew, or needs descaling. Check your manual for specific light patterns.
Q: Is it safe to put my Keurig in the dishwasher?
A: Generally, no. Only specific parts like the K-Cup holder or drip tray may be dishwasher safe. The main unit should never be submerged in water.
Q: My Keurig is making a lot of noise. Is that normal?
A: Some operational noise is normal, especially during heating and pumping. However, excessive or unusual noises might indicate a clog or a pump issue.
Q: How do I ensure my K-Cup is properly pierced?
A: Make sure the K-Cup is fully seated in the holder and the lid is pulled down completely. The machine’s needles should pierce both the top and bottom of the pod.
Q: Can I use any K-Cup in my Keurig?
A: Most Keurigs are designed to work with standard K-Cup pods. Some newer models might have compatibility restrictions, so check your machine’s specifications.
What this page does NOT cover (and where to go next)
- Specific error codes for your model: If your Keurig displays a specific error code, consult your owner’s manual for a detailed explanation and troubleshooting steps.
- Advanced internal repairs: This guide focuses on user-serviceable issues. If internal components are suspected to be broken, professional repair or replacement may be necessary.
- Troubleshooting other brew types: This article is specific to single-serve brewers not making a full pot. Issues with drip coffee makers or espresso machines are not covered.
- Commercial Keurig models: While many principles are similar, commercial brewers often have different maintenance requirements and troubleshooting procedures.
- Warranty claims: If your machine is under warranty and you suspect a defect, contact the manufacturer directly for service options.