Do Coffee Grounds Help Hydrangeas Grow Bigger?
Quick answer
- Coffee grounds can be beneficial for hydrangeas, providing nitrogen and improving soil structure.
- They can also help acidify the soil, which is preferred by certain hydrangea varieties.
- However, using too many grounds can harm your plants.
- Always compost coffee grounds or use them in moderation to avoid potential issues.
- The direct impact on hydrangea size is more about overall soil health than a magical growth spurt.
- Observe your plants and soil to determine the right approach.
Who this is for
- Home gardeners looking to improve their hydrangea blooms and plant health.
- Anyone curious about using common household waste, like coffee grounds, in their garden.
- Gardeners who want to understand the specific benefits and risks of adding coffee grounds to their soil.
What to check first
Brewer type and filter type
- What to check: The type of coffee maker you use and whether it employs paper, metal, or reusable filters.
- Why it matters: Different brewing methods and filters can leave varying residues. For instance, some paper filters might retain more oils or have been bleached. While generally not a major concern for garden use, understanding your starting point can help. If you use a French press, you’ll likely have more finely ground coffee and potentially more oils.
- What “good” looks like: Clean, used coffee grounds that are primarily organic material, with no significant chemical additives from the brewing process.
Water quality and temperature
- What to check: The quality of the water you use for watering your hydrangeas and the typical temperature it reaches in your area.
- Why it matters: Hydrangeas, like all plants, are sensitive to water quality. Heavily chlorinated or mineral-rich water can negatively impact soil pH and nutrient availability. While coffee grounds can influence pH, starting with good quality water sets a better foundation. Water temperature is less of a direct factor for coffee grounds themselves, but crucial for overall plant health; avoid shocking roots with extremely cold or hot water.
- What “good” looks like: Tap water that is not excessively hard or treated with high levels of chlorine, or filtered water. Rainwater is often ideal.
Grind size and coffee freshness
- What to check: The fineness of your coffee grounds and how recently they were used.
- Why it matters: Finely ground coffee will break down and incorporate into the soil more quickly, releasing nutrients faster. Coarser grounds will decompose more slowly. Freshly used grounds are still rich in organic matter and beneficial compounds. Stale grounds, while still usable, might have lost some of their potency.
- What “good” looks like: Used coffee grounds that are still moist and have a distinct coffee aroma, indicating freshness. The grind size can vary, but a medium grind is common.
Coffee-to-water ratio
- What to check: The amount of coffee grounds you are considering adding relative to the amount of soil or water your hydrangeas receive.
- Why it matters: This is crucial for determining the concentration of nutrients and potential acidity. Too many grounds can overwhelm the soil, leading to nutrient imbalances or excessive acidity. A balanced approach is key to reaping the benefits without causing harm.
- What “good” looks like: A light scattering of grounds mixed into the soil or a small amount added to compost. For watering, a very diluted mixture, if any.
Cleanliness/descale status
- What to check: The overall cleanliness of your coffee maker and whether it has been recently descaled.
- Why it matters: While primarily for your coffee’s taste, a clean brewing system means cleaner grounds. Coffee makers can accumulate mineral deposits and old coffee oils. While these are unlikely to cause significant harm to hydrangeas in small amounts, a clean system ensures you’re adding mostly beneficial organic matter.
- What “good” looks like: A coffee maker that is regularly cleaned and descaled, producing fresh grounds free from stale residues.
Step-by-step (brew workflow)
Here’s how to incorporate coffee grounds into your hydrangea care:
1. Gather Used Coffee Grounds: Collect grounds from your daily brewing.
- What “good” looks like: Moist, dark brown grounds with a fresh coffee smell.
- Common mistake: Using grounds that have sat out for days and have become moldy or dried out.
- How to avoid: Collect grounds daily or store them in an airtight container in the refrigerator for a short period.
2. Consider Composting: Add coffee grounds to your compost bin.
- What “good” looks like: Grounds are mixed with other organic materials (greens and browns) in the compost pile.
- Common mistake: Adding only coffee grounds to the compost, creating a dense, anaerobic mass.
- How to avoid: Balance coffee grounds with “brown” materials like dry leaves, shredded paper, or cardboard.
3. Allow Grounds to Dry Slightly (Optional but Recommended): Let the grounds sit for a day or two to reduce excess moisture.
- What “good” looks like: Grounds are still moist but not dripping wet, making them easier to handle and spread.
- Common mistake: Applying very wet grounds directly, which can clump and potentially encourage mold.
- How to avoid: Spread them thinly on a tray or newspaper for a day or two.
4. Determine Application Method: Decide whether to mix into soil or use as a top dressing.
- What “good” looks like: You have a clear plan for how the grounds will be integrated into the plant’s environment.
- Common mistake: Applying grounds in a thick layer directly on the soil surface without mixing.
- How to avoid: Plan to either work them into the top few inches of soil or mix them with other mulch materials.
5. Mix into Soil (Preferred Method): Gently work a light layer of grounds into the top 2-3 inches of soil around the hydrangea.
- What “good” looks like: Grounds are dispersed evenly within the soil, not clumped together.
- Common mistake: Digging too deeply and disturbing the hydrangea’s root system.
- How to avoid: Use a trowel or hand rake and be mindful of the plant’s base.
6. Apply as a Light Top Dressing (Use Sparingly): If not mixing, scatter a very thin layer around the base of the plant, keeping it a few inches away from the stem.
- What “good” looks like: A light, almost invisible scattering of grounds.
- Common mistake: Applying a thick layer that can crust over, preventing water and air penetration.
- How to avoid: Aim for a layer no thicker than 1/8 to 1/4 inch.
7. Water Thoroughly: After applying grounds, water the plant well.
- What “good” looks like: The soil is evenly moist, and the grounds are beginning to integrate.
- Common mistake: Not watering, which can lead to the grounds drying out and potentially repelling water.
- How to avoid: Ensure the entire area is adequately watered.
8. Observe Your Hydrangeas: Monitor the plants for any signs of stress or improvement over the next few weeks.
- What “good” looks like: Healthy leaf color, good turgor, and no signs of fungal issues or wilting.
- Common mistake: Ignoring the plant’s response, assuming the grounds are automatically beneficial.
- How to avoid: Regularly check leaf color, growth, and overall plant vigor.
9. Repeat Moderately: Apply grounds sparingly, perhaps once every 1-2 months during the growing season.
- What “good” looks like: A consistent, but not excessive, application of grounds over time.
- Common mistake: Over-application, leading to nutrient imbalances or soil compaction.
- How to avoid: Stick to a light application schedule and avoid adding grounds every time you water.
Common mistakes (and what happens if you ignore them)
| Mistake | What it causes | Fix |
|---|---|---|
| Applying wet, clumpy grounds | Can lead to mold growth, suffocation of soil, and poor water penetration. | Dry grounds slightly before application; mix into soil or compost. |
| Applying a thick layer directly on top | Creates a water-repellent crust, hindering water and air from reaching roots. | Mix grounds into the top 2-3 inches of soil or apply a very thin top dressing (1/8-1/4 inch). |
| Using too many grounds at once | Can lead to nitrogen burn, nutrient imbalances, or excessive acidity, stressing the plant. | Use grounds sparingly; a light scattering or a small amount in compost is sufficient. |
| Not mixing grounds into the soil | Grounds can remain on the surface, decomposing slowly and potentially attracting pests or mold. | Always aim to incorporate grounds into the soil or compost. |
| Applying grounds too close to the stem | Can encourage stem rot or fungal issues by trapping moisture against the plant’s base. | Keep grounds a few inches away from the main stem of the hydrangea. |
| Using grounds from flavored coffees | Artificial flavors and oils can be detrimental to plant health and soil microbes. | Stick to plain, unflavored coffee grounds. |
| Not watering after application | Dry grounds can form a barrier, preventing water from reaching the roots. | Always water thoroughly after applying coffee grounds to help them break down and integrate. |
| Applying grounds to already acidic soil | Can further lower pH, potentially to a level harmful to the specific hydrangea variety. | Test your soil pH before applying grounds if you suspect it’s already very acidic. |
| Using grounds from organic coffee | While generally safe, non-organic coffee grounds might contain pesticide residues that could accumulate. | Opt for organic coffee grounds if possible, though the risk from typical consumption is generally low for garden use. |
| Applying grounds too frequently | Continuous high doses can lead to nutrient overload or an overly acidic environment. | Apply sparingly, no more than once every 1-2 months during the growing season. |
Decision rules (simple if/then)
- If your hydrangeas are wilting despite regular watering, then check if you’ve applied too many coffee grounds, as this can sometimes hinder water uptake.
- If your hydrangea leaves are turning yellow or brown and you’ve been using coffee grounds, then it might be a sign of nitrogen overload or pH imbalance.
- If you have a soil test indicating your soil is already very acidic, then use coffee grounds with extreme caution or avoid them altogether.
- If you are growing hydrangeas that prefer alkaline soil (less common), then coffee grounds are likely not a good amendment for them.
- If your compost pile is getting too dense and smelly, then adding coffee grounds can help balance the carbon-to-nitrogen ratio and improve aeration.
- If you notice mold growing on the surface of the soil where you applied grounds, then you likely applied them too thickly or they were too wet; mix them in and water well.
- If you want to encourage blue blooms on bigleaf hydrangeas, then coffee grounds can help acidify the soil, which is necessary for blue coloration, but do not overdo it.
- If you are unsure about your soil’s pH, then it’s best to get a soil test before adding any amendments, including coffee grounds.
- If you are using a very fine grind of coffee, then it will break down faster, so you’ll need to use even less to avoid overwhelming the soil.
- If you have a metal coffee filter, the grounds might contain more oils, so be extra cautious about applying them in large quantities.
- If your goal is to improve soil structure and add slow-release nitrogen, then coffee grounds are a good, eco-friendly option when used appropriately.
If your goal is to improve soil structure and add slow-release nitrogen, then coffee grounds are a good, eco-friendly option when used appropriately. For a more comprehensive soil amendment, especially if you’re unsure about your soil’s composition, a product designed to improve soil structure can be very beneficial.
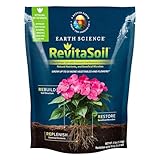
- Premium Soil Revitalizer: Rebuilds depleted soils with premium earthworm castings (worm castings), natural nutrients, and soil-friendly biology
- Boosts Plant Growth: Proven to grow up to 3X more vegetables and flowers with an exclusive patent-pending formula
- Restores Soil Health: One application helps repair structural damage and re-energizes your soil to give you bigger harvests, more flowers, and thriving plants
- Coverage & Convenience: Each 4lb bag revitalizes up to 16 sq ft of soil in gardens, landscapes, raised beds, and pots. Revitalize your existing soil instead of purchasing large, heavy bags of new potting and garden soils
- Natural & Eco-Friendly: Sustainably made and packed full of natural nutrition without any harmful chemicals or pesticides. RevitaSoil is an all-natural solution for gardeners looking to improve soil health, boost growth, and protect the environment.
FAQ
Do coffee grounds change hydrangea color?
Yes, coffee grounds can help acidify the soil, which is a key factor in determining the color of bigleaf hydrangeas. More acidic soil (lower pH) tends to produce blue flowers, while more alkaline soil (higher pH) results in pink flowers. However, soil pH is influenced by many factors, and coffee grounds are just one potential contributor.
How many coffee grounds should I use for my hydrangeas?
It’s best to use coffee grounds sparingly. A light scattering, no more than 1/4 inch thick, mixed into the top few inches of soil, or a small amount added to your compost, is generally sufficient. Avoid applying large quantities at once.
Can I put coffee grounds directly on the soil surface?
While you can, it’s not the ideal method. Placing a thick layer of wet grounds directly on the soil can create a crust that prevents water and air from reaching the roots. It’s better to mix them into the top layer of soil or add them to your compost pile.
Are coffee grounds good for all types of hydrangeas?
Coffee grounds are generally beneficial for most flowering plants, including hydrangeas, by adding organic matter and nutrients. However, their effect on soil pH is most relevant for bigleaf hydrangeas (Hydrangea macrophylla) where gardeners often aim for specific colors. Other hydrangea types may be less sensitive to pH changes.
How often can I use coffee grounds on my hydrangeas?
It’s advisable to use coffee grounds in moderation. Applying them once every 1-2 months during the active growing season is typically sufficient. Over-application can lead to nutrient imbalances or overly acidic soil conditions.
What if my coffee grounds have mold?
If your coffee grounds have developed mold, it’s best to discard them and not use them in your garden. Mold can indicate that the grounds have decomposed too much or are not stored properly, and introducing mold to your soil can harm your plants.
Can I use coffee grounds as a fertilizer for hydrangeas?
Coffee grounds do contain nitrogen and other trace minerals, so they can act as a mild, slow-release fertilizer. However, they are not a complete fertilizer and should be used as a soil amendment to improve overall soil health rather than as a primary nutrient source.
While coffee grounds can act as a mild, slow-release fertilizer due to their nitrogen content, for a more complete nutrient profile, consider using a dedicated organic fertilizer.

- Contains ALL Primary Nutrients: N-P-K
- Contains ALL Secondary Nutrients: Ca-Mg-S
- For ALL Plants; Fruits, Veggies, Roses, Potted, & More!
- Makes 20+ Gallons / Contains Azomite
- Versatile: Apply To Soil, Foliar Feed, and/ or Compost Tea
Will coffee grounds kill my hydrangeas?
Coffee grounds are unlikely to kill hydrangeas if used correctly. The main risks come from over-application, which can lead to nutrient imbalances, overly acidic soil, or poor soil aeration, stressing the plant.
What this page does NOT cover (and where to go next)
- Specific NPK ratios of coffee grounds and their precise impact on different hydrangea varieties.
- Next steps: Research general soil amendment guides for hydrangeas and consult local extension offices for specific nutrient recommendations.
- Detailed chemical analysis of coffee grounds and their interaction with specific soil minerals.
- Next steps: Explore resources on soil science and plant nutrition for a deeper understanding of soil chemistry.
- The impact of different coffee roasting levels on soil amendment properties.
- Next steps: Look for gardening forums or horticultural publications that discuss specific plant amendments and their effects.
- Using coffee grounds for pest control beyond their general soil-enriching properties.
- Next steps: Research organic pest control methods for gardens.