DIY Flannel Coffee Koozie Tutorial
Quick answer
- Yes, flannel is an excellent material for DIY coffee koozies due to its absorbency and insulation properties.
- Flannel’s soft texture and ability to wick moisture make it ideal for keeping your hands comfortable and your drink’s temperature stable.
- A simple flannel koozie can be made with basic sewing skills, a sewing machine, and a few essential supplies.
- Consider pre-washing your flannel to account for shrinkage before cutting and sewing.
- You can customize your flannel koozie with decorative stitching, patches, or by layering different flannel patterns.
- Ensure your koozie fits snugly around your mug or travel cup for maximum effectiveness.
Who this is for
- Crafty individuals looking for a practical and cozy DIY project.
- Coffee drinkers who want to keep their hands warm and their beverages at the right temperature.
- Anyone interested in creating personalized gifts for fellow coffee lovers.
What to check first
- Brewer type and filter type: While this article focuses on making a koozie, understanding your typical brewing method can inform the size and shape of your koozie. For instance, if you primarily use a French press, your koozie might need to accommodate a wider mug. If you use an Aeropress, you might be looking for a koozie for a travel tumbler.
- Water quality and temperature: For brewing, good water is key. For your koozie, consider how well flannel handles condensation from a cold drink or heat from a hot one. Flannel’s natural fibers are good at absorbing moisture, which is a plus for both hot and cold beverages.
- Grind size and coffee freshness: These are brewing specifics. For your koozie, the “freshness” of your materials matters. Ensure your flannel is clean and free of any residues that could transfer to your hands or drinkware.
- Coffee-to-water ratio: Again, a brewing concern. For the koozie, think about the “fabric-to-filling” ratio. If you’re adding an insulating layer like batting, the thickness of that layer will impact performance.
- Cleanliness/descale status: For brewing, this is crucial for taste. For your koozie, ensure your sewing machine is clean and the needle is sharp to avoid snags or uneven stitches. Pre-washing your fabric is also a form of “cleaning” to prepare it for its final form.
Step-by-step (brew workflow)
This section details how to construct a basic flannel coffee koozie.
1. Gather your materials: You’ll need flannel fabric (two contrasting or coordinating pieces are nice), an insulating layer (like fusible fleece or batting, optional but recommended), matching thread, scissors, pins, a sewing machine, and a mug or travel cup to use as a template.
- What “good” looks like: All materials are clean, ironed, and ready for cutting.
- Common mistake: Forgetting the insulating layer if you want extra warmth or cold retention.
- How to avoid it: Double-check your supply list before you start cutting.
You’ll need matching sewing thread to bring your koozie together. Opt for a good quality polyester thread for durability.

- [Sewing Thread Assortment]: Includes 36 different colors of sewing thread, offering a comprehensive palette for a wide range of sewing projects, from delicate embroidery to bold quilting designs.
- [Matching Bobbins]: Each spool of thread comes with a matching color bobbin, ensuring seamless transitions and professional finishes without the hassle of winding your own bobbins.
- [High-Quality]: Made from durable polyester, these threads are strong, resistant to fading, and less prone to breaking, making them ideal for both hand sewing and machine use.
- [Widely Applied]: Suitable for various applications, including sewing, embroidery, quilting, and crafting, making it a perfect addition to any sewing enthusiast’s toolkit.
- [Ideal Gift]: Comes in a neatly arranged carton box, keeping your threads and bobbins easily accessible and well-organized. It's a surprise for your family or friends who loves sewing or hand sewing.
2. Measure your vessel: Place your mug or travel cup on a flat surface. Measure its height and circumference. Add about 1/2 inch to the circumference for seam allowance and ease, and about 1/2 inch to the height for top and bottom hems.
- What “good” looks like: Accurate measurements that account for the vessel’s shape and a little extra room for sewing.
- Common mistake: Measuring too tightly, making the koozie difficult to put on or take off.
- How to avoid it: Wrap a flexible measuring tape around the widest part of your cup, or use a piece of string and then measure the string.
3. Cut your fabric: Using your measurements, cut two pieces of flannel fabric for the outer and inner layers of your koozie. If using an insulating layer, cut one piece of that material to the same dimensions as your flannel pieces.
- What “good” looks like: Clean, straight cuts that match your measurements precisely.
- Common mistake: Cutting the fabric unevenly, leading to a lopsided koozie.
- How to avoid it: Use a rotary cutter and mat for the most precise cuts, or a sharp pair of fabric scissors.
4. Prepare the insulating layer (if using): If you’re using fusible fleece, follow the manufacturer’s instructions to iron it onto the wrong side of one of your flannel pieces. If using batting, you can either baste it to the wrong side of one flannel piece or treat it as a separate layer to be sewn with the flannel.
- What “good” looks like: The insulating material is securely attached to the flannel without wrinkles or shifting.
- Common mistake: Not allowing the fusible fleece to cool completely before handling, causing it to stick to itself.
- How to avoid it: Be patient and let the fabric cool down before proceeding to the next step.
5. Pin the layers together: Place your two flannel pieces right sides together. If you have an insulating layer, place it on the outside of one of the flannel pieces. Pin all around the edges, leaving a 2-3 inch opening along one of the long sides for turning.
- What “good” looks like: All layers are aligned evenly, and pins are placed perpendicular to the edge to make sewing easier.
- Common mistake: Not leaving an opening for turning, requiring you to unpick stitches.
- How to avoid it: Mark your opening clearly with a pin or chalk.
6. Sew the koozie: Using your sewing machine, stitch around the pinned edges with a 1/4 inch seam allowance. Remember to backstitch at the beginning and end of your seam, and at the opening.
- What “good” looks like: A continuous stitch line with no gaps, and a secure seam that won’t unravel.
- Common mistake: Forgetting to backstitch, leading to seams that pull apart.
- How to avoid it: Always backstitch at the start and end of your seams.
Using your sewing machine, stitch around the pinned edges with a 1/4 inch seam allowance. Ensure your machine is in good working order for smooth stitches.
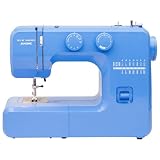
- Overview Features: 15 Built-In Stitches, 4-Step Buttonhole, Front-Loading Bobbin System, Heavy Duty Interior Metal Frame
- Customizable Features: Adjustable Stitch Length & ZigZag Width, Reverse Lever, Darning Plate
- Convenience Features: 3-Piece Feed Dog System, Removable Free Arm, Dual Retractable Spool Pins
- Easy to Use: Tutorial Videos, Built-In Bobbin Diagram, Quick Start Guide Included
- Included: Zig-Zag Foot (set on machine) Zipper Foot, Blind Hem Foot, Buttonhole Foot, Darning Plate, Bobbins, Needle set, Foot Control, Instruction Manual
7. Clip the corners: Trim the excess fabric from the corners of your sewn koozie. Be careful not to cut into the stitching.
- What “good” looks like: Cleanly trimmed corners that will create sharp, defined edges when turned.
- Common mistake: Cutting too close to the seam, weakening the corner.
- How to avoid it: Use small, sharp scissors and snip at an angle.
8. Turn the koozie: Reach through the opening you left and carefully pull the koozie right side out. Use a dull point (like a chopstick or a pencil eraser) to gently push out the corners.
- What “good” looks like: The koozie is fully turned, with crisp corners and no inside-out fabric.
- Common mistake: Rushing the turning process, which can stretch the fabric or leave seams inside out.
- How to avoid it: Be patient and work slowly, gently coaxing the fabric through the opening.
9. Close the opening: Fold the raw edges of the opening inward so they are flush with the sewn seam. Press the opening flat with an iron. Topstitch close to the folded edge to close the opening securely.
- What “good” looks like: The opening is seamlessly closed, and the topstitching is neat and consistent.
- Common mistake: Leaving the opening unstitched or with messy stitches.
- How to avoid it: Pressing the opening well before topstitching makes it much easier to sew neatly.
10. Topstitch the top and bottom edges (optional but recommended): For a professional finish and to help the koozie hold its shape, you can topstitch around the top and bottom edges of the koozie. This also adds a decorative element.
- What “good” looks like: Even, straight stitching along the top and bottom edges.
- Common mistake: Uneven topstitching that detracts from the koozie’s appearance.
- How to avoid it: Go slowly and guide the fabric carefully under the presser foot.
Common mistakes (and what happens if you ignore them)
| Mistake | What it causes | Fix |
|---|---|---|
| Not pre-washing flannel | Koozie may shrink unevenly after washing, distorting its shape. | Pre-wash and dry your flannel fabric before cutting to account for shrinkage. |
| Incorrectly measuring the vessel | Koozie will be too tight, too loose, or won’t fit at all. | Use a flexible measuring tape or string for accurate circumference and height measurements. Add seam allowance and ease. |
| Using dull scissors or a dull sewing needle | Fabric can snag, tear, or create uneven stitches, leading to a poor finish. | Ensure you are using sharp fabric scissors and a fresh, sharp sewing machine needle appropriate for your fabric type. |
| Forgetting to leave an opening for turning | You’ll have to unpick stitches to turn the koozie right side out. | Mark your opening clearly before sewing and double-check it before you begin stitching. |
| Not backstitching at the beginning/end of seams | Seams can unravel easily with use, especially at stress points. | Always backstitch for 2-3 stitches at the start and end of every seam to secure the stitching. |
| Cutting corners too close to the stitching | Corners may fray or tear, weakening the koozie’s structure. | Clip corners at an angle, leaving a small margin of fabric to protect the seam. |
| Not pushing out the corners completely | Koozie will have rounded, unprofessional-looking corners. | Use a dull point like a chopstick or the eraser end of a pencil to gently push out corners from the inside. |
| Leaving the turning opening unstitched | The opening will remain visible, making the koozie look unfinished. | Fold the raw edges inward and topstitch close to the edge to neatly close the opening. |
| Using an inappropriate thread | Thread may break easily or not match the fabric, affecting durability/look. | Use good quality all-purpose polyester thread that matches or complements your fabric. |
| Not ironing the fabric before cutting | Fabric can be uneven, leading to inaccurate cuts and a skewed final product. | Press your flannel fabric smooth before measuring and cutting to ensure precise dimensions. |
Decision rules (simple if/then)
- If you want a warmer koozie, then add a layer of fusible fleece or batting because it will increase insulation.
- If you are using a travel tumbler with a lid, then make sure your koozie height accommodates the entire body of the tumbler, not just the drinking portion, because the koozie is meant to cover the part you hold.
- If your flannel has a distinct right and wrong side (e.g., a pattern or nap), then pay close attention to placing the right sides together when sewing because this ensures the exterior of your koozie looks as intended.
- If you are new to sewing, then consider using a slightly larger seam allowance (e.g., 3/8 inch instead of 1/4 inch) because it provides more room for error and is more forgiving.
- If you want a koozie that is easier to slide on and off a cup, then make the circumference measurement about 1/4 to 1/2 inch larger than the cup’s widest point because this provides a little extra ease.
- If your flannel is very thin, then consider using a slightly thicker flannel or reinforcing the seams because thin fabric might not offer enough durability or insulation.
- If you are sewing a koozie for a mug with a handle, then measure the circumference around the mug without the handle and ensure your koozie is designed to be slipped on and off easily, rather than sewn around the handle itself.
- If you want to add decorative stitching, then do it before you sew the koozie pieces together because it’s easier to manage the fabric when it’s flat.
- If you notice your sewing machine skipping stitches, then check your needle and thread because this is often a sign that either the needle is dull or the thread is not compatible.
- If you are making a koozie for a very cold drink, then consider using a denser insulating material like a thicker batting or a specialized thermal lining because standard flannel alone might not prevent significant condensation.
- If you want a koozie that feels softer against your hand, then use a flannel with a brushed or napped finish for the interior layer because this provides a more comfortable tactile experience.
FAQ
Can I use any type of flannel for a coffee koozie?
Generally, yes. Cotton flannel is popular due to its softness, absorbency, and insulation. Thicker flannels will offer more warmth and better condensation control.
How do I make sure the koozie fits my specific mug?
Measure the circumference of your mug at its widest point and its height. Add about 1/2 inch to the circumference for seam allowance and ease, and about 1/2 inch to the height for hems. Cut your fabric pieces to these adjusted dimensions.
Should I add an insulating layer?
It’s highly recommended, especially if you want your koozie to keep drinks hot or cold for longer, or to prevent your hands from getting too hot or cold. Fusible fleece or batting are good options.
What if my koozie is too tight after sewing?
This usually means the initial circumference measurement was too exact or didn’t account for seam allowance. For future projects, add a bit more ease to your measurements. For the current koozie, you might be able to carefully unpick a seam or two and add a small strip of fabric to widen it.
How do I wash my flannel koozie?
Most flannel koozies can be machine washed on a gentle cycle with cold water and tumble dried on low heat. However, always check any specific fabric care instructions if you used special materials.
Can I make a koozie without a sewing machine?
Yes, you can hand-stitch a flannel koozie. It will take longer, but using a strong, even stitch like a backstitch will result in a durable and attractive koozie.
My koozie looks a bit lopsided. What went wrong?
This often happens if the fabric wasn’t cut precisely or if the layers shifted during sewing. Ensure your fabric is smooth and flat before cutting, and use plenty of pins to keep layers aligned while sewing.
What’s the best way to get neat corners?
After sewing, clip the corners diagonally without cutting the stitching. Then, when turning the koozie right side out, use a dull pointed object (like a chopstick) to gently push the corners out from the inside.
What this page does NOT cover (and where to go next)
- Detailed instructions on specific sewing machine maintenance or troubleshooting. (For this, consult your sewing machine manual or a local sewing repair shop.)
- Advanced koozie design techniques, such as adding zippers, embroidery, or complex appliqué. (Explore craft blogs and sewing pattern websites for inspiration.)
- The science of heat transfer and insulation materials in depth. (Look for resources on textile science or thermal engineering for a deeper understanding.)