DIY Guide: Building An Industrial Style Coffee Table
Quick answer
- Plan your design carefully, considering dimensions, materials, and stability.
- Choose durable materials like steel, reclaimed wood, or piping for an authentic industrial look.
- Measure twice, cut once – precision is key for a professional finish.
- Secure all joints and connections properly for a sturdy and safe table.
- Apply appropriate finishes to protect materials and enhance aesthetics.
- Gather all necessary tools and safety gear before starting your how to make an industrial coffee table project.
- Don’t rush the process; enjoy the craft of building your custom piece.
Who this is for
- DIY enthusiasts looking for a rewarding woodworking and metalworking project.
- Homeowners wanting to add a unique, custom-built industrial furniture piece to their living space.
- Individuals interested in learning basic construction techniques with various materials.
What to check first
Before you start to make an industrial coffee table, careful planning is essential.
Brewer type and filter type
Consider the overall style you’re aiming for. Will your industrial coffee table feature a heavy metal frame with a thick wood top, or a lighter, more open design with pipe legs? The type of materials you choose will dictate the tools and techniques required. For example, working with steel will require different tools than working with aluminum or wood. Think about the filter type too – will you incorporate mesh, perforated metal, or a solid top?
Consider using metal pipe furniture components for a truly authentic industrial look. These pipes and fittings are readily available and can be easily assembled into sturdy legs and frames.
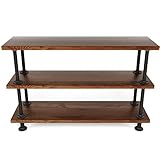
- 【Industrial & Vintage Shoe Rack】When your visitors enter your entrance, they will be impressed by this eye-catching shoe rack, made of classic brown wood board and a sturdy metal frame, this shoe storage organizer surely is your showcase of unique taste.
- 【Shoe Storage Organizer with Great Storage】Do you have too many shoes at home, but not enough space to store them? Then this shoe rack can completely solve your troubles. The top table of industrial shoe shelf can be put some things you carry with you when you go out, such as keys, coin purses and so on.
- 【Simple Assembly Shoe Shelf】This Shoe Rack is complete with 8 pcs 12 inch iron pipes, 4 pcs 4 inch iron pipes, 24 flanges, Wood planks are NOT included.You are not good at installation? It doesn't matter. As easy as screwing in a light bulb – If you can turn a screw, you can bring the vintage beauty of industrial decor to your home or office.
- 【DESIGNED TO LAST】 - Our side table legs are made from strong metal components to ensure maximum durability. They're also coated with industrial grease, making them tough against rust build up. You can also paint it to match your color scheme.
- 【Multi-Functional Storage Shelf】 It is not only suitable for shoe rack, you may also use it as display rack, plant rack, flower rack, sundries rack. Suitable for entry, hallway, living room, bedroom, kitchen or balcony.
Water quality and temperature
The “water quality” in this context refers to the condition and suitability of your materials. Are your wood pieces free from significant warping or damage? Is your metal stock straight and true? Using high-quality, defect-free materials will lead to a better finished product and reduce frustration during construction. The “temperature” relates to your working environment – ensure you have adequate space, lighting, and ventilation, especially when cutting, grinding, or applying finishes.
Grind size and coffee freshness
“Grind size” here refers to the precision of your cuts and measurements. Accurate cuts are crucial for joints to fit snugly and for the table to be stable and level. “Coffee freshness” translates to the condition of your tools. Are your saw blades sharp? Are your drills bits in good condition? Dull tools can lead to inaccurate cuts, splintered wood, and increased effort, compromising the quality of your industrial coffee table.
Coffee-to-water ratio
This is your material-to-design ratio. Have you calculated the amount of wood, metal, and fasteners you’ll need? It’s often wise to buy a little extra material to account for mistakes or design adjustments. Overestimating slightly is better than running short in the middle of your project.
Cleanliness/descale status
Maintain a clean and organized workspace. Sawdust, metal shavings, and clutter can be safety hazards and make it difficult to find tools or work efficiently. Regularly cleaning your tools and work area will ensure a smoother and safer building experience for your industrial coffee table.
Step-by-step (brew workflow)
Here’s how to make an industrial coffee table, step by step:
1. Plan your design and gather inspiration.
- What to do: Sketch out your ideas, considering dimensions (length, width, height), material choices (wood, metal, pipe), and overall aesthetic. Look at existing industrial coffee tables for inspiration.
- What “good” looks like: A clear, detailed drawing with all major dimensions noted, and a list of required materials.
- Common mistake and how to avoid it: Starting without a clear plan leads to wasted materials and frustration. Avoid this by spending ample time on design and measurement before cutting anything.
2. Source your materials.
- What to do: Purchase or reclaim wood (e.g., barn wood, scaffolding planks), metal (steel tubing, angle iron, flat bar), and any necessary hardware (screws, bolts, casters).
- What “good” looks like: Materials that match your design, are in good condition, and are suitable for the structural requirements of a coffee table.
- Common mistake and how to avoid it: Using unsuitable or damaged materials compromises the table’s strength and appearance. Inspect all materials carefully before purchase.
3. Cut metal components to size.
- What to do: Using a metal-cutting saw, angle grinder with a cutting disc, or hacksaw, cut all metal pieces (legs, frame supports) according to your plan. Wear appropriate safety gear.
- What “good” looks like: Clean, straight cuts with accurate lengths.
- Common mistake and how to avoid it: Inaccurate cuts lead to a wobbly or uneven table. Double-check all measurements before cutting and use a square to ensure straight cuts.
4. Prepare metal for assembly.
- What to do: Deburr any sharp edges on your cut metal pieces using a file or grinder. If welding, bevel edges as needed. Clean off any oil or rust.
- What “good” looks like: Smooth, safe edges and clean surfaces ready for joining or finishing.
- Common mistake and how to avoid it: Leaving sharp edges is a safety hazard. Neglecting cleaning can affect weld quality or paint adhesion.
5. Assemble the metal frame.
- What to do: Join the metal components. This could involve welding, bolting, or using pipe fittings. Ensure the frame is square and stable.
- What “good” looks like: A rigid, level, and square metal frame that forms the base of your industrial coffee table.
- Common mistake and how to avoid it: An out-of-square frame will result in a wobbly table. Use clamps and a carpenter’s square to hold pieces in place and check for squareness during assembly.
6. Cut and prepare wood components.
- What to do: Cut your wood planks to the desired length and width for the tabletop. Sand all surfaces smooth, starting with a coarser grit and progressing to finer grits.
- What “good” looks like: Evenly sized wood pieces with smooth, splinter-free surfaces, ready for finishing.
- Common mistake and how to avoid it: Uneven cuts or rough sanding will detract from the table’s appearance. Take your time with measuring and sanding.
7. Finish metal and wood components.
- What to do: Apply protective finishes. For metal, this might be primer and paint (e.g., matte black), clear coat, or a wax finish. For wood, apply stain, sealant, or polyurethane.
- What “good” looks like: Even, durable finishes that protect the materials and enhance their industrial aesthetic.
- Common mistake and how to avoid it: Rushing the finishing process can lead to drips, uneven coats, or inadequate protection. Follow product instructions for drying times and application techniques.
8. Attach the tabletop to the frame.
- What to do: Carefully position the finished wood tabletop onto the metal frame. Secure it from underneath using screws, bolts, or wood cleats, allowing for wood expansion/contraction if possible.
- What “good” looks like: A securely attached tabletop that is centered and flush with the frame.
- Common mistake and how to avoid it: Using screws that are too long can pierce through the top. Not accounting for wood movement can lead to cracking. Use appropriate fasteners and consider slotted holes for wood expansion.
9. Add any final touches or accessories.
- What to do: Install casters if desired, add corner protectors, or any other decorative elements to complete your industrial coffee table.
- What “good” looks like: All accessories are securely installed and complement the table’s design.
- Common mistake and how to avoid it: Forgetting small details can leave the table feeling unfinished. Review your initial design plan to ensure everything is included.
Common mistakes (and what happens if you ignore them)
| Mistake | What it causes | Fix |
|---|---|---|
| Not planning dimensions carefully | Table is too big/small for the space, or too tall/short for typical seating. | Measure your living space and existing furniture. Use painter’s tape on the floor to visualize the size. |
| Using soft or thin wood for the top | Dents, scratches, and warping over time, especially with heavy use. | Choose hardwoods (oak, maple, walnut) or robust reclaimed wood. Ensure thickness is at least 1 inch. |
| Skipping proper metal preparation (deburring, cleaning) | Sharp edges cause injuries; paint/finish peels or doesn’t adhere well. | Always deburr cut edges with a file or grinder. Clean metal thoroughly with degreaser before priming/painting. |
| Not squaring the metal frame during assembly | A wobbly, uneven table that rocks when touched. | Use a carpenter’s square and clamps during welding/bolting. Check diagonals to ensure perfect squareness. |
| Using inadequate fasteners for wood to metal | Tabletop detaches, screws strip out, or wood cracks. | Use appropriate wood screws with pilot holes, or machine screws with threaded inserts for metal. Allow for wood movement where possible. |
| Not finishing materials properly | Rust on metal, water damage/stains on wood, dull appearance. | Apply primer and multiple coats of paint/clear coat to metal. Stain and seal wood with durable finishes (polyurethane, wax). |
| Rushing the drying time for finishes | Sticky surfaces, uneven coats, reduced durability. | Follow manufacturer’s instructions for drying and curing times for all paints, stains, and sealants. |
| Ignoring safety precautions (PPE) | Cuts, burns, eye injuries, respiratory issues from dust/fumes. | Always wear safety glasses, gloves, hearing protection, and a respirator when cutting, grinding, or painting. |
Decision rules (simple if/then)
- If you want a very sturdy and permanent frame, then consider welding steel because it creates strong, monolithic joints.
- If you prefer a modular or adjustable design, then use threaded pipes and fittings because they allow for easy assembly and disassembly.
- If your wood top will be exposed to moisture (e.g., for drinks), then apply a durable, water-resistant sealant because it prevents staining and damage.
- If you’re working with reclaimed wood, then inspect it thoroughly for nails or staples before cutting because they can damage saw blades.
- If your metal frame is prone to rust, then apply a rust-inhibiting primer before painting because it provides a protective barrier.
- If the table feels wobbly after assembly, then check all joints and fasteners for tightness and ensure the frame is square because these are common causes of instability.
- If you want to move the table easily, then install heavy-duty locking casters because they provide mobility and stability when locked.
- If you desire a darker, aged look for wood, then use a wood stain followed by a clear coat because it deepens the color and protects the surface.
- If you’re drilling into metal, then use a center punch first because it prevents the drill bit from wandering.
- If you want to hide screw heads on the tabletop, then use counter-sunk screws and fill the holes with wood putty or plugs because it creates a smooth surface.
FAQ
Q: What type of wood is best for an industrial coffee table top?
A: Hardwoods like oak, maple, walnut, or even reclaimed barn wood are excellent choices. They are durable, have attractive grain patterns, and can withstand daily use. Softwoods like pine can work, but they are more prone to dents and scratches.
Q: Do I need special tools to make an industrial coffee table?
A: It depends on your design. For metal, you might need an angle grinder, metal-cutting saw, or welder. For wood, a circular saw, miter saw, sander, and drill are common. Many basic hand tools like wrenches, squares, and clamps will also be essential.
Q: How do I prevent my metal frame from rusting?
A: To prevent rust, clean the metal thoroughly to remove any oils or residues, then apply a rust-inhibiting primer. After priming, finish with a durable paint designed for metal, or a clear coat if you want the raw metal look. Regular waxing can also add a layer of protection.
Q: Can I use plumbing pipes for the legs of my industrial coffee table?
A: Yes, black iron or galvanized steel plumbing pipes are a popular choice for industrial-style furniture. They are sturdy and provide an authentic aesthetic. Just ensure you use the correct fittings and sizes to create a stable structure.
Q: How do I make sure my table is level and doesn’t wobble?
A: Precision in cutting and assembly is key. Use a carpenter’s square frequently during frame assembly to ensure all corners are 90 degrees. Check the table for wobbles on a flat surface before attaching the top. Adjustable feet or shims can help fine-tune leveling if needed.
Q: What kind of finish should I use for the wood top?
A: For durability and protection, polyurethane (oil-based or water-based) is a common choice. Other options include tung oil, Danish oil, or wax finishes, which offer different levels of protection and aesthetics. Consider how much wear and tear the table will endure.
What this page does NOT cover (and where to go next)
- Advanced welding techniques and safety protocols
- Specific brand recommendations for tools or materials
- Detailed instructions for specific joint types (e.g., mortise and tenon)
- Upholstery or complex woodworking joinery
- Electrical wiring for integrated features (e.g., charging ports)
- Commercial-scale furniture production methods