Create Your Own Vanilla Powder For Coffee
Quick answer
- Use real vanilla beans, not extract.
- Dry the beans thoroughly before grinding.
- A coffee grinder works, but dedicate it to spices.
- Store in an airtight container, away from light.
- Start with a small batch to get the hang of it.
- Use it sparingly; it’s potent stuff.
Who this is for
- Coffee lovers who want to elevate their daily brew.
- DIY enthusiasts who enjoy making their own ingredients.
- Anyone looking for a natural, intense vanilla flavor without artificial additives.
What to check first
Vanilla Bean Quality
This is the big one. You need actual vanilla beans. Forget the imitation stuff. We’re talking real deal. Madagascan Bourbon beans are a classic choice, but Tahitian or Mexican beans offer different flavor profiles. The beans should be pliable and have a rich, sweet aroma. Dry, brittle beans won’t yield much flavor.
Drying Process
Getting moisture out is key. You can air-dry them, but it takes time. A low oven or a food dehydrator is faster. The goal is to get them brittle enough to grind into a fine powder. If they’re still a bit soft, your powder will clump.
Grinding Equipment
A dedicated spice grinder is ideal. If you use your coffee grinder, well, good luck getting that vanilla scent out of your coffee later. Trust me on this. A high-powered blender might work for small batches, but you might not get a super fine powder.
A dedicated spice grinder is ideal for this process. If you don’t have one, a good quality spice grinder is a worthwhile investment for making your own vanilla powder.
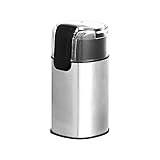
- Electric coffee bean grinder appliance for home use
- Can grind 30 grams/1 ounce of beans for drip coffee brewing in 10 seconds
- Grind coffee beans, herbs, spices, grains, nuts, and more
- Clear safety lid allows you to easily see the results in progress
- Heavy-duty stainless steel grind blade
Storage
Once you’ve got your powder, it needs protection. An airtight glass jar is best. Keep it in a cool, dark place. Humidity and light are enemies of vanilla powder. It can lose its potency fast if not stored right.
Cleanliness
This seems obvious, but make sure everything is bone dry and clean. Any residual moisture or old coffee grounds will mess with your vanilla powder’s flavor and shelf life.
Step-by-step (brew workflow)
Here’s how to get that sweet vanilla magic going:
1. Select Your Beans: Grab 2-3 good quality vanilla beans. Look for plump, dark, and fragrant ones. This is the foundation of your flavor.
- Good looks like: Beans that feel slightly oily and smell like a sweet, woody perfume.
- Common mistake: Using old, dry beans. They won’t have enough flavor. Avoid them.
2. Split the Beans: Using a sharp knife, carefully slice each bean lengthwise down the middle. This exposes the tiny seeds (vanilla caviar) inside.
- Good looks like: A clean split revealing the caviar.
- Common mistake: Cutting too deep and losing seeds. Be gentle.
3. Scrape the Caviar: Use the back of your knife to scrape out the caviar from both halves of each bean. This is where the concentrated flavor lives.
- Good looks like: A gooey, fragrant paste of tiny black seeds.
- Common mistake: Not scraping thoroughly. You want every last bit of that flavor.
4. Dry the Bean Pods: Lay the scraped-out bean pods flat on a clean surface. You can air dry them for a few days, or speed things up.
- Good looks like: Pods that are starting to stiffen.
- Common mistake: Trying to grind them while they’re still soft. They’ll just gum up your grinder.
5. Dehydrate (Optional but Recommended): Place the pods in a food dehydrator on a low setting (around 130-140°F) for several hours, or in a very low oven (lowest setting, door ajar) for a similar time. They need to be completely brittle.
- Good looks like: Pods that snap easily when bent.
- Common mistake: Using too high a temperature. You don’t want to cook them, just dry them.
6. Grind the Pods: Once brittle, break the pods into smaller pieces. Put them in your dedicated spice grinder. Grind until you have a fine powder. You might need to do this in batches.
- Good looks like: A fine, dark brown powder. It should smell intensely of vanilla.
- Common mistake: Grinding too long and overheating the beans, which can dull the flavor. Pulse it.
7. Combine with Caviar: Add the scraped vanilla caviar to the ground pod powder in the grinder. Give it a few more pulses to fully incorporate.
- Good looks like: A uniform, dark powder with flecks of caviar.
- Common mistake: Not mixing it well. You want the flavor distributed evenly.
8. Sift (Optional): For an ultra-fine powder, you can sift it through a fine-mesh sieve. This removes any larger bits.
- Good looks like: A super smooth, consistent powder.
- Common mistake: Skipping this step if you’re aiming for a truly gourmet finish.
9. Store Properly: Transfer your homemade vanilla powder to a small, airtight glass jar. Seal it tightly.
- Good looks like: A sealed jar with no air gaps.
- Common mistake: Leaving it in a plastic bag or a container that doesn’t seal well. Moisture gets in.
10. Label and Date: Clearly label the jar “Vanilla Powder” and add the date you made it. This helps you track its freshness.
- Good looks like: A clear label with all necessary info.
- Common mistake: Forgetting what’s in the jar, especially if you make other homemade spice powders.
Common mistakes (and what happens if you ignore them)
| Mistake | What it causes | Fix |
|---|---|---|
| Using imitation vanilla extract | No actual vanilla flavor, just artificial notes. | Start with real vanilla beans. |
| Not drying the beans enough | Clumpy powder, reduced shelf life, potential mold. | Ensure beans are brittle before grinding. Use a dehydrator or low oven. |
| Using a contaminated grinder | Vanilla powder tastes like coffee or other spices. | Dedicate a grinder solely for spices or thoroughly clean and dry your coffee grinder. |
| Grinding too long or too hot | Burnt or dull vanilla flavor. | Use short pulses in the grinder. Let it cool if it gets warm. |
| Exposing powder to moisture | Clumping, loss of flavor, potential spoilage. | Store in an airtight glass jar. Keep away from steam and humidity. |
| Storing in direct sunlight or heat | Vanilla flavor degrades quickly, losing potency. | Store in a cool, dark cupboard or pantry. |
| Using too much powder in coffee | Overpowering, artificial-tasting vanilla. | Start with a tiny pinch (1/16th tsp) and adjust to taste. It’s potent! |
| Not scraping out all the caviar | Less intense vanilla flavor. | Be thorough when scraping the seeds from the bean pods. |
| Not sifting for a finer powder | Gritty texture in your coffee or baked goods. | Sift through a fine-mesh sieve for a smoother finish. |
| Forgetting to label the jar | Confusion with other powders, using old or spoiled product. | Always label your homemade creations with the contents and date. |
| Not letting the powder fully cool after grinding | Moisture can re-form, leading to clumping. | Let the powder sit for a few minutes after grinding before storing. |
Decision rules (simple if/then)
- If your vanilla beans feel soft and bendy, then you need to dry them further before grinding because they won’t break down into a powder.
- If your grinder smells like coffee, then you should probably get a new one for spices because the coffee flavor will taint your vanilla.
- If your powder clumps together in the jar, then it’s likely due to moisture, so ensure your storage container is airtight and keep it away from humidity.
- If you want a super smooth powder, then sift it through a fine-mesh sieve because this removes any larger particles.
- If you’re unsure about the dryness of the beans, then try snapping one; if it breaks cleanly, it’s ready.
- If you’re making a large batch, then grind in smaller portions to avoid overheating your grinder and dulling the vanilla’s flavor.
- If you notice your vanilla powder losing its aroma, then it’s time to replace it because the volatile compounds have dissipated.
- If you’re sensitive to strong flavors, then start with just a tiny pinch (less than 1/16th of a teaspoon) in your coffee because homemade vanilla powder is highly concentrated.
- If you want to experiment with different vanilla notes, then try using Mexican or Tahitian beans instead of the standard Madagascan Bourbon.
- If you accidentally use too much powder, then add a little more plain coffee or milk to dilute the flavor.
- If you’re storing for longer than a few months, then consider vacuum sealing small portions to preserve freshness.
FAQ
How long does homemade vanilla powder last?
Properly stored in an airtight container away from light and moisture, it can last for 1-2 years. However, its potency will gradually decrease over time.
Can I use vanilla extract instead of beans?
No, you cannot make powder from vanilla extract. Extract is liquid and contains alcohol and water, which are not suitable for creating a dry powder. You must start with whole vanilla beans.
What’s the best way to grind the beans?
A dedicated spice grinder is best for a fine, consistent powder. If using a coffee grinder, ensure it’s thoroughly cleaned and ideally used only for spices afterward.
How much powder should I use in my coffee?
Start very small, like a tiny pinch (less than 1/16th of a teaspoon). It’s incredibly potent. You can always add more, but you can’t take it out.
Why is my powder clumpy?
This is almost always due to residual moisture. Ensure the beans are completely brittle before grinding and store the powder in a truly airtight container.
Can I use the scraped-out bean pods without the seeds?
Yes, you can grind the dried pods alone for a milder vanilla flavor. However, the caviar contains the most concentrated flavor, so combining them yields the best result.
What’s the difference between vanilla powder and vanilla sugar?
Vanilla powder is pure ground vanilla bean. Vanilla sugar is made by steeping vanilla beans or powder with sugar, infusing the sugar with flavor. They serve different purposes.
Is it cheaper to make my own vanilla powder?
The upfront cost of good vanilla beans can be high, but if you use them regularly, making your own powder can be more cost-effective than buying pre-made gourmet vanilla powder.
What this page does NOT cover (and where to go next)
- Commercial Production: This guide is for home use. Scaling up requires different equipment and considerations.
- Advanced Flavor Extraction: Techniques like solvent extraction are for industrial processes, not home kitchens.
- Specific Bean Varietal Nuances: While we mentioned types, deep dives into the terroir and specific flavor compounds of each varietal are beyond this scope.
- Vanilla Bean Cultivation: Growing your own vanilla is a complex horticultural undertaking.
Next, explore different coffee brewing methods to best appreciate your new vanilla powder, or look into making other homemade flavorings for your coffee.