Create Your Own Custom Coffee Blend
Quick answer
- Experiment with different single-origin beans.
- Blend beans with complementary flavor profiles.
- Start with small batches to test your blends.
- Roast your own beans for ultimate control.
- Keep detailed notes on your ratios and results.
- Don’t be afraid to get it wrong. That’s how you learn.
Who this is for
- Coffee lovers who want more than just a standard cup.
- Home roasters looking to perfect their craft.
- Anyone who enjoys tinkering and creating something unique.
What to check first
Brewer type and filter type
What are you using to brew? A pour-over? French press? Espresso machine? Your brewing method dictates a lot about the coffee’s final taste. For example, a paper filter will remove more oils than a metal filter, leading to a cleaner cup.
Your choice of brewing methods significantly impacts the final taste of your custom blend. Consider exploring different brewing techniques to find what best suits your preferences.

- Pour Over Coffee: Manual Pour Over Coffee Maker allows you to brew an excellent cup of Coffee in minutes
- Stainless steel: Includes a new and improved permanent, stainless steel mesh filter that helps extract your coffee's aromatic oils and subtle flavors instead of being absorbed by a paper filter
- Coffee Carafe: Made of durable, heat-resistant borosilicate glass with Cork Band detailing that is both functional and elegant; single wall
- Quick and Easy: Simply add coarse ground Coffee to filter, pour a small amount of water in a circular motion over ground Coffee until soaked then add the remaining water and let drip
- Servings: Pour Over Coffee Maker makes 8 cups of Coffee, 4 oz each; dishwasher safe
Water quality and temperature
Your coffee is mostly water, so good water matters. Filtered tap water is usually best. Avoid distilled or softened water. Temperature is critical too. For most drip and pour-over methods, aim for 195-205°F. Too cool, and you get sour coffee. Too hot, and it can taste bitter.
Grind size and coffee freshness
Freshly roasted beans are key. Ideally, use beans within a few weeks of their roast date. Grind them right before you brew. The grind size needs to match your brewer. Coarse for French press, medium for drip, fine for espresso. Too fine a grind can clog filters and lead to over-extraction. Too coarse, and you get weak, watery coffee.
Coffee-to-water ratio
This is your foundation. A good starting point for most brewing methods is a 1:15 to 1:18 ratio of coffee to water. That means for every gram of coffee, you use 15 to 18 grams of water. Weighing your coffee and water is the most accurate way to nail this.
Cleanliness/descale status
A dirty brewer is the enemy of good coffee. Old coffee oils go rancid and make everything taste bad. Descale your machine regularly, especially if you have hard water. A quick rinse after every brew is also a must.
Step-by-step (brew workflow)
Here’s a general workflow for brewing a custom blend. Adjust based on your specific method.
1. Select your beans. Pick two or three single-origin beans that sound interesting together. Maybe a bright Ethiopian and a chocolaty Brazilian.
- What “good” looks like: Beans with distinct aroma profiles that hint at complementary flavors.
- Common mistake: Grabbing whatever’s closest without considering how they might taste together. Avoid this by smelling each bean and imagining the combined aroma.
To start creating your custom blend, explore a variety of single-origin coffee beans. You can find excellent options online that offer distinct flavor profiles.

- Brooklyn Blend - A perennial filter classic, we use the Brooklyn blend as our go-to coffee of the day. We source community-grown coffees from our trusted relationships in Colombia, Guatemala, and Honduras for a blend that’s sweet and familiar.
- Flavor Profile - A medium roast blend brimming with flavors of creamy cocoa, sweet toffee, and rich dried fruits. This offering brews beautifully on the French Press at home and is equally tasty with or without milk.
- Freshly Roasted Coffee - We believe fresh coffee matters, so we put the roast date on all our 12oz bags. Our coffee stays fresh for 180 days and is best if brewed within 2 weeks of opening.
- Roasted in NYC - Open since 2012, our flagship cafe in Williamsburg, Brooklyn serves as the hub of all things Partners. Visit us there or in our other cafes in Manhattan and Long Island City for freshly brewed NY coffee.
- Sip With Confidence - We submit our coffees to third-party food safety labs for testing of heavy metals, mold, and mycotoxins, including ochratoxin A (OTA) and aflatoxin. Coffee that meets our strict internal quality and safety specs moves on to roasting.
2. Determine your blend ratio. Start with a simple 50/50 split, or try 70/30 if one bean is much stronger.
- What “good” looks like: A ratio that feels balanced and intentional, not just random.
- Common mistake: Using an arbitrary ratio without a plan. Don’t guess; think about what flavor you want to emphasize.
3. Weigh your beans. Use your chosen ratio to measure out the total amount of coffee you’ll need for your brew.
- What “good” looks like: Precise measurements for consistent results.
- Common mistake: Eyeballing the amount. This leads to wildly inconsistent brews. Use a scale, trust me.
4. Grind your beans. Grind your blend to the appropriate size for your brewer. If you have a capable grinder, you can grind them together.
- What “good” looks like: A uniform grind size tailored to your brewing method.
- Common mistake: Grinding them separately if you have a less consistent grinder. If your grinder struggles with uniformity, grind them together for better consistency.
For the best results when grinding your blend, a quality coffee bean grinder is essential. This will ensure a uniform grind size tailored to your brewing method.
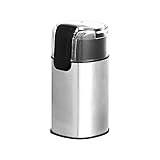
- Electric coffee bean grinder appliance for home use
- Can grind 30 grams/1 ounce of beans for drip coffee brewing in 10 seconds
- Grind coffee beans, herbs, spices, grains, nuts, and more
- Clear safety lid allows you to easily see the results in progress
- Heavy-duty stainless steel grind blade
5. Heat your water. Bring your filtered water to the optimal temperature, usually 195-205°F.
- What “good” looks like: Water that’s just off the boil, not boiling furiously.
- Common mistake: Using boiling water, which can scorch the coffee. Let it sit for 30-60 seconds after it boils.
6. Prepare your brewer. Rinse your filter (if using paper) with hot water to remove any papery taste and preheat your brewer. Discard the rinse water.
- What “good” looks like: A clean, preheated brewer ready to go.
- Common mistake: Forgetting to rinse the paper filter. This can leave a papery aftertaste.
7. Add your ground coffee. Place the ground blend into your prepared brewer.
- What “good” looks like: An even bed of coffee grounds.
- Common mistake: Leaving grounds clumped on the sides. Give the brewer a gentle shake to level it.
8. Bloom the coffee. Pour just enough hot water over the grounds to saturate them evenly. Let it sit for 30 seconds. You’ll see it bubble and expand.
- What “good” looks like: A gentle, even rise of the coffee bed.
- Common mistake: Pouring too much water during the bloom, or not letting it bloom at all. The bloom releases CO2, allowing for better extraction.
9. Continue pouring. Slowly pour the remaining water over the grounds in a controlled manner. Use a gooseneck kettle for pour-overs for precision.
- What “good” looks like: A steady, even saturation of the coffee bed without disturbing it too much.
- Common mistake: Pouring too fast or too aggressively, which can create channels and uneven extraction.
10. Let it brew. Allow all the water to pass through the coffee bed. Total brew time will vary by method.
- What “good” looks like: The coffee finishes brewing within the expected time frame for your method.
- Common mistake: Rushing the process or letting it sit too long. This leads to under or over-extraction.
11. Taste and evaluate. Pour your coffee into a mug. Smell it. Sip it. How does it taste?
- What “good” looks like: A cup that tastes balanced, with the flavors you intended coming through.
- Common mistake: Not tasting critically. Pay attention to the acidity, body, sweetness, and finish.
12. Take notes. Record your bean origins, ratios, grind size, water temp, and your tasting notes. This is crucial for replicating success or learning from mistakes.
- What “good” looks like: A logbook or digital file with detailed information.
- Common mistake: Relying on memory. You’ll forget the exact ratio that made that amazing cup.
Common mistakes (and what happens if you ignore them)
| Mistake | What it causes | Fix |
|---|---|---|
| Using stale coffee beans | Flat, dull, and lifeless flavor; lack of aroma | Buy beans with a recent roast date; store them properly. |
| Incorrect grind size | Under-extracted (sour, weak) or over-extracted (bitter, harsh) | Match grind size to brewer; adjust based on taste. |
| Inconsistent coffee-to-water ratio | Weak or overly strong coffee; hard to replicate | Weigh your coffee and water for every brew. |
| Water too hot or too cold | Scorched taste (bitter) or sour, underdeveloped flavor | Use a thermometer or let boiling water sit for 30-60 seconds. |
| Dirty brewing equipment | Rancid, off-flavors; masks the coffee’s true taste | Clean your brewer thoroughly after each use; descale regularly. |
| Uneven coffee bed in the brewer | Channels form, leading to uneven extraction | Gently shake the brewer to level grounds; pour water evenly. |
| Skipping the bloom | Gassy coffee, poor extraction, weak flavor | Always bloom your coffee for 30 seconds to release CO2. |
| Using poor-quality water | Off-flavors, mineral taste, or lack of flavor | Use filtered water; avoid distilled or heavily softened water. |
| Not tasting critically | Inability to identify what needs adjustment | Sip slowly, pay attention to aroma, acidity, body, and finish. |
| Forgetting to record brew details | Can’t replicate great results or learn from bad ones | Keep a notebook or digital log of your blends and brew parameters. |
Decision rules (simple if/then)
- If your coffee tastes sour and weak, then increase your coffee-to-water ratio (use more coffee) or grind finer because under-extraction is likely.
- If your coffee tastes bitter and harsh, then decrease your coffee-to-water ratio (use less coffee) or grind coarser because over-extraction is likely.
- If your coffee has a papery taste, then make sure you’re rinsing your paper filter thoroughly with hot water before brewing.
- If your coffee tastes muddy or silty, then consider using a finer grind for your filter type or ensure your grinder produces fewer fines.
- If your French press coffee is too weak, then try a coarser grind and a longer steep time, or increase your coffee dose.
- If your espresso is gushing out too fast, then grind finer and ensure your tamp is firm and even.
- If you’re getting channeling in your pour-over, then slow down your pour rate and try to saturate the grounds more evenly.
- If your coffee lacks sweetness, then check your water temperature; it might be too low, or your coffee might be too old.
- If you want to highlight the fruit notes in a blend, then try a lighter roast and a pour-over method.
- If you want to emphasize the chocolate and nutty notes, then try a medium roast and a French press.
- If your blend tastes “muddy” without distinct flavors, then try adjusting your blend ratio or using beans with more distinct profiles.
FAQ
How do I know if my beans are fresh enough?
Look for a roast date on the bag. Ideally, use beans within 2-4 weeks of that date. If there’s no date, assume they’re old and move on.
Can I blend pre-ground coffee?
It’s not recommended. Pre-ground coffee loses its aroma and flavor much faster than whole beans. For blending, always start with fresh, whole beans.
What’s the best way to store my custom blend?
Keep whole beans in an airtight container away from light, heat, and moisture. Don’t store them in the fridge or freezer long-term; condensation can be an issue.
How much coffee should I use for my first custom blend?
Start small. A 10-20 gram batch is enough to test a new blend. This saves you wasting a larger quantity if the blend doesn’t turn out as expected.
What if I don’t like my custom blend?
Don’t sweat it. That’s part of the learning process. Analyze the taste, adjust your ratio or bean choices, and try again. It’s all about experimentation.
Can I blend decaf and regular coffee?
Absolutely. If you want the flavor profile without the caffeine kick, blending decaf with regular is a solid option. Just ensure both are fresh.
Is it better to blend before or after roasting?
Blending before roasting is called “green blending” and is common for roasters. For home brewers, blending roasted beans is much easier and gives you more control over individual bean development.
How do I know which beans complement each other?
Think about flavor notes. If one bean is described as having “caramel” and another as “dark chocolate,” they’ll likely pair well. Bright, fruity beans can add complexity to richer, darker ones.
What this page does NOT cover (and where to go next)
- Specific roast profiles for home roasting (check roasting forums).
- Advanced espresso extraction techniques (look for espresso-specific guides).
- Detailed water chemistry for brewing (explore water filtration and mineral content resources).
- Commercial-scale blending and sourcing (this is for home brewers).