Blender Coffee Ice Cream: Creamy and Quick
Quick answer
- Use a high-powered blender for the smoothest texture.
- Start with a good quality coffee base – cold brew concentrate works best.
- Freeze your liquid ingredients (like milk or cream) in ice cube trays beforehand for faster freezing.
- Sweeten to taste, but remember coffee can be bitter, so adjust accordingly.
- Add a touch of vanilla extract to enhance the coffee flavor.
- Don’t over-blend; stop when it reaches a soft-serve consistency, then freeze for a firmer scoop.
For the smoothest, creamiest texture, we highly recommend using a high-powered blender.
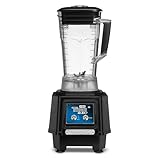
- Motor: 2 Horsepower high-performance motor delivers 24,000 max RPM for consistent blending power in commercial kitchens and bars, ensuring reliable operation during peak service hours
- Container: 64 oz BPA-free copolyester jar with stackable design maximizes storage efficiency while providing durable construction for high-volume blender use in professional settings
- Controls: 2-speed toggle switch provides simple operation with reliable performance for bartenders and kitchen staff in fast-paced commercial environments and busy food service operations
- Drive: Stainless steel user-replaceable drive coupling ensures long-lasting durability and easy maintenance for continuous commercial blender operation in demanding restaurant environments
- Certifications: cULus and NSF approved for commercial food service applications, meeting strict safety and sanitation standards for professional kitchen use in restaurants and bars
Who this is for
- Home cooks who love coffee and want a speedy dessert.
- Anyone with a decent blender looking for a no-churn ice cream recipe.
- Folks who appreciate a sweet treat without a lot of fuss or fancy equipment.
What to check first
Brewer type and filter type
This recipe relies on a concentrated coffee flavor, so how you make your coffee matters. Cold brew concentrate is ideal because it’s less acidic and packs a punch. If you’re using hot brewed coffee, make sure it’s strong and cooled completely. Paper filters will give you a cleaner taste than metal or cloth filters, which can sometimes impart subtle flavors.
Water quality and temperature
While this isn’t a hot brew, the water used for your coffee base still affects the final taste. Filtered water is always a good bet. If you’re making a cold brew concentrate, the water temperature is less critical than with hot brewing, but using cool or room temperature water is standard.
Grind size and coffee freshness
For cold brew, a coarse grind is essential. This prevents over-extraction and bitterness. Freshly ground beans will always yield a superior flavor. If you’re using pre-ground coffee, try to use it within a few weeks of opening the bag for the best results.
Coffee-to-water ratio
This is key for getting that intense coffee flavor without watering down your ice cream. For cold brew concentrate, a common ratio is 1:4 (coffee to water). You’ll be using this concentrate, so you want it strong. For hot coffee, aim for a double-strength brew.
Cleanliness/descale status
Make sure your blender is sparkling clean. Any lingering food residue can mess with the flavor. If your blender has been through a lot, giving it a good descaling (check your manual) can help it run more efficiently, which is important for blending frozen ingredients.
Step-by-step (brew workflow)
Step 1: Prepare Your Coffee Base
- What to do: Make a strong batch of cold brew concentrate or a very strong hot coffee. Let it cool completely.
- What “good” looks like: You have about 1 to 1.5 cups of intensely flavored, cooled coffee liquid. It should smell rich and inviting.
- Common mistake and how to avoid it: Using weak coffee. This will result in bland ice cream. Always err on the side of too strong; you can always dilute later if needed, but you can’t add flavor back.
Step 2: Freeze Your Liquid Dairy/Non-Dairy
- What to do: Pour your heavy cream, milk, or non-dairy alternative into ice cube trays. Freeze until solid.
- What “good” looks like: You have a tray full of frozen dairy or non-dairy cubes. They should be completely solid.
- Common mistake and how to avoid it: Not freezing them long enough. Partially frozen cubes won’t blend into a creamy texture and might leave ice chunks.
To make freezing your liquid ingredients a breeze, consider using durable silicone ice cube trays.
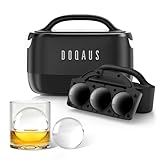
- ✅ Achieve Bar-Quality Clarity with Directional Freezing: Stop settling for cloudy, bubble-filled ice. Our clear ice cube maker utilizes advanced physics to push impurities away, creating 3 crystal-clear spheres and 4 cubes per cycle. It is the secret weapon for the home mixologist wanting presentation-ready drinks without expensive machinery.
- ✅ Preserve Complex Flavors with Slow Dilution: Designed for the purist, this whiskey ice cubes mold produces dense, 2.5-inch ice that melts 40% slower than standard ice. Enjoy your single malt or bourbon chilled but undiluted, ensuring the aromatic profile remains distinct from the first sip to the last.
- ✅ Effortless Release with Premium Hybrid Design: Unlike rigid plastic trays that crack, our flexible silicone ice ball maker mold ensures smooth removal. The non-stick material lets you pop out perfect shapes instantly, making drink preparation seamless for relaxing solo evenings or busy gatherings.
- ✅ Versatile 2-in-1 Capacity for Entertaining: Hosting a cocktail night? This round ice cube mold creates 7 pieces simultaneously, catering to different glass styles. Whether serving an Old Fashioned (sphere) or a Negroni (cube), you will have the right ice shape ready for every guest's preference.
- ✅ The Sophisticated Choice for Gifting: More than just a standard ice mold, this clear ice system is an essential upgrade for any wet bar. Packaged to impress, it creates a tangible experience, making it an ideal gift for fathers, partners, or enthusiasts who value the ritual of a perfectly poured drink.
Step 3: Gather Other Ingredients
- What to do: Get your sweetener (sugar, honey, maple syrup), vanilla extract, and any optional mix-ins ready.
- What “good” looks like: All your supporting ingredients are measured and within easy reach of the blender.
- Common mistake and how to avoid it: Forgetting to measure or having ingredients scattered. This leads to stopping mid-blend to find something, which can cause melting.
Step 4: Combine Base Liquids and Sweetener
- What to do: Add your cooled coffee concentrate, any liquid sweetener (like honey or maple syrup if using), and vanilla extract to the blender.
- What “good” looks like: The liquids are combined in the blender jar. The mixture smells like coffee and vanilla.
- Common mistake and how to avoid it: Adding dry sugar at this stage. It might not dissolve properly, leaving a gritty texture.
Step 5: Add Frozen Cubes
- What to do: Add your frozen dairy/non-dairy cubes to the blender. If using granulated sugar, add it now.
- What “good” looks like: The blender is full but not overflowing with frozen cubes and liquid.
- Common mistake and how to avoid it: Overfilling the blender. This makes it hard to blend evenly and can strain the motor.
Step 6: Initial Blending
- What to do: Start blending on a low speed, gradually increasing to high. Use the tamper if your blender has one to push ingredients down.
- What “good” looks like: The mixture starts to break down and move. It will look chunky and icy at first.
- Common mistake and how to avoid it: Not using the tamper or stopping too soon. The mixture needs help to circulate and break down the frozen ingredients.
Step 7: Blend Until Creamy
- What to do: Continue blending, stopping to scrape down the sides if needed, until the mixture is smooth and creamy, like soft-serve ice cream.
- What “good” looks like: The texture is uniform, thick, and smooth. No ice chunks are visible.
- Common mistake and how to avoid it: Over-blending. This can generate too much heat and melt the ice cream, making it soupy.
Step 8: Taste and Adjust Sweetness
- What to do: Carefully taste the mixture. Add more sweetener if desired and blend briefly to incorporate.
- What “good” looks like: The sweetness is balanced with the coffee flavor.
- Common mistake and how to avoid it: Not tasting. You might end up with ice cream that’s too sweet or not sweet enough.
Step 9: Add Mix-ins (Optional)
- What to do: If adding chocolate chips, cookie pieces, or nuts, pulse them in at the very end or stir them in by hand.
- What “good” looks like: Mix-ins are evenly distributed but not pulverized.
- Common mistake and how to avoid it: Blending mix-ins on high. This turns them into powder or mush.
Step 10: Freeze for Scooping
- What to do: Transfer the soft-serve consistency ice cream to a freezer-safe container. Press plastic wrap directly onto the surface to prevent ice crystals, then cover. Freeze for at least 2-4 hours, or until firm enough to scoop.
- What “good” looks like: The ice cream is firm but still scoopable. It holds its shape when you scoop it.
- Common mistake and how to avoid it: Not freezing long enough. This leaves you with a very soft, melty dessert.
Common mistakes (and what happens if you ignore them)
| Mistake | What it causes | Fix |
|---|---|---|
| Using weak coffee | Bland, watery ice cream | Use cold brew concentrate or double-strength hot coffee. |
| Not freezing liquids solid | Icy, chunky texture | Freeze dairy/non-dairy cubes until completely solid. |
| Overfilling the blender | Uneven blending, motor strain, potential melting | Blend in batches if necessary; use a tamper to assist circulation. |
| Over-blending | Melted, soupy consistency | Blend only until smooth and creamy, then transfer to freeze. |
| Not tasting and adjusting sweetness | Too sweet or not sweet enough | Taste before transferring to the freezer and adjust sweetener. |
| Not using a tamper (if available) | Ingredients get stuck, uneven blending | Use the tamper to push ingredients towards the blades. |
| Not cooling hot coffee completely | Melts frozen ingredients too quickly | Ensure any hot coffee is fully cooled before adding to the blender. |
| Adding dry sugar too late | Gritty texture | Add granulated sugar with the frozen ingredients or dissolve first. |
| Not covering the ice cream properly | Ice crystal formation, freezer burn | Press plastic wrap directly on the surface before covering the container. |
| Using old or stale coffee beans | Off-flavors, less intense coffee taste | Use freshly roasted and ground coffee beans for the best flavor. |
Decision rules (simple if/then)
- If your blender struggles to blend the frozen ingredients, then add a tablespoon or two of liquid (coffee base or milk) because this helps the blades catch and process the mixture.
- If the ice cream is too soft after freezing, then let it freeze for another hour or two because it likely just needed more time to firm up.
- If the ice cream has ice crystals, then you likely over-blended or didn’t cover it properly during freezing, so try pressing plastic wrap directly onto the surface next time.
- If the coffee flavor is too weak, then next time use a stronger coffee base or slightly more concentrate because the coffee is the star here.
- If the ice cream is too sweet, then next time reduce the amount of sweetener or use a less sweet coffee base because sweetness can be adjusted at the end.
- If your blender is not powerful, then consider blending in smaller batches and pausing more frequently to avoid overheating the motor because high-powered blenders are best for this.
- If you want a richer texture, then use a higher percentage of heavy cream in your frozen cubes because fat content contributes to creaminess.
- If you are using granulated sugar and it’s not dissolving, then dissolve it in your coffee base first before freezing the liquids because this ensures a smooth texture.
- If the mixture seems too thick to blend, then add a splash more of your coffee base because this will help it move more freely.
- If you prefer a dairy-free option, then use full-fat coconut milk or cashew milk for your frozen cubes because these provide a good creamy base.
FAQ
Can I use regular brewed coffee instead of cold brew?
Yes, you can, but make sure it’s a very strong brew. Let it cool completely before using it. Cold brew concentrate generally gives a richer, less acidic flavor that works well in ice cream.
How long does this coffee ice cream last in the freezer?
Homemade ice cream is best consumed within 1-2 weeks. After that, the texture can start to degrade, and ice crystals may form, even with proper storage.
What kind of sweetener works best?
Granulated sugar, honey, or maple syrup all work well. The amount will depend on your preference and the sweetness of your coffee base. You can adjust it at the end.
Can I make this without a high-powered blender?
It’s challenging. You might get a more icy result. If your blender isn’t super powerful, try blending in very small batches, and let the mixture rest slightly between blends to prevent overheating.
What if I don’t have ice cube trays?
You can pour your liquid into a shallow freezer-safe dish and break it up once frozen, or use pre-frozen milk or cream cartons if you have them. Just ensure the liquid is fully frozen.
Can I add alcohol to this recipe?
Yes, a tablespoon or two of a coffee liqueur or a neutral spirit like vodka can be added. It can also help keep the ice cream from freezing rock-hard, though it won’t dramatically change the texture in small amounts.
How can I make it more “coffee-flavored”?
Use a higher quality, darker roast coffee. You can also add a touch of instant espresso powder to your coffee base for an extra kick.
What this page does NOT cover (and where to go next)
- Advanced flavor infusions (like cardamom, chili, or mint) – explore adding spices or extracts during the blending stage.
- Detailed explanations of blender motor power and blade design – check your blender’s manual for its capabilities.
- Commercial ice cream maker comparisons – this recipe is specifically for blender-based methods.
- Nutritional breakdowns and specific dietary substitutions beyond dairy-free milk options – research specific ingredient impacts if needed.
While this recipe is blender-focused, if you’re looking for traditional churning methods, an ice cream maker can provide a different kind of creamy consistency.

- DOUBLE-INSULATED FREEZER BOWL: This Cuisinart Cuisinart Ice Cream Maker Machine with double-insulated freezer bowl holds a generous 2 quarts of your favorite frozen dessert treats, including ice cream, frozen yogurt, sorbet, sherbet, and frozen drinks.
- SUPERIOR FUNCTIONALITY: The brushed stainless steel ice cream machine features a fully automatic heavy-duty motor to make frozen desserts or drinks in under 30 minutes.
- MUST-HAVE FEATURES: Large ingredient spout for easily adding favorite mix-ins, including retractable cord storage that keeps countertops clutter-free.
- WHAT’S INCLUDED: Frozen yogurt machine comes with a double-insulated freezer bowl that holds up to 2 quarts of frozen dessert, paddle, instructions, and a recipe book.
- LIMITED 3-YEAR WARRANTY: The BPA-free Cuisinart Ice Cream Maker Machine ICE30BCP1 comes with a limited 3-year warranty.