Stop the Drip: Cuisinart Coffee Maker Leak Solutions
Quick answer
- Most Cuisinart coffee maker leaks come from the carafe, water reservoir, or brew basket.
- Check the carafe lid and placement first – it’s often the simplest fix.
- Ensure the brew basket is seated correctly and the filter isn’t overflowing.
- A cracked water reservoir or worn-out seals are common culprits for internal leaks.
- Regular cleaning and descaling prevent many common Cuisinart coffee maker leak issues.
What this problem usually is (and is not)
- This is usually about a minor overflow or a simple misplacement.
- It’s generally not a sign of a major electrical fault.
- We’re talking about water getting where it shouldn’t, not smoke signals from your kitchen.
- Avoid poking around inside with sharp objects or when the machine is plugged in. Safety first, always.
- This guide focuses on leaks during or immediately after brewing.
Likely causes (triage list)
Carafe & Lid Issues
- Carafe not seated properly: The carafe needs to sit flush under the brew basket’s drip spout. If it’s crooked, coffee overflows.
- Clogged carafe lid: Some lids have a valve that can get blocked by grounds. This stops coffee from draining freely.
- Cracked carafe: A hairline crack can let coffee seep out during brewing.
Brew Basket & Filter Problems
- Overfilled brew basket: Too much coffee grounds or water can cause a mess. Stick to the recommended ratio.
- Incorrect filter placement: A folded or improperly seated paper filter can let water bypass the grounds and leak.
- Clogged brew basket: Coffee grounds can build up and prevent proper drainage.
Water Reservoir & Internal Leaks
- Cracked water reservoir: If you see water pooling under the machine, the reservoir might have a crack.
- Worn-out seals or gaskets: Over time, seals around the water intake or heating element can degrade.
- Overflowing reservoir: Overfilling the reservoir can cause water to spill out the top.
If you notice water pooling under your Cuisinart, a cracked water reservoir is a common culprit. Replacing it with a new coffee maker water reservoir can often resolve persistent leaks.
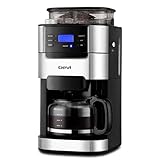
- 【𝟐-𝟏𝟎 𝐂𝐮𝐩 𝐅𝐥𝐞𝐱𝐢𝐛𝐥𝐞 𝐂𝐚𝐩𝐚𝐜𝐢𝐭𝐲】Our drip coffee maker with built-in grinder lets you brew anywhere from 2 to 10 cups. Simply use the “POWDER 2-10” button to adjust the ratio of coffee to water for your perfect strength.
- 【𝐂𝐮𝐬𝐭𝐨𝐦𝐢𝐳𝐚𝐛𝐥𝐞 𝐁𝐫𝐞𝐰 & 𝐆𝐫𝐢𝐧𝐝】This all-in-one machine with a burr grinder offers 3 grind strength levels and 8 adjustable settings. Grind fresh whole beans right before brewing for consistently smooth, flavorful coffee.
- 【𝐑𝐞𝐮𝐬𝐚𝐛𝐥𝐞 & 𝐄𝐚𝐬𝐲-𝐂𝐥𝐞𝐚𝐧 𝐅𝐢𝐥𝐭𝐞𝐫】The coffee maker includes a durable reusable filter that is easy to clean—just rinse with water for quick maintenance and less waste.
- 【𝐈𝐦𝐩𝐨𝐫𝐭𝐚𝐧𝐭 𝐍𝐨𝐭𝐞】Product dimensions: 12.36"D x 8.38"W x 16.93"H. Please measure your countertop and cabinet space beforehand to ensure proper fit.
- 【𝐏𝐫𝐞-𝐁𝐫𝐞𝐰 𝐄𝐱𝐭𝐫𝐚𝐜𝐭𝐢𝐨𝐧 𝐓𝐞𝐜𝐡𝐧𝐨𝐥𝐨𝐠𝐲】Featuring advanced pre-brew technology, this black & silver coffee maker evenly saturates coffee grounds through precise temperature control, unlocking richer flavor and aroma before full brewing.
Machine Setup & Condition
- Unit not level: An uneven surface can cause water to collect and leak from one side.
- Scale buildup: Mineral deposits can clog internal pathways, forcing water out elsewhere.
Fix it step-by-step (brew workflow)
1. Assess the leak location: Where is the water coming from? Underneath? The side? The carafe area?
- What “good” looks like: You can pinpoint the exact source of the drip.
- Common mistake: Ignoring the location and just wiping it up. You need to know where it’s coming from to fix it.
2. Check the carafe and lid: Ensure the carafe is pushed all the way in, directly under the brew spout. Inspect the lid for any clogs or damage.
- What “good” looks like: The carafe sits snugly and the lid seals properly.
- Common mistake: Not pushing the carafe in firmly. It’s a common oversight.
3. Inspect the brew basket: Remove the brew basket. Is it clean? Are there any grounds stuck in the drainage holes?
- What “good” looks like: The basket is free of debris and the drainage holes are clear.
- Common mistake: Forgetting to clean the basket thoroughly after each brew.
4. Verify filter placement: If using paper filters, ensure it’s fully open, creased properly, and seated snugly against the basket walls.
- What “good” looks like: The filter forms a clean cone or basket shape within the brew basket.
- Common mistake: Using a crumpled or folded filter that allows water to escape around the sides.
5. Measure coffee and water accurately: Use the markings on your Cuisinart or a scale. Don’t eyeball it.
- What “good” looks like: You’re using the correct amount of coffee grounds for the water volume.
- Common mistake: Adding too much coffee grounds, which can clog the filter and cause overflow.
6. Run a water-only cycle (if reservoir leak suspected): Fill the reservoir with water only (no coffee). Run a brew cycle. Watch for leaks.
- What “good” looks like: No water leaks during this test.
- Common mistake: Not doing this test, which makes it hard to isolate reservoir/internal issues from brew basket issues.
7. Inspect the water reservoir: If water is leaking from the base, carefully check the reservoir for cracks or damage. Is the seal at the base of the reservoir intact?
- What “good” looks like: The reservoir is solid and free of visible cracks.
- Common mistake: Overlooking a small hairline crack that can grow over time.
8. Clean the drip tray (if applicable): Some models have a removable drip tray. Ensure it’s not overflowing.
- What “good” looks like: The drip tray is empty and clean.
- Common mistake: Letting the drip tray fill up completely, which can then spill.
9. Descale the machine: If you suspect scale buildup, follow your Cuisinart manual’s descaling instructions.
- What “good” looks like: The machine brews smoothly with no internal leaks after descaling.
- Common mistake: Skipping descaling for too long, leading to blockages.
10. Reassemble and test brew: Put everything back together correctly and brew a small batch of coffee.
- What “good” looks like: A perfect, drip-free cup of coffee.
- Common mistake: Rushing the reassembly and missing a step, leading to another leak.
Prevent it next time
- Clean the brew basket and carafe after every use. Seriously, it takes 30 seconds.
- Descale your Cuisinart every 1-3 months, depending on water hardness. Check your manual.
- Use filtered water. It reduces scale buildup and tastes better.
- Don’t overfill the water reservoir or the brew basket. Stick to the lines.
- Ensure the carafe is fully seated before brewing.
- Check the carafe lid for clogs regularly.
- Inspect the water reservoir for cracks periodically.
- Keep the machine on a level surface.
- Make sure the power cord is in good shape – no frayed wires.
- If it’s been a while, check the seals around the water intake.
Common mistakes (and what happens if you ignore them)
| Mistake | What it causes | Fix |
|---|---|---|
| Not seating the carafe properly | Coffee overflows the carafe, making a mess on the counter. | Ensure the carafe is pushed all the way in and centered under the brew spout. |
| Overfilling the brew basket | Grounds clog the filter, causing water to back up and overflow the basket. | Measure your coffee grounds and water. Use the maximum capacity recommendations from your Cuisinart manual. |
| Using a damaged or unfolded filter | Water bypasses the coffee grounds, leading to weak coffee and leaks. | Always use a properly sized filter and ensure it’s fully opened and seated correctly in the brew basket. |
| Ignoring scale buildup | Clogs internal parts, restricting water flow and causing leaks or poor brewing. | Descale your machine regularly according to the manufacturer’s instructions. This is crucial for longevity. |
| Not cleaning the carafe lid valve | Prevents coffee from draining, causing it to back up and overflow. | Rinse the carafe lid thoroughly after each use. Use a small brush or toothpick to clear any stubborn grounds from the valve. |
| Using tap water with high mineral content | Leads to rapid scale buildup, which can cause internal leaks. | Use filtered or distilled water. It tastes better too, bonus! |
| Placing the machine on an uneven surface | Causes water to pool and potentially leak from one side of the unit. | Ensure the coffee maker is on a stable, level countertop. |
| Forgetting to check the reservoir | A small crack can go unnoticed, leading to constant dripping. | Periodically inspect the water reservoir for any signs of damage or leaks, especially if you see water pooling under the machine. |
| Using old or stale coffee | Can contribute to clogs in the brew basket and filter. | While not a direct leak cause, fresh coffee grinds better and brews more efficiently. |
| Not tightening the water reservoir | Some reservoirs twist or snap into place. If loose, water can escape. | Ensure the water reservoir is securely seated. Check for any gaskets or seals that might be out of place when reinserting. |
Decision rules (simple if/then)
- If coffee overflows the carafe, then check carafe placement and lid first because these are the most common and easiest fixes.
- If water pools under the machine, then inspect the water reservoir for cracks because this indicates an internal leak.
- If the brew basket overflows, then check coffee amount and filter placement because these directly impact water flow.
- If brewing is slow and leaks occur, then descale the machine because scale buildup is a likely culprit.
- If only a small amount of water leaks from the side, then check if the machine is level because an uneven surface can cause this.
- If the carafe lid seems blocked, then clean the valve because a clogged lid stops drainage.
- If you see water dripping from the main body of the machine, then check internal seals or the reservoir because this suggests a more serious issue.
- If the leak only happens when the machine is full, then check for overfilling the reservoir or brew basket because too much liquid is trying to escape.
- If the machine is brand new and leaking, then double-check that all parts are correctly assembled and that there’s no shipping damage to the reservoir.
- If the leak persists after trying all basic fixes, then it’s time to consult your Cuisinart manual or contact customer support because there might be a component failure.
FAQ
Q: My Cuisinart coffee maker is leaking from the bottom. What should I do?
A: This often points to a cracked water reservoir or a faulty seal. Check the reservoir for visible damage. If you can’t find a crack, it might be an internal seal issue.
Q: Coffee is overflowing from the brew basket. Why?
A: Usually, this means you’ve used too much coffee grounds, the filter is clogged or not seated correctly, or the carafe isn’t pushed in far enough to activate the pause-and-serve mechanism.
Q: Is it safe to use my Cuisinart coffee maker if it’s leaking a little?
A: For minor drips from the carafe area, it might be okay if you catch them. However, leaks from the base or electrical components are a safety concern. Unplug it and investigate.
Q: How often should I descale my Cuisinart coffee maker?
A: It depends on your water hardness and usage. A good rule of thumb is every 1-3 months. Check your specific model’s manual for precise recommendations.
Q: My Cuisinart coffee maker leaks when it’s not even brewing. What’s wrong?
A: This could mean the water reservoir isn’t sealed properly, or there’s a leak in the reservoir itself. Ensure it’s seated correctly and check for cracks.
Q: Can I use any brand of coffee filters with my Cuisinart?
A: Generally, yes, but using filters that are the correct size and shape for your brew basket is important to prevent leaks and ensure proper brewing.
Q: The pause-and-serve feature is dripping. How do I fix it?
A: Coffee grounds can sometimes clog the valve under the brew basket. Try cleaning the brew basket thoroughly, paying attention to the drainage holes.
Q: My Cuisinart coffee maker is old. Is it normal for it to start leaking?
A: Seals and plastic parts can degrade over time. While some leaks can be fixed, an older machine might eventually require replacement if multiple components fail.
What this page does NOT cover (and where to go next)
- Specific internal component repair: This guide focuses on user-fixable issues. If a heating element or pump fails, it’s beyond basic troubleshooting.
- Electrical diagnostics: We’re not digging into wiring. If you see sparks or smell burning, unplug immediately.
- Warranty claims: This is about fixing your machine, not navigating manufacturer warranties.
- Advanced brewing techniques: We’re sticking to leak prevention, not how to make the perfect pour-over.
- Troubleshooting other brands: While many principles apply, specific models vary.
- Deep cleaning methods beyond descaling: For stubborn grime, consult your manual for specific cleaning instructions.