Spooky Coffee Filter Spider Webs for Halloween Decor
Quick Answer
- Gather paper coffee filters, scissors, and a marker.
- Fold filters to create symmetrical shapes for cutting.
- Cut patterns into the folded filters to mimic spider webs.
- Unfold carefully to reveal your web design.
- Layer multiple webs for a fuller, spookier look.
- Attach to windows, walls, or hang for decoration.
Who This Is For
- Crafters looking for an easy, budget-friendly Halloween decoration.
- Parents and children seeking a fun, indoor craft activity.
- Anyone wanting to add a touch of spooky charm to their home for the holiday.
If you’re looking for a variety of spooky additions to complement your DIY spider webs, consider a set of assorted Halloween decorations. These can include plastic spiders, bats, or other creepy crawlies to bring your craft to life.
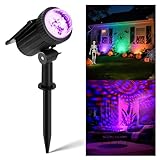
- 【𝐔𝐩𝐠𝐫𝐚𝐝𝐞𝐝 𝟑-𝐢𝐧-𝟏 Solar Spotlight】Mount it on any exterior wall for your pool, palm, or garden path in a crisp cone of light; pop the sturdy stake into soil for plants and statues, flower beds, and ornamental trees into nighttime sculptures. Finish charging under direct sun, then carry it indoors to cast a soft, cozy glow across living-room walls or bedroom ceilings—no cords, no fuss. Perfect for house parties, laid-back nights, or as a festive gift that keeps on shining.
- Ultra-Bright Animated Festival Projector:With red, green, and blue diodes blending into seven vivid combos, this LED projector switches between swirling motion and steady beams. Brighter, sharper, and packed with animated patterns than run-of-the-mill units, it turns any yard into an instant backdrop for Halloween, Christmas, birthdays or any night you want to celebrate.
- Install anywhere in seconds: Feather-light and completely cordless, our solar yard spotlights go anywhere—no outlets, no fuss. Pop in the stake for instant garden glow, or snap on the bracket to wash walls and fences with crisp light. Give them a single 12-hour sun-bath first, then let them run night after night.
- POLIGHTY Solar spotlight for Any Occasion: From haunted-house nights to glow-stick birthdays, POLIGHTY’s solar spotlight turns any yard, porch, patio, or patch of lawn into a neon canvas. Zap zombies with a purple beam, make fluorescent posters pop, or flood inflatables with color—then swap skeletons for Santas and do it all again at Christmas, Thanksgiving, Easter, or whatever’s next on the calendar.
- Create a Spooky Ambiance: Purple light reacts with UV-reactive paint to produce a fluorescent effect; when it shines on a tombstone painted with fluorescent paint, the letters on the tombstone become more eye-catching and creepy. Blacklights are perfect for creating an eerie, glowing effect for Halloween decor, making skeletons, ghosts, spiderwebs, trees, and other decorations appear brighter and more eerie
What to Check First
- Brewer Type and Filter Type: While this craft uses coffee filters, the type of coffee brewer you own (drip, pour-over, etc.) is irrelevant. Ensure you have standard, unbleached or bleached paper coffee filters. Avoid filters with a strong scent or unusual coatings, as these might affect the paper’s texture or how it holds shape.
- Water Quality and Temperature: Not applicable for this craft. You won’t be brewing coffee.
- Grind Size and Coffee Freshness: Not applicable for this craft. No coffee is needed.
- Coffee-to-Water Ratio: Not applicable for this craft.
- Cleanliness/Descale Status: Ensure your coffee filters are clean and dry, not stained or damp from previous coffee brewing.
Step-by-Step: How to Make Coffee Filter Spider Webs
1. Gather Your Materials: Collect clean, dry paper coffee filters (any size works, but larger ones offer more surface area for designs), a pair of sharp scissors, and a marker (optional, for drawing your design first).
- What “Good” Looks Like: All materials are readily accessible and filters are in good condition.
- Common Mistake: Using old, stained filters.
- How to Avoid: Double-check your filter stash for any that might have been used or are damaged.
2. Fold the Filter: Take one coffee filter and fold it in half, creating a semi-circle. Then, fold it in half again, forming a quarter-circle. Continue folding it in half a third time, resulting in a long, thin triangular wedge.
- What “Good” Looks Like: The filter is folded neatly into a wedge shape with all edges aligned.
- Common Mistake: Uneven folds that lead to asymmetrical cuts.
- How to Avoid: Take your time with each fold, ensuring the pointed end stays together and the curved edges are aligned.
3. Draw Your Design (Optional): If you want a specific pattern, you can lightly draw lines or shapes along the folded edges of the wedge with your marker. Think about where you want to cut away sections to create the web effect.
- What “Good” Looks Like: A faint outline of your intended cuts is visible on the folded filter.
- Common Mistake: Drawing too dark, making the marker lines visible on the final web.
- How to Avoid: Use a light hand and a pencil or a very light-colored marker. You can also skip this step and cut freehand.
4. Cut the Web Pattern: Using your scissors, carefully cut small shapes (triangles, curves, or notches) along the two straight, folded edges of the wedge. Avoid cutting across the very tip of the wedge, as this will cause the filter to fall apart. You can also cut small shapes along the curved outer edge.
- What “Good” Looks Like: You’ve made several cuts that remove sections of the folded filter.
- Common Mistake: Cutting too much away, or cutting the point off the wedge.
- How to Avoid: Make smaller, more numerous cuts. Remember that when unfolded, these cuts will create the gaps in your web.
5. Unfold Carefully: Gently open up the folded filter. Start by unfolding it once, then again, until it’s fully open. Be delicate, as the paper can tear easily.
- What “Good” Looks Like: A symmetrical, web-like pattern has emerged.
- Common Mistake: Ripping the delicate paper during unfolding.
- How to Avoid: Unfold slowly, using your fingers to support the paper and guide it open.
6. Repeat for More Webs: Create as many spider webs as you need for your desired decoration. You can vary the size by using different filter sizes or by adjusting how many times you fold the filter before cutting.
- What “Good” Looks Like: You have a collection of unique coffee filter spider webs.
- Common Mistake: Making all webs identical.
- How to Avoid: Experiment with different cutting patterns and filter sizes to create visual interest.
7. Layer for Depth (Optional): For a fuller, more realistic spider web effect, layer two or more of your created webs on top of each other. You can slightly offset them for a more organic look.
- What “Good” Looks Like: The layered webs create a thicker, more intricate appearance.
- Common Mistake: Layering too many webs, making them look messy.
- How to Avoid: Stick to layering 2-3 webs at a time for the best effect.
8. Hang or Attach Your Webs: Use small pieces of clear tape, a tiny dab of craft glue, or even clear fishing line to attach your spider webs to windows, mirrors, walls, doorways, or to hang them from the ceiling.
- What “Good” Looks Like: Your webs are securely attached and artfully placed for maximum spooky impact.
- Common Mistake: Using too much tape or glue, which can be visible or damage surfaces.
- How to Avoid: Use minimal amounts of adhesive, and test on an inconspicuous area if you’re concerned about your surface.
Common Mistakes (and What Happens If You Ignore Them)
| Mistake | What It Causes | Fix |
|---|---|---|
| Using stained or damp filters | Webs may look dirty or not hold shape well; potential for mold or mildew. | Use only clean, dry paper coffee filters. |
| Folding the filter unevenly | Asymmetrical cuts and an unbalanced, messy-looking web. | Take care to align all edges precisely during each fold. |
| Cutting across the pointed tip | The entire filter design will unravel and fall apart. | Always leave the very tip of the folded wedge intact. |
| Cutting too much material away | The web becomes too sparse and may be very fragile. | Make smaller, more frequent cuts along the folded edges. |
| Ripping the paper during unfolding | Tears and holes in the web, detracting from the delicate appearance. | Unfold very slowly and gently, using your fingers to support the paper. |
| Using dark markers for design lines | Visible marker lines on the finished web. | Use a light pencil or skip drawing the design altogether and cut freehand. |
| Layering too many webs | The webs lose their delicate appearance and look cluttered. | Layer only 2-3 webs for a fuller look; more can become overwhelming. |
| Using too much tape or glue | Visible adhesive marks, potential damage to surfaces. | Use small, discreet pieces of clear tape or a tiny amount of craft glue. |
| Not cleaning scissors before cutting | Can transfer coffee residue or odors to the filters. | Ensure your scissors are clean and dry. |
| Using filters with strong scents | The craft may impart an unwanted coffee aroma to your decor. | Opt for plain, unbleached or standard bleached filters. |
Decision Rules for Making Coffee Filter Spider Webs
- If you want a large, statement web, then use basket-style coffee filters because they have a wider diameter.
- If you want a delicate, intricate web, then make smaller, more numerous cuts along the folded edges because this creates finer gaps.
- If you are crafting with young children, then pre-fold the filters for them and supervise cutting because they may struggle with precise folding and cutting.
- If you want your webs to be more durable, then avoid cutting too much material away because more paper means more structural integrity.
- If you’re unsure of your cutting pattern, then start with simple shapes like triangles or small semi-circles because they are easier to execute.
- If you want to hang your webs, then consider attaching a thin string to one of the inner points before unfolding because it provides a secure hanging point.
- If you want to reuse your webs, then use a non-damaging adhesive like painter’s tape or very small pieces of clear tape because it’s less likely to leave residue.
- If you want a more dimensional web, then layer two webs and slightly offset them because this adds depth without looking too heavy.
- If you want to avoid marker lines, then cut freehand or use a very light pencil because it will be less noticeable.
- If your cuts seem too large, then consider folding the filter again and making smaller cuts to fill in gaps before unfolding.
- If you want to attach them to a window without tape, then try lightly misting the edges with water and pressing them to the glass because static and moisture can help them adhere temporarily.
FAQ
Q: Can I use colored coffee filters for this craft?
A: Yes, colored coffee filters can add a fun twist to your decorations. Just ensure the color is evenly applied and doesn’t bleed when handled.
Q: How do I make my spider webs look more realistic?
A: Vary the size and density of your cuts. Creating some thicker lines and some thinner gaps, and layering webs can also enhance realism.
Q: Can I add glitter or paint to my coffee filter webs?
A: You can, but be aware that adding embellishments like glitter or heavy paint can make the delicate paper filter tear more easily. Apply them sparingly.
Q: What’s the best way to attach these to a wall?
A: Use small pieces of removable poster putty or painter’s tape to avoid damaging your wall. Attach the putty or tape to a thicker part of the web.
Q: How long will these decorations last?
A: Coffee filter webs are best for temporary decoration. They are delicate and can be damaged by moisture or rough handling. They are ideal for a single Halloween season.
Q: Can I make spider webs of different sizes?
A: Absolutely. Use different sizes of coffee filters (e.g., standard cone vs. larger basket filters) or adjust how many times you fold the filter before cutting to achieve varying dimensions.
Q: What if my web tears when I unfold it?
A: Don’t worry! Small tears can sometimes add to the spooky, weathered look. If it’s a significant tear, you can try to mend it with a tiny piece of tape or simply start over with a new filter.
Q: Can I use these outdoors?
A: It’s not recommended. Coffee filter webs are made of paper and are very susceptible to wind and moisture, which will quickly ruin them. They are best suited for indoor decorating.
What This Page Does Not Cover (and Where to Go Next)
- Advanced Web Techniques: This guide covers basic folding and cutting. For more complex, intricate web patterns, you might explore advanced origami or paper-cutting techniques.
- Adding 3D Elements: This guide focuses on flat web designs. For adding 3D spiders or other embellishments, you’ll need to look into separate craft tutorials for those items.
- Long-Term Preservation: These are temporary decorations. If you’re interested in preserving paper crafts for longer periods, you’d need to research archival methods, which are generally not applicable to this type of craft.
- Commercial-Scale Production: This guide is for home crafting. Information on mass-producing decorations for sale would involve different machinery and processes.