Smooth & Sweet: Making Vanilla Cold Brew Coffee
Quick answer
- Start with good beans, ideally medium to dark roast.
- Use filtered water for the cleanest flavor.
- Grind your coffee coarse, like sea salt.
- Steep for 12-24 hours in the fridge.
- Add vanilla extract or a vanilla bean during steeping.
- Strain thoroughly for a smooth finish.
- Dilute to taste with more water or milk.
Who this is for
- Anyone craving a smooth, low-acid coffee with a hint of sweetness.
- Folks who want to ditch expensive coffee shop cold brew.
- Campers and travelers looking for an easy, make-ahead coffee solution.
What to check first
Brewer type and filter type
You don’t need fancy gear. A large jar with a lid works fine. For straining, cheesecloth, a fine-mesh sieve, or even a French press can do the trick. If you’re using a dedicated cold brew maker, just follow its instructions. The key is keeping those grounds out of your final cup.
You don’t need fancy gear to make great cold brew. A large glass jar with a lid works perfectly for steeping your coffee grounds.
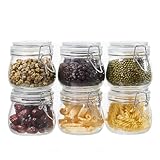
- 【Premium Glass Jars with Airtight Lids】These airtight glass jars feature a wire clip fastening system with clear preserving seals, locking in freshness and flavor. Ideal for dry goods and long-term food storage.
- 【Perfect Size: 17 oz Capacity – Set of 6】Each jar holds 17oz, just right for storing beans, flour, sugar, cereal, pasta, or snacks. Comes as a 6 pack to organize your kitchen efficiently.
- 【Durable & Safe Food Storage Containers】Made from thick, lead-free, glass food storage containers that are BPA-free, odor-resistant, and safe for everyday use.
- 【Multi-Purpose Glass Canisters for Kitchen & Pantry】Great for kitchen canning and pickling jars – also suitable for DIY jam, honey, kimchi, spices, and more. A functional and elegant solution for pantry storage jars.
- 【Stylish & Practical Storage Jars】Sleek square design saves space and looks beautiful on shelves. These glass storage jars are easy to stack and clean, combining utility with minimalist decor.
Water quality and temperature
Tap water can have off-flavors. Filtered water is your best bet for a pure taste. Cold brew is all about slow extraction, so room temperature or fridge temperature is what you want. No need to boil anything here.
Grind size and coffee freshness
This is crucial. You want a coarse grind, think sea salt or breadcrumbs. Too fine, and you’ll get sludge and over-extraction. Freshly ground beans are always better, but for cold brew, even a week or two old bag can work. Just make sure it’s not stale.
Coffee-to-water ratio
A good starting point is a 1:4 ratio of coffee to water. That means for every cup of coffee grounds, use four cups of water. You can adjust this later based on how strong you like it. Some folks go as strong as 1:2 for a concentrate.
Cleanliness/descale status
Your brewer and any containers should be spotless. Old coffee oils can go rancid and ruin your batch. If you use a machine that heats water, make sure it’s descaled. For cold brew, it’s more about general hygiene.
Step-by-step (brew workflow)
1. Gather your gear. You’ll need a jar or container, your coffee, a grinder, filtered water, and something to strain with.
- What “good” looks like: Everything is clean and ready to go.
- Common mistake: Using a dirty container. Avoid this by washing everything thoroughly.
2. Measure your coffee. Use your chosen ratio. For a 1:4 concentrate, measure out 1 cup of whole beans.
- What “good” looks like: Accurate measurement for consistent results.
- Common mistake: Eyeballing it. This leads to weak or overly strong brews.
3. Grind your coffee. Aim for a coarse, even grind. Like coarse sea salt.
- What “good” looks like: Uniform particles, no fine dust.
- Common mistake: Grinding too fine. This makes your cold brew bitter and muddy. Use a burr grinder if you can.
4. Add coffee to your brewer. Pour the ground coffee into your clean jar or container.
- What “good” looks like: All the grounds are in the container.
- Common mistake: Spilling grounds. Be careful when transferring.
5. Add vanilla. This is where the magic happens. You can add 1-2 teaspoons of vanilla extract or a split vanilla bean.
- What “good” looks like: Vanilla is mixed in with the grounds.
- Common mistake: Adding too much vanilla. Start small; you can always add more later.
6. Add water. Pour in your filtered water, ensuring all the grounds are saturated. Stir gently.
- What “good” looks like: The grounds are fully wet, and the mixture is stirred.
- Common mistake: Not fully saturating the grounds. This leads to uneven extraction.
7. Steep in the fridge. Cover the container and place it in the refrigerator.
- What “good” looks like: The container is sealed and chilling.
- Common mistake: Leaving it on the counter. This can lead to spoilage and poor flavor.
8. Wait. Let it steep for 12 to 24 hours. Longer steeping means a stronger brew.
- What “good” looks like: Patience! The longer it sits, the more flavor develops.
- Common mistake: Impatience. Don’t pull it out too early, or it will be weak.
9. Strain the coffee. Use a fine-mesh sieve lined with cheesecloth, a paper filter, or a French press. Strain it slowly and thoroughly.
- What “good” looks like: Clear, dark liquid with no grounds.
- Common mistake: Rushing the straining. This lets sediment through, making your coffee gritty. Double-strain if needed.
10. Dilute and serve. Your cold brew concentrate is ready. Mix it with water, milk, or your favorite creamer to taste. Start with a 1:1 ratio of concentrate to liquid.
- What “good” looks like: A perfectly balanced cup of coffee.
- Common mistake: Drinking the concentrate straight. It’s super strong! Always dilute.
Common mistakes (and what happens if you ignore them)
| Mistake | What it causes | Fix |
|---|---|---|
| Using pre-ground coffee | Weak, watery, or bitter brew | Grind your beans right before brewing. |
| Grinding too fine | Muddy, over-extracted, bitter coffee | Use a coarse grind. Think sea salt. |
| Not saturating all grounds | Uneven extraction, weak spots | Stir gently after adding water to ensure full saturation. |
| Steeping at room temperature | Potential for spoilage, off-flavors | Always steep in the refrigerator. |
| Rushing the straining process | Gritty, sediment-filled coffee | Strain slowly and consider double-straining for clarity. |
| Using stale or low-quality beans | Flat, unpleasant, or weak flavor | Start with fresh, quality beans. Medium to dark roasts work well. |
| Adding too much vanilla at once | Overpowering vanilla flavor, masking coffee notes | Start with a small amount and add more to taste after brewing. |
| Not diluting the concentrate | Extremely strong, unpalatable coffee | Always dilute your cold brew concentrate to your liking. |
| Using tap water with strong flavors | Off-flavors in the final brew | Use filtered or bottled water for the cleanest taste. |
| Not cleaning equipment properly | Rancid oils, stale coffee taste | Wash all brewing and storage containers thoroughly. |
Decision rules (simple if/then)
- If your cold brew tastes weak, then increase the coffee-to-water ratio next time because you need more coffee grounds for the same amount of water.
- If your cold brew tastes bitter, then grind coarser or steep for less time because you might be over-extracting.
- If your cold brew has sediment, then strain it more carefully or use a finer filter because you’re letting grounds through.
- If your cold brew tastes sour, then check your coffee freshness and grind size because those are common culprits.
- If you want a stronger vanilla flavor, then add a bit more vanilla extract or use a whole vanilla bean next time because you can always add more.
- If your cold brew tastes muddy, then make sure you’re using a coarse grind and not over-agitating during steeping because fine particles are the issue.
- If you’re in a hurry, then plan ahead because cold brew takes time. You can’t rush the steeping process.
- If you’re sensitive to acidity, then cold brew is a great choice because it’s naturally lower in acid than hot brewed coffee.
- If you want to experiment, then try different coffee roasts or add a cinnamon stick along with the vanilla because variety is the spice of life.
- If your final drink is too strong, then add more water or milk because dilution is key to enjoying cold brew concentrate.
FAQ
How long does vanilla cold brew last?
Your vanilla cold brew concentrate should last about 1-2 weeks in the refrigerator when stored in an airtight container. Always give it a sniff before you drink it to make sure it smells fresh.
Can I use vanilla syrup instead of extract?
Yes, you can! If you use vanilla syrup, you might want to reduce the amount of sweetener you add to your final cup, as the syrup is already sweet. Start with a tablespoon and adjust.
What kind of coffee beans are best for vanilla cold brew?
Medium to dark roasts generally work best. They have richer, deeper flavors that complement vanilla well. Avoid very light roasts, as they might get a bit too bright or acidic for this application.
Do I need a special cold brew maker?
Nope! A simple jar with a lid and some cheesecloth or a fine-mesh sieve will do the trick. Dedicated cold brew makers can make the process a little easier, but they aren’t essential.
How much vanilla should I add?
For a standard 1:4 concentrate batch (around 4 cups of water), start with 1-2 teaspoons of vanilla extract or half a vanilla bean. You can always add more flavor when you dilute it to drink.
Why is my cold brew cloudy?
Cloudiness usually comes from fine coffee particles that weren’t strained out properly. Make sure you’re using a coarse grind and straining slowly, perhaps even double-straining through a paper filter or cheesecloth.
Can I make vanilla cold brew at room temperature?
While some people do, it’s generally not recommended. Steeping in the fridge is safer and helps prevent any potential bacterial growth or off-flavors from developing. Plus, it keeps your kitchen cool.
What’s the difference between cold brew and iced coffee?
Cold brew is brewed with cold water over a long period, resulting in a smooth, low-acid concentrate. Iced coffee is typically hot brewed coffee that’s then cooled down and served over ice, which can sometimes taste more acidic.
What this page does NOT cover (and where to go next)
- Specific brand recommendations for coffee beans or grinders.
- Detailed chemical explanations of extraction.
- Advanced flavor infusion techniques beyond vanilla.
- Troubleshooting for specific types of automatic cold brew machines.
- Recipes for cold brew cocktails or desserts.