Simple Cold Brew Coffee Using Cheesecloth
Quick answer
- Use a coarse grind for your coffee beans.
- Steep for 12-24 hours at room temperature or in the fridge.
- Strain through cheesecloth at least twice for a cleaner brew.
- Dilute the concentrate with water or milk to taste.
- Store in an airtight container in the refrigerator.
- Cold brew is less acidic and smoother than hot coffee.
Who this is for
- Anyone who wants a smooth, low-acid coffee without fancy equipment.
- Campers or folks without electricity who want great coffee.
- Budget-conscious coffee lovers looking to save a few bucks.
What to check first
Brewer type and filter type
You’re using cheesecloth here. That’s the star. Make sure it’s food-grade, of course. You’ll need enough to line your container or wrap your grounds.
When using cheesecloth for your cold brew, ensure it’s food-grade. You can find reliable options like this food grade cheesecloth to line your container or wrap your grounds.
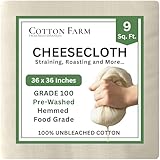
- 𝐏𝐮𝐫𝐞, 𝐔𝐧𝐛𝐥𝐞𝐚𝐜𝐡𝐞𝐝 𝐂𝐨𝐭𝐭𝐨𝐧 – 𝐏𝐫𝐞-𝐖𝐚𝐬𝐡𝐞𝐝 & 𝐎𝐝𝐨𝐫-𝐅𝐫𝐞𝐞 Crafted from 100% natural, unbleached cotton cheesecloth, pre-washed to remove residues and stiffness. Odorless and food-safe, so it won’t affect the taste, smell, or color of your food.
- 𝐅𝐢𝐧𝐢𝐬𝐡𝐞𝐝, 𝐍𝐨-𝐅𝐫𝐚𝐲 𝐄𝐝𝐠𝐞𝐬 (𝐎𝐯𝐞𝐫𝐥𝐨𝐜𝐤𝐞𝐝 𝐒𝐭𝐢𝐭𝐜𝐡𝐢𝐧𝐠) Edges are professionally finished with tight overlock stitching to prevent fraying, unraveling, or loose threads. Designed for repeated use and washing without falling apart.
- 𝐆𝐫𝐚𝐝𝐞 𝟏𝟎𝟎 𝐅𝐢𝐧𝐞 𝐌𝐞𝐬𝐡 – 𝐂𝐥𝐞𝐚𝐧, 𝐄𝐯𝐞𝐧 𝐒𝐭𝐫𝐚𝐢𝐧𝐢𝐧𝐠 Ultra-dense Grade 100 weave (46×54 threads per inch) allows liquids to pass smoothly while keeping solids contained. No grit, no residue, no unwanted particles.
- 𝐏𝐫𝐞-𝐂𝐮𝐭 𝟏×𝟏 𝐘𝐚𝐫𝐝 𝐒𝐡𝐞𝐞𝐭 – 𝐑𝐞𝐚𝐝𝐲 𝐭𝐨 𝐔𝐬𝐞 Comes pre-cut in a convenient 1×1 yard size and sealed for hygienic storage. Use it as is or cut to your preferred size for everyday kitchen tasks.
- 𝐈𝐝𝐞𝐚𝐥 𝐟𝐨𝐫 𝐒𝐭𝐫𝐚𝐢𝐧𝐢𝐧𝐠, 𝐂𝐨𝐨𝐤𝐢𝐧𝐠 & 𝐅𝐨𝐨𝐝 𝐏𝐫𝐞𝐩 Perfect for straining and food prep with cheesecloth—ideal for yogurt, butter, sauces, broths, cold brew coffee, nut milk, and cheese making.
Water quality and temperature
Good water makes good coffee. Filtered water is best if your tap water tastes off. Temperature matters less for cold brew since it’s, well, cold. Room temp or fridge temp is fine.
Grind size and coffee freshness
This is crucial for cold brew. You want a coarse grind. Think breadcrumbs or coarse sea salt. Too fine, and you’ll get sludge. Fresh beans, ground right before brewing, always win.
For the perfect cold brew, a coarse grind is essential. Consider using high-quality coarse grind coffee beans, which will give you that ideal breadcrumb-like texture.

- SINGLE-ORIGIN BALI HIGHLANDS COFFEE – Sourced from the volcanic highlands of Bali, Indonesia, these Certified Organic Arabica beans deliver a rich, full-bodied cup with tasting notes of dark chocolate, warm spice, and subtle brown sugar sweetness for a bold yet smooth coffee experience.
- ARTISAN ROASTED IN SMALL DAILY BATCHES – Carefully roasted in small quantities using traditional craft roasting methods to ensure optimal flavor development, consistency, and a smooth finish without the burnt or bitter taste common in mass-produced coffee.
- ROASTED FRESH FOR MAXIMUM FLAVOR – Our beans are roasted continuously and shipped quickly so you enjoy coffee that is typically just days off roast, preserving aroma, natural oils, and peak flavor intensity in every cup.
- BOLD, SMOOTH, AND NATURALLY LOW ACID – Designed for everyday enjoyment, this coffee delivers strong flavor with a smooth finish and low acidity, making it ideal for espresso, drip machines, pour-over, French press, or cold brew.
- 100% CERTIFIED ORGANIC ARABICA BEANS – Made exclusively from premium organic beans with no added flavors, chemicals, or preservatives, providing a clean, pure coffee experience you can trust.
Coffee-to-water ratio
A good starting point is 1:4 to 1:8 ratio of coffee to water. This makes a concentrate. You’ll dilute it later. Experiment to find your sweet spot.
Cleanliness/descale status
Even with cold brew, clean gear is key. Old coffee oils can make your brew taste bitter or stale. Give your container and any tools a good wash.
Step-by-step (brew workflow)
1. Gather your gear. You’ll need a large jar or pitcher, cheesecloth, a rubber band or string, and your coffee.
- What “good” looks like: Everything is clean and ready to go. No last-minute scrambling.
- Common mistake: Forgetting a way to secure the cheesecloth. Avoid this by having a rubber band or string handy.
2. Grind your beans. Aim for a coarse grind. It should look like coarse sand or small pebbles.
- What “good” looks like: Evenly sized particles, no fine dust.
- Common mistake: Using a fine grind. This leads to a cloudy, bitter brew and clogged filters.
3. Add coffee grounds to your container. Pour your coarsely ground coffee into your clean jar or pitcher.
- What “good” looks like: All the grounds are in the container, ready for water.
- Common mistake: Spilling grounds. Be gentle, especially if you’re using a narrow-mouthed jar.
4. Add water. Pour cold or room-temperature filtered water over the grounds. Use your chosen ratio. For example, 1 cup of coffee to 4 cups of water for a concentrate.
- What “good” looks like: All grounds are saturated. You can give it a gentle stir to ensure this.
- Common mistake: Not saturating all the grounds. This leads to uneven extraction and weak spots.
5. Stir gently. Give the mixture a light stir to make sure all the coffee grounds are wet.
- What “good” looks like: A uniform slurry of coffee and water.
- Common mistake: Over-stirring. You don’t want to agitate the grounds too much, which can release bitterness.
6. Cover and steep. Cover your container. Let it sit at room temperature or in the refrigerator for 12 to 24 hours. Longer steeping means a stronger brew.
- What “good” looks like: The container is sealed and steeping undisturbed.
- Common mistake: Forgetting about it. Set a reminder if you tend to lose track of time.
7. Prepare for straining. Drape a few layers of cheesecloth over the mouth of a clean pitcher or bowl. Secure it with a rubber band or string.
- What “good” looks like: The cheesecloth is taut and securely fastened.
- Common mistake: Using too few layers of cheesecloth. This lets fine particles through.
8. Strain the coffee. Slowly pour the steeped coffee through the cheesecloth-lined pitcher. Let gravity do the work.
- What “good” looks like: The liquid passes through, leaving most of the grounds behind.
- Common mistake: Pouring too fast. This can cause the grounds to overflow or the cheesecloth to tear.
9. Re-strain if needed. For a cleaner brew, carefully fold the cheesecloth over the remaining grounds and strain again, or use a fresh piece of cheesecloth. You might even run it through a fine-mesh sieve after the cheesecloth.
- What “good” looks like: The coffee is noticeably clearer, with minimal sediment.
- Common mistake: Skipping this step. If you like your coffee smooth, a second strain is worth it.
10. Dilute and serve. Your cold brew is a concentrate. Dilute it with water, milk, or ice to your preferred strength. A 1:1 ratio of concentrate to water is a good starting point.
- What “good” looks like: A perfectly balanced cup of coffee that tastes great to you.
- Common mistake: Drinking the concentrate straight. It’s usually too strong and bitter.
11. Store properly. Pour the diluted coffee into an airtight container and store it in the refrigerator. It should last about a week.
- What “good” looks like: The container is sealed, and the coffee is ready for future enjoyment.
- Common mistake: Leaving it out. This can lead to spoilage and affect the taste.
Common mistakes (and what happens if you ignore them)
| Mistake | What it causes | Fix |
|---|---|---|
| Using a fine coffee grind | Cloudy, bitter, sludgy coffee; clogged filter | Use a coarse grind, like breadcrumbs. |
| Not enough cheesecloth layers | Sediment in your final brew | Use at least 2-3 layers, or more if needed. |
| Over-agitating grounds | Bitter, over-extracted coffee | Stir gently only to ensure saturation. |
| Too short steeping time | Weak, watery coffee | Steep for 12-24 hours; adjust based on your preference. |
| Too long steeping time | Bitter, harsh, or sour coffee | Stick to the 12-24 hour range; taste test to find your sweet spot. |
| Not straining thoroughly | Gritty, muddy coffee | Strain multiple times, using fresh cheesecloth if necessary. |
| Using stale coffee beans | Flat, dull, or stale-tasting coffee | Use freshly roasted beans, ground just before brewing. |
| Incorrect coffee-to-water ratio | Brew too weak or too strong (concentrate) | Start with 1:4 to 1:8 and adjust to your liking. |
| Dirty brewing equipment | Off-flavors, rancid taste | Clean all containers and tools thoroughly before brewing. |
| Not diluting the concentrate | Overpoweringly strong and bitter coffee | Dilute with water, milk, or ice to taste. |
Decision rules (simple if/then)
- If your cold brew tastes weak, then increase the coffee-to-water ratio or steep for a longer time because you need more extraction.
- If your cold brew tastes bitter, then use a coarser grind or reduce the steeping time because you might be over-extracting.
- If your cold brew has sediment, then use more layers of cheesecloth or strain it a second time because the filter isn’t catching all the fines.
- If you want a stronger coffee flavor, then use less water in your initial brew or steep for longer because you’re aiming for a more concentrated result.
- If you prefer a smoother, less acidic cup, then stick to the cold brew method because the lower temperature extraction naturally reduces acidity.
- If your coffee tastes “off” or stale, then check the freshness of your beans or the cleanliness of your equipment because these are common culprits.
- If you’re brewing for the first time, then start with a 1:4 coffee-to-water ratio and 18 hours of steeping because this is a solid baseline.
- If you’re sensitive to caffeine, then consider a shorter steeping time or a lower coffee-to-water ratio because less extraction means less caffeine.
- If you want to speed up the brewing process slightly, then try steeping at room temperature instead of in the fridge, but be mindful of potential flavor differences.
- If your cheesecloth is letting too much through, then try folding it over itself an extra time or using a finer mesh filter after the cheesecloth because you need better filtration.
FAQ
What kind of coffee beans should I use for cold brew?
You can use almost any type of coffee bean. Medium to dark roasts often work well because their flavors are robust and can stand up to the long steeping time. Freshly roasted beans will always yield the best results.
How long does cold brew coffee last?
Stored properly in an airtight container in the refrigerator, cold brew concentrate can last for about 7 to 10 days. The flavor might start to degrade slightly towards the end of that period.
Can I use pre-ground coffee?
Yes, but it’s not ideal. If you must use pre-ground coffee, make sure it’s a coarse grind. Otherwise, you’ll likely end up with a muddy, bitter brew. Grinding fresh beans just before brewing makes a noticeable difference.
What’s the difference between cold brew concentrate and regular cold brew?
Cold brew concentrate is a strong coffee mixture made with a higher coffee-to-water ratio and a longer steep time. Regular cold brew is typically made with a lower ratio and shorter time, or it’s simply the concentrate diluted to drinking strength.
Why is my cold brew cloudy?
Cloudy cold brew is usually due to a fine grind size or inadequate straining. The fine particles of coffee are passing through your cheesecloth. Using a coarser grind and straining multiple times should help.
Can I make cold brew without cheesecloth?
Absolutely. You can use a fine-mesh sieve, a French press, or specialized cold brew makers. Cheesecloth is just a very accessible and cheap option for filtering.
Is cold brew healthier than hot coffee?
Cold brew is generally less acidic than hot coffee, which can be easier on your stomach. It also contains caffeine, though the amount can vary based on the brew ratio and steeping time.
How do I adjust the strength of my cold brew?
You can adjust the strength by changing the coffee-to-water ratio, the steeping time, or the amount you dilute the concentrate. Experiment to find what works best for your taste.
What this page does NOT cover (and where to go next)
- Specific brand recommendations for coffee beans or cheesecloth. (Check coffee blogs or specialty stores.)
- Detailed explanations of coffee extraction science. (Look for brewing guides.)
- Advanced cold brew techniques like nitrogen infusion. (Explore dedicated equipment reviews.)
- Recipes for cold brew cocktails or specialty drinks. (Search for coffee recipe sites.)
- The impact of different water mineral compositions on flavor. (Consult water treatment resources.)