Simple Cold Brew Coffee Recipe
Quick answer
- Use a coarse grind. This is key for cold brew.
- Stick to a 1:4 coffee-to-water ratio. It’s a solid starting point.
- Let it steep for 12-24 hours. Patience pays off.
- Filter it well. Double filtering is your friend.
- Dilute the concentrate. Cold brew is strong stuff.
- Store it in the fridge. It’ll last a couple of weeks.
Who this is for
- Anyone who wants smooth, low-acid coffee without the fuss.
- Folks who enjoy iced coffee but hate the bitterness of hot-brewed coffee chilled.
- Campers and travelers looking for an easy, make-ahead coffee solution.
What to check first
Brewer type and filter type
You don’t need fancy gear. A simple jar and a fine-mesh strainer work. A cheesecloth or paper filter can help catch smaller grounds. For more dedicated setups, French presses or dedicated cold brew makers are slick. Just make sure your filter can handle coarse grounds and won’t clog too easily.
You don’t need fancy gear to make great cold brew; a simple glass jar with a lid is all you really need to get started.
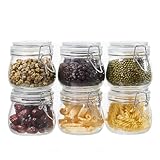
- 【Premium Glass Jars with Airtight Lids】These airtight glass jars feature a wire clip fastening system with clear preserving seals, locking in freshness and flavor. Ideal for dry goods and long-term food storage.
- 【Perfect Size: 17 oz Capacity – Set of 6】Each jar holds 17oz, just right for storing beans, flour, sugar, cereal, pasta, or snacks. Comes as a 6 pack to organize your kitchen efficiently.
- 【Durable & Safe Food Storage Containers】Made from thick, lead-free, glass food storage containers that are BPA-free, odor-resistant, and safe for everyday use.
- 【Multi-Purpose Glass Canisters for Kitchen & Pantry】Great for kitchen canning and pickling jars – also suitable for DIY jam, honey, kimchi, spices, and more. A functional and elegant solution for pantry storage jars.
- 【Stylish & Practical Storage Jars】Sleek square design saves space and looks beautiful on shelves. These glass storage jars are easy to stack and clean, combining utility with minimalist decor.
Water quality and temperature
Tap water is usually fine, but if yours tastes funky, your coffee will too. Filtered water is always a safe bet. Cold brew uses cold or room temperature water. No need for a thermometer here, just use what’s comfortable to the touch.
Grind size and coffee freshness
This is non-negotiable for cold brew. You want a coarse grind, like breadcrumbs or coarse sea salt. Too fine, and you’ll get sludge and over-extraction. Freshly ground beans are best, but even pre-ground coffee can work if it’s not ancient.
Coffee-to-water ratio
A good starting point is 1:4 by weight. That’s one part coffee to four parts water. For example, 4 ounces of coffee to 16 ounces of water. You can adjust this later based on your taste.
Cleanliness/descale status
Give your brewing vessel and any filters a good wash. Old coffee oils can turn rancid and make your brew taste bitter or stale. If you use a machine, check the manual for descaling instructions.
Step-by-step (brew workflow)
1. Measure your coffee. Grab your coarse-ground coffee. For a 1:4 ratio, if you want about 20 oz of concentrate, start with 5 oz of coffee grounds.
- What “good” looks like: Exactly the amount you planned for.
- Common mistake: Guessing the amount. This leads to weak or too-strong brew. Always measure.
2. Add coffee to your brewer. Dump those grounds into your jar, French press, or cold brew maker.
- What “good” looks like: All the coffee is in the vessel.
- Common mistake: Spilling grounds. It’s just messy and wastes coffee.
3. Measure your water. Use cold or room-temperature filtered water. For our 5 oz of coffee, measure out 20 oz of water.
- What “good” looks like: The right amount of clean water.
- Common mistake: Using hot water. This is for hot coffee, not cold brew.
4. Pour water over coffee. Gently pour the water over the grounds, making sure to saturate them all.
- What “good” looks like: All the coffee grounds are wet. No dry pockets.
- Common mistake: Pouring too fast or aggressively. This can cause grounds to clump, leading to uneven extraction.
5. Stir gently. Give it a quick, gentle stir to ensure all the grounds are submerged.
- What “good” looks like: A uniform slurry of coffee and water.
- Common mistake: Over-stirring. This can agitate the grounds too much and extract unwanted flavors.
6. Cover and steep. Seal your brewer or cover your jar. Let it sit at room temperature or in the fridge for 12 to 24 hours.
- What “good” looks like: It’s sealed and out of the way.
- Common mistake: Leaving it uncovered. You don’t want dust or other fridge smells getting in.
7. Filter the coffee. This is where you separate the liquid from the grounds. If using a French press, slowly press the plunger. If using a jar, pour through a fine-mesh strainer lined with cheesecloth or a paper filter.
- What “good” looks like: Clear liquid with minimal sediment.
- Common mistake: Rushing the filtering. This lets grounds sneak through.
8. Filter again (optional but recommended). For an even cleaner brew, filter it a second time.
- What “good” looks like: Crystal clear concentrate.
- Common mistake: Skipping this. You might end up with gritty coffee.
9. Dilute the concentrate. Your filtered brew is a concentrate. Pour it over ice and add water or milk to taste. A 1:1 or 1:2 ratio of concentrate to water/milk is common.
- What “good” looks like: A drinkable, delicious iced coffee.
- Common mistake: Drinking the concentrate straight. It’s way too strong.
10. Store the concentrate. Pour the remaining concentrate into an airtight container and store it in the refrigerator.
- What “good” looks like: Sealed tight and chilling.
- Common mistake: Leaving it out. It needs to be cold and sealed to stay fresh.
Common mistakes (and what happens if you ignore them)
| Mistake | What it causes | Fix |
|---|---|---|
| Using a fine grind | Muddy, bitter coffee; clogged filters | Use a coarse grind (like sea salt). |
| Incorrect coffee-to-water ratio | Too weak or too strong concentrate | Start with 1:4 (coffee:water) and adjust to taste. |
| Under-steeping (too short) | Weak, watery, underdeveloped flavor | Steep for at least 12 hours. |
| Over-steeping (too long) | Bitter, harsh, sometimes sour flavors | Stick to 12-24 hours. Taste test to find your sweet spot. |
| Not filtering properly | Gritty, sludgy coffee | Filter twice, using a fine-mesh strainer and/or paper filter. |
| Using hot water | Extracts different compounds, less smooth taste | Always use cold or room-temperature water. |
| Not stirring initially | Uneven extraction, some grounds stay dry | Give it a gentle stir after adding water to ensure full saturation. |
| Storing uncovered | Absorbs fridge odors, goes stale faster | Use an airtight container. |
| Drinking concentrate straight | Overwhelmingly strong, unpleasant flavor | Always dilute with water, milk, or ice. |
| Using stale coffee beans | Flat, lifeless flavor, lacks depth | Use freshly roasted beans if possible. |
Decision rules (simple if/then)
- If your cold brew tastes bitter, then reduce the steep time because over-extraction is likely.
- If your cold brew tastes weak, then increase the coffee-to-water ratio (more coffee) for the next batch because you’re using too little coffee.
- If your cold brew is gritty, then filter it again through a finer filter because you’re letting too many fine particles through.
- If you’re in a hurry, then make your cold brew ahead of time because it requires a long steep.
- If you prefer a less intense flavor, then dilute your concentrate more because cold brew is meant to be strong.
- If your tap water tastes bad, then use filtered water because water quality significantly impacts coffee flavor.
- If you want to experiment with different flavors, then try different coffee beans because origin and roast level matter.
- If your cold brew tastes sour, then check your grind size and steep time because under-extraction or certain bean characteristics can cause sourness.
- If you are brewing outdoors without refrigeration, then a shorter 12-hour steep at room temperature is usually sufficient because warmer temps extract faster.
- If you notice a lot of sediment at the bottom of your steeped coffee, then use a coarser grind next time because fine grounds will settle out.
FAQ
How long does cold brew concentrate last?
It’s best to use it within 1-2 weeks when stored in an airtight container in the refrigerator. After that, the flavor can start to degrade.
Can I use any type of coffee bean?
Yes, but medium to dark roasts often yield a smoother, richer cold brew. Light roasts can sometimes come across as too acidic or bright for cold brew.
What’s the difference between cold brew and iced coffee?
Cold brew is brewed with cold water over a long period, resulting in a smooth, low-acid concentrate. Iced coffee is typically hot-brewed coffee that’s been chilled, which can retain more bitterness.
Why is my cold brew so bitter?
This is usually due to over-extraction. Try a coarser grind, a shorter steep time, or a less aggressive stir.
How do I make cold brew less acidic?
Cold brew is naturally less acidic than hot coffee because the cold water doesn’t extract as many acidic compounds. If it’s still too acidic for you, try a darker roast bean or a longer steep time.
What’s the best way to store cold brew?
Keep your concentrate in an airtight glass jar or bottle in the fridge. This prevents it from picking up other smells and keeps it fresh.
Do I have to use a special cold brew maker?
Nope. A simple mason jar, a French press, or even a pitcher with a strainer will work just fine. The key is the coarse grind and the long steep.
How much caffeine is in cold brew?
Cold brew concentrate can be quite potent. The actual caffeine content varies widely based on your coffee-to-water ratio and steep time, but it’s generally higher than hot coffee per ounce of concentrate. Always dilute it!
What this page does NOT cover (and where to go next)
- Specific equipment reviews or brand recommendations. (Look for product reviews for detailed comparisons.)
- Advanced cold brew techniques like nitrogen infusion or different extraction methods. (Explore coffee brewing forums or specialized coffee sites.)
- Detailed flavor profiling of different coffee origins for cold brew. (Visit roaster websites or coffee education resources.)
- Recipes for cold brew-based coffee drinks beyond simple dilution. (Search for “cold brew cocktails” or “cold brew recipes.”)