Making Espresso With the Ninja Coffee Bar
Quick Answer
- The Ninja Coffee Bar can produce a concentrated coffee beverage that resembles espresso, but it’s not true espresso made with high pressure.
- It uses a “Specialty Brew” setting to create a stronger, more concentrated coffee.
- For a closer espresso-like experience, use a finer grind and a higher coffee-to-water ratio.
- Adjusting the brew strength and size can help achieve a more intense flavor.
- While it won’t replace a dedicated espresso machine, it can deliver a satisfying base for coffee drinks.
- Experiment with different coffee beans and roast levels to find what works best for you.
Who This Is For
- Home coffee drinkers who own a Ninja Coffee Bar and want to make stronger coffee for drinks like lattes or cappuccinos.
- Those looking for a convenient way to get a concentrated coffee base without investing in a separate espresso machine.
- Individuals who enjoy experimenting with their coffee maker to achieve different brew styles.
If you’re looking for a convenient way to get a concentrated coffee base without the investment in a separate, dedicated concentrated coffee maker, the Ninja Coffee Bar’s Specialty Brew is a great option.

- Perfect Coffee Every Time: This pump-free coffee maker heats water to the correct temperature for coffee extraction
- Brew-Volume Selector switch for brewing half or full carafes Easy to Use: The Moccamaster brews a full 40 oz pot of coffee in 4-6 minutes using one switch
- Easy to Use: The Moccamaster brews a full 40 oz pot of coffee in 4-6 minutes using one switch
- Quiet and Safe: The Moccamaster Select quietly brews your coffee and automatically turns off after 100 minutes
- Delicious Coffee and Peace of Mind: Moccamaster coffee brewers have a 5-year warranty
This guide is perfect for home coffee drinkers who own a Ninja Coffee Bar and want to elevate their morning routine with stronger, espresso-like brews.
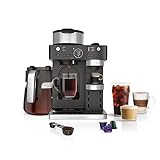
- BARISTA PLUS TECHNOLOGY: The 19-bar pressure system delivers ultra-flavorful espresso with a silky-smooth crema by brewing at the optimal temperature and pressure.
- COFFEEHOUSE DRINKS AT HOME: The built-in, fold-away frother allows you to create espresso-based cappuccinos, lattes, flat whites, and more.
- BREW SINGLE-SERVE ESPRESSO: Choose your favorite espresso capsule and brew up to 3 styles: Espresso (1.35 oz), Lungo (3.75 oz), and Over Ice (1 oz).
- BREW THROUGH COFFEE GROUNDS: Make a Classic, Rich, or Over Ice brew. Select 9 different sizes ranging from cup, to travel mug, to a full 12-cup carafe.
- VERSATILITY TO ENTERTAIN: Treat your guests to an espresso-based coffeehouse drink or brew a 12-cup carafe for the crowd.
What to Check First
Brewer Type and Filter Type
Your Ninja Coffee Bar is a drip coffee maker with a specific “Specialty Brew” function designed for concentrated coffee. It typically uses a permanent, reusable mesh filter.
- Brewer Type: You have a Ninja Coffee Bar with a Specialty Brew setting. This is crucial as not all Ninja models have this capability.
- Filter Type: Ensure you are using the correct, clean, permanent mesh filter that came with your machine. Disposable paper filters are generally not recommended for the Specialty Brew function, as they can clog or affect the flow rate needed for concentration. Check your manual to confirm the recommended filter type for this function.
Water Quality and Temperature
The quality and temperature of your water significantly impact the final brew.
- Water Quality: Use filtered water. Tap water can contain minerals that affect taste and can lead to scale buildup in your machine.
- Water Temperature: The Ninja Coffee Bar is designed to heat water to optimal brewing temperatures automatically. You don’t typically need to adjust this, but ensure the machine is functioning correctly and heating the water. For Specialty Brew, the machine aims for a hotter temperature to extract more from the grounds.
Grind Size and Coffee Freshness
The size of your coffee grounds and how recently they were roasted are critical for flavor extraction.
- Grind Size: For a more espresso-like concentrate, you’ll want a grind that is finer than standard drip coffee but not as fine as for true espresso. Aim for something between a fine and medium-fine grind. If the grind is too coarse, the water will pass through too quickly, resulting in weak coffee. If it’s too fine, it can clog the filter and lead to over-extraction and bitterness.
- Coffee Freshness: Use freshly roasted and freshly ground coffee beans. Coffee loses its aromatic compounds and flavor over time after roasting and grinding. Ideally, grind your beans just before brewing.
For a more espresso-like concentrate, you’ll want a grind that is finer than standard drip coffee. Investing in a quality coffee grinder fine can make a significant difference in achieving the right texture.

- THE DO-IT-ALL GRINDER: Opus is a powerful all-purpose grinder that grinds for the full range of coffee brewing styles—espresso, pour-over, electric coffee makers, French press, and cold brew—with 41+ easily adjustable settings.
- 40 MM STAINLESS STEEL CONICAL BURRS: A 6-blade 40 mm conical burr set and powerful motor with 6Nm of torque deliver outstanding consistency and flavor across all brewing styles.
- DESIGNED IN CALIFORNIA: Opus understands your countertop is valuable real estate. Designed in San Francisco by a small but mighty team, Fellow melds minimalist aesthetics with maximum functionality to help you brew better coffee and tea at home.
- EASE AT EVERY STEP: Use the volumetric dosing lid to measure beans for up to 12 cups of brewed coffee, pop the load bin lid for a grind guide so you’re never lost, make precision adjustments using the inner ring, and keep your settings in check with unique no-tool calibration.
- REDUCED GRIND RETENTION: Opus’s direct drop-down design from load bin to catch reduces grind retention, while the anti-static technology and spouted catch make for less chaff mess.
Coffee-to-Water Ratio
The amount of coffee grounds relative to water is key to achieving a concentrated brew.
- Ratio: For Specialty Brew, you’ll want to use more coffee grounds than you would for a standard cup. A good starting point is often around 1:10 to 1:12 (coffee to water by weight), whereas drip coffee might be closer to 1:15 or 1:17. For example, if you’re making a 4 oz beverage, you might start with 35-40 grams of coffee. Experimentation is key here, as personal preference varies.
- Measurement: Use a scale for the most accurate results, or a consistent scoop if a scale isn’t available.
Cleanliness/Descale Status
A clean machine ensures optimal performance and prevents off-flavors.
- Cleanliness: Ensure the brew basket, carafe, and water reservoir are clean before each use. Coffee oils can build up and turn rancid, affecting taste.
- Descaling: Follow your Ninja Coffee Bar’s manual for descaling instructions. Mineral buildup can impede water flow and heating, affecting brew quality and potentially damaging the machine. If you notice slower brewing times or inconsistent temperatures, it’s likely time to descale.
Step-by-Step: Brewing Espresso-Like Concentrate with the Ninja Coffee Bar
1. Prepare the Water Reservoir: Fill the water reservoir with fresh, filtered water to the desired brew size mark. For a concentrated brew, you might choose a smaller cup size (e.g., 4 oz, 6 oz) even if you want a larger final drink, as you’ll be adding milk or water later.
- What “good” looks like: The water level is clear and corresponds to the selected brew size.
- Common mistake: Using old or tap water.
- Avoid it by: Always using fresh, filtered water.
2. Add Coffee Grounds: Place the permanent brew basket in the brewer. Add your coffee grounds. For a concentrate, use a finer grind (between fine and medium-fine) and a higher coffee-to-water ratio. Start with roughly 2-3 tablespoons of coffee per 4 oz of water, or use a scale for precision (e.g., 35-40 grams of coffee for 4 oz of water).
- What “good” looks like: The grounds are evenly distributed in the brew basket.
- Common mistake: Using too little coffee or too coarse a grind.
- Avoid it by: Measuring your coffee and aiming for the recommended finer grind size.
3. Select Brew Size: Choose the smallest brew size that matches the amount of water you added to the reservoir (e.g., if you added water for 4 oz, select the 4 oz button).
- What “good” looks like: The selected brew size is illuminated on the control panel.
- Common mistake: Selecting a larger brew size than the water added.
- Avoid it by: Double-checking the water level and corresponding button.
4. Select Brew Type: Press the “Specialty Brew” button. This setting is designed to produce a more concentrated coffee.
- What “good” looks like: The “Specialty Brew” indicator light is on.
- Common mistake: Forgetting to select Specialty Brew and using the regular brew setting.
- Avoid it by: Ensuring the Specialty Brew button is activated before starting.
5. Select Brew Strength (if applicable): If your model has a brew strength selector (e.g., Rich, Over Ice), select the “Rich” or strongest option.
- What “good” looks like: The desired strength setting is clearly indicated.
- Common mistake: Leaving the strength on a milder setting.
- Avoid it by: Actively choosing the richest setting for concentration.
6. Place Carafe/Cup: Ensure the correct carafe or your desired mug is properly positioned on the warming plate or drip tray.
- What “good” looks like: The vessel is centered and stable.
- Common mistake: Not placing the vessel correctly, leading to spills.
- Avoid it by: Making sure the carafe or cup is fully seated.
7. Start the Brew Cycle: Press the “Start/Stop” button to begin the brewing process.
- What “good” looks like: The machine begins to heat and dispense coffee.
- Common mistake: Pressing the wrong button or not pressing it firmly enough.
- Avoid it by: Confirming the start button has been activated.
8. Monitor Brew: Watch as the coffee brews. The Specialty Brew cycle may run slightly differently than a standard brew, often with a slower initial drip.
- What “good” looks like: A dark, concentrated stream of coffee is flowing into your vessel.
- Common mistake: Assuming the brew is complete too early.
- Avoid it by: Allowing the machine to complete its full cycle.
9. Serve or Dilute: Once brewing is complete, carefully remove the carafe or mug. The resulting liquid is a concentrated coffee base.
- What “good” looks like: A small amount of very dark, aromatic coffee.
- Common mistake: Drinking the concentrate straight without realizing its intensity.
- Avoid it by: Understanding that this is a base and may need to be diluted or mixed.
10. Add Milk/Water (Optional): If you’re making a latte, cappuccino, or Americano, add steamed milk, cold milk, or hot water to your concentrated coffee to taste.
- What “good” looks like: A well-balanced beverage with your desired flavor and strength.
- Common mistake: Adding too much liquid, diluting the flavor too much.
- Avoid it by: Adding liquid gradually and tasting as you go.
Common Mistakes (and What Happens If You Ignore Them)
| Mistake | What It Causes | Fix |
|---|---|---|
| Using tap water | Off-flavors, mineral buildup (scale), reduced brewer efficiency. | Use filtered or bottled water. |
| Using a grind that’s too coarse | Weak, watery coffee lacking body and flavor; under-extraction. | Use a finer grind, closer to what you’d use for drip coffee, but not as fine as for true espresso. |
| Using a grind that’s too fine | Coffee grounds clogging the filter, slow brew, bitter/burnt taste; over-extraction. | Use a slightly coarser grind. |
| Not using enough coffee grounds | Diluted, weak flavor; lacks the “concentrated” quality desired. | Increase the amount of coffee grounds used, aiming for a higher coffee-to-water ratio. |
| Forgetting to select “Specialty Brew” | Produces regular drip coffee, not a concentrated base. | Ensure the “Specialty Brew” button is pressed before starting the brew cycle. |
| Using stale coffee beans | Flat, dull, or even unpleasant flavors; lack of aroma and vibrancy. | Use freshly roasted beans and grind them just before brewing. |
| Not cleaning the brew basket regularly | Rancid coffee oils impart bitter, stale flavors to fresh brews. | Wash the brew basket thoroughly after each use. |
| Neglecting to descale the machine | Slower brewing, inconsistent water temperature, potential machine damage. | Follow the manufacturer’s instructions for regular descaling. |
| Brewing with old, leftover coffee | Stale, bitter taste; lacks freshness and aroma. | Always brew with fresh grounds and fresh water. |
| Overfilling the brew basket with grounds | Grounds can bypass the filter, leading to a messy brew and gritty coffee. | Ensure grounds do not go above the fill line of the brew basket. |
Decision Rules for Espresso-Like Concentrate
- If your coffee tastes weak and watery, then increase the amount of coffee grounds you are using because you likely have too low a coffee-to-water ratio.
- If your coffee tastes bitter or burnt, then try a slightly coarser grind because your grounds might be too fine, leading to over-extraction.
- If your coffee tastes bland and lacks flavor, then use fresher coffee beans and grind them immediately before brewing because stale coffee loses its aromatic compounds.
- If the brew cycle seems to take longer than usual or the coffee flow is slow, then check if your grounds are too fine or if the machine needs descaling because fine grounds can clog the filter and scale can impede water flow.
- If you want a stronger base for a latte, then use the “Specialty Brew” setting and consider a finer grind because this setting is designed for concentration.
- If you are making an Americano, then brew a concentrated coffee first using Specialty Brew, and then add hot water because this mimics the espresso-to-water ratio.
- If the coffee tastes off, then ensure you are using filtered water because tap water can introduce unwanted flavors and minerals.
- If you’re not getting a good crema (the frothy layer), then understand that the Ninja Coffee Bar’s pressure is not high enough for true espresso crema because it lacks the necessary pump mechanism.
- If you are making an iced coffee drink, then brew a concentrate and pour it over ice because this will prevent excessive dilution as the ice melts.
- If you desire a more intense flavor, then experiment with darker roast beans because they generally have bolder, more robust profiles suitable for concentrated brews.
FAQ
Can the Ninja Coffee Bar make true espresso?
No, the Ninja Coffee Bar cannot make true espresso. True espresso requires high pressure (typically 9 bars) generated by a dedicated espresso machine. The Ninja Coffee Bar uses a drip brewing method, even on its Specialty Brew setting, which does not achieve the necessary pressure.
What is “Specialty Brew” on the Ninja Coffee Bar?
“Specialty Brew” is a setting designed to create a more concentrated, stronger coffee beverage. It typically uses a different water flow and temperature to extract more flavor from the coffee grounds than a standard brew cycle.
How can I make the coffee from my Ninja Coffee Bar stronger?
To make the coffee stronger, use the “Specialty Brew” setting, a finer grind (but not espresso-fine), and a higher coffee-to-water ratio. Ensure you are using fresh, quality coffee beans.
Will I get crema from the Ninja Coffee Bar?
You will likely not get the thick, stable crema associated with true espresso. The Specialty Brew might produce a very thin, short-lived layer of foam, but it’s not the same as espresso crema due to the lack of high pressure.
What’s the best way to use the Ninja Coffee Bar concentrate for lattes?
Brew a concentrate using Specialty Brew. Then, steam or froth your milk separately and combine the concentrate with the frothed milk to your desired taste. You might add a little hot water if the concentrate is too intense for your liking before adding milk.
How much coffee should I use for Specialty Brew?
For Specialty Brew, you should use more coffee grounds than for a regular cup. A good starting point is around 2-3 tablespoons of coffee per 4 oz of water, or approximately 35-40 grams of coffee for 4 oz of water. Experiment to find your preferred strength.
Can I use paper filters with Specialty Brew?
While some Ninja models might allow it, it’s generally recommended to use the permanent mesh filter for Specialty Brew. Paper filters can sometimes clog with finer grinds or alter the flow rate, potentially affecting the concentration. Check your manual for specific recommendations.
What This Page Does Not Cover (and Where to Go Next)
- Achieving true espresso crema and texture. For this, you would need to explore dedicated espresso machines.
- Specific recommendations for milk frothing and steaming techniques. This often requires separate appliances or techniques.
- Detailed comparisons between different types of coffee beans and their suitability for concentrated brews. Exploring coffee origins and roast profiles can be a next step.
- Advanced brewing techniques like temperature surfing or pressure profiling, which are exclusive to more sophisticated coffee equipment.