Making Decaf Coffee Kombucha: A Guide
Quick Answer
- Yes, you can make decaf coffee kombucha.
- Decaffeination processes can affect the coffee’s flavor and the final kombucha’s taste.
- The most common decaffeination methods are Swiss Water Process and CO2 Process, which are generally preferred for kombucha brewing.
- Expect a less robust coffee flavor in your decaf kombucha compared to one made with regular coffee.
- You’ll still need a SCOBY and starter liquid, just as you would for regular coffee kombucha.
- Adjust your expectations for the caffeine kick; it will be minimal to non-existent.
Who This Is For
- Individuals who enjoy the fermented tang of kombucha but want to avoid caffeine.
- Coffee enthusiasts looking for novel ways to experiment with brewing and fermentation.
- Home brewers seeking to create a unique, low-caffeine beverage with a coffee twist.
If you’re looking to dive into making your own decaf coffee kombucha, a comprehensive kombucha brewing kit can provide you with many of the essential tools to get started.
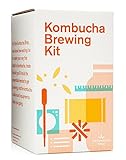
- MADE BY KOMBUCHA BREWERS FOR KOMBUCHA BREWERS: This kit has everything you need to start brewing your own kombucha at home. Our best in the industry kombucha cultures, equipment, and instruction will turn you into a kombucha-brewing rockstar in no time.
- QUALITY PRODUCTS: Our 1 Gal. Brew Jar is made of thick American glass and US MADE pH Test Strips and Temperature Gauge will help you monitor your brew's progress. Need Help? Our support team is here to quickly answer any of your questions along the way.
- EXPERT KNOWLEDGE: More educational material than any other kit on the market - our fan favorite Brewing Instructions and Post Brewing-Guide take all the guesswork out of brewing kombucha for the first time. We ensure your brewing success!
- CERTAIN TO GROW: Our cultures are grown in our Madison, WI brewery using triple filtered water, high-quality sugar and lose leaf tea, plus our six-week aged kombucha starter. We guarantee your first batch to ferment or we'll send a free replacement.
- THE PERFECT PRESENT: This complete and beautiful kit is sure to be the perfect present for any kombucha fan in your life. All of our kits are entirely shelf stable so you can order and ship worry free! They'll love it, we promise.
What to Check First
Brewer Type and Filter Type
This applies if you are brewing the coffee from scratch for your kombucha. The method you use to brew the coffee will impact its flavor profile. Drip coffee makers, French presses, or pour-over devices can all be used. The key is to brew a concentrated coffee that will serve as the base for your kombucha.
Water Quality and Temperature
For the best results, use filtered water. Tap water can contain chlorine or other minerals that may interfere with the fermentation process or impart off-flavors. The brewing temperature of your coffee should be within the range recommended for your chosen brewing method, typically between 195-205°F. This ensures proper extraction of coffee solubles.
Grind Size and Coffee Freshness
The grind size will depend on your brewing method. For a French press, a coarse grind is best, while a medium grind is suitable for drip coffee makers. For decaf coffee, freshness is still important, though the flavor intensity might be lower than with regular beans. Use freshly ground decaf beans if possible for the best aroma and taste.
Coffee-to-Water Ratio
When making the coffee base for your kombucha, you’ll want a more concentrated brew than you might typically drink. A good starting point is a ratio of 1:4 or 1:5 (coffee to water by weight or volume). For example, using 4 oz of coffee grounds for 16-20 oz of water. This provides enough “food” for the SCOBY to ferment effectively.
Cleanliness/Descale Status
Ensure all your brewing equipment, fermentation vessels, and any tools that come into contact with your kombucha are thoroughly cleaned and sanitized. Any residue from previous brews or cleaning agents can negatively impact your decaf coffee kombucha. A clean environment is crucial for successful fermentation and to prevent mold growth.
Step-by-Step (Brew Workflow)
1. Prepare Your Decaf Coffee: Brew a strong batch of decaf coffee using your preferred method. Aim for a concentrated brew, such as a 1:4 coffee-to-water ratio.
- What “good” looks like: A rich, dark liquid with a pleasant aroma, brewed to the correct strength.
- Common mistake: Brewing a weak coffee. This can lead to insufficient nutrients for the SCOBY and a less flavorful kombucha.
- How to avoid: Measure your coffee grounds and water carefully, and use a brewing method that allows for strong extraction.
2. Cool the Coffee: Allow the brewed decaf coffee to cool down to room temperature, ideally between 68-78°F.
- What “good” looks like: The coffee is no longer hot to the touch.
- Common mistake: Adding hot coffee to the SCOBY. Heat will kill the beneficial bacteria and yeast in your SCOBY and starter liquid.
- How to avoid: Use a thermometer or be patient and let it cool completely.
3. Combine Coffee, Water, and Sugar: In your clean fermentation vessel, combine the cooled decaf coffee with filtered water and the appropriate amount of sugar. The sugar is food for the SCOBY. A common ratio is 1 cup of sugar per gallon of liquid.
- What “good” looks like: A well-mixed liquid with the sugar fully dissolved.
- Common mistake: Not dissolving the sugar completely. Undissolved sugar can lead to uneven fermentation.
- How to avoid: Stir thoroughly until no sugar granules remain.
For successful brewing, ensure you have a clean fermentation vessel ready. A wide-mouth glass jar is ideal for this stage of the process.

- MAKE YOUR OWN SAUERKRAUT, KIMCHI, AND PICKLES - The Kenley fermentation crock is a natural and easy way to make sauerkraut, kimchi, pickles, and more at home. With a 1/2-gallon capacity, it can hold up to 3.2lb of vegetables, making it perfect for small batches.
- HIGH-GRADE CERAMIC AND FOOD-SAFE COATING - Crafted from the finest natural stoneware, this authentic fermentation jar ensures that the flavors you taste come only from your vegetables. A carefully designed, food-safe coating prevents oxidation and improves temperature stability, resulting in well-preserved and delicious fermented vegetables.
- GAME-CHANGING WATER SEAL - The Kenley 1/2 gallon sauerkraut crock is designed to make fermentation easy so you get great results every time. The water seal lid lets fermentation gases escape while keeping air out, ensuring your vegetables are properly preserved and taste great.
- ENHANCE FERMENTATION WITH WEIGHTS AND POUNDER - The fermentation crock comes with unglazed weighting stones to keep all kimchi or sauerkraut submerged under the brine during fermentation. The pounder is added to pack down the cabbage, releasing its juices and speeding up the fermentation process.
- EASY TO USE AND CARE FOR - The fermenting crock is double-glazed for easy cleaning and care. To clean, simply remove any stray vegetable matter when empty, wash with your usual washing-up liquid, and dry fully. Sturdy yet elegant, the Kenley fermentation crock looks great on any countertop.
4. Add Starter Liquid: Pour in your starter liquid. This is unflavored kombucha from a previous batch, which helps to lower the pH and kickstart the fermentation. Aim for about 1-2 cups of starter liquid per gallon of brew.
- What “good” looks like: The liquid is now a lighter color with a slightly tangy scent.
- Common mistake: Using too little starter liquid. This can result in a longer fermentation time and a higher risk of contamination.
- How to avoid: Measure your starter liquid accurately.
5. Introduce the SCOBY: Gently place your SCOBY into the fermentation vessel. It might float, sink, or hover, all of which are normal.
- What “good” looks like: The SCOBY is submerged or partially submerged in the liquid.
- Common mistake: Damaging the SCOBY. Handle it with clean hands or utensils.
- How to avoid: Be gentle and avoid dropping or tearing the SCOBY.
6. Cover the Vessel: Cover the opening of the fermentation vessel with a breathable cloth, such as cheesecloth or a tight-weave kitchen towel. Secure it with a rubber band or string.
- What “good” looks like: The cover is secure and allows air in but keeps insects and debris out.
- Common mistake: Using an airtight lid. This can lead to pressure buildup and prevent the necessary air exchange for fermentation.
- How to avoid: Always use a breathable cover.
7. Ferment (First Fermentation): Place the vessel in a dark, quiet spot at room temperature (68-78°F) for 7-14 days.
- What “good” looks like: The liquid is bubbling gently, and a new SCOBY layer may be forming on the surface.
- Common mistake: Disturbing the brew too often. This can disrupt the nascent SCOBY and the fermentation process.
- How to avoid: Resist the urge to stir or move the vessel unnecessarily.
8. Taste Test: After about 7 days, begin tasting your decaf coffee kombucha using a clean straw or spoon.
- What “good” looks like: The kombucha has a pleasant balance of sweet and tart, with a subtle coffee note.
- Common mistake: Waiting too long to taste. This can result in overly sour kombucha.
- How to avoid: Start tasting early and often to find your preferred flavor profile.
9. Bottle (Optional Second Fermentation): Once the kombucha reaches your desired taste, you can bottle it for a second fermentation. Add flavorings if desired.
- What “good” looks like: The kombucha is transferred into airtight bottles, leaving some headspace.
- Common mistake: Overfilling the bottles. This can lead to exploding bottles due to carbonation buildup.
- How to avoid: Leave about an inch of headspace in each bottle.
10. Carbonate (Second Fermentation): Let the bottled kombucha sit at room temperature for 1-3 days to build carbonation.
- What “good” looks like: The bottles feel firm when squeezed, indicating carbonation.
- Common mistake: Not “burping” the bottles. This can lead to excessive pressure and potential explosions.
- How to avoid: Open bottles carefully to release excess pressure daily during this stage.
11. Refrigerate: Once carbonated to your liking, refrigerate the bottles to stop fermentation and chill the kombucha.
- What “good” looks like: Cold, fizzy decaf coffee kombucha ready to drink.
- Common mistake: Drinking it too warm. The flavors are best when chilled.
- How to avoid: Ensure it’s thoroughly chilled before serving.
Common Mistakes (and What Happens If You Ignore Them)
| Mistake | What it Causes | Fix |
|---|---|---|
| Using hot coffee | Kills the SCOBY and starter culture, halting fermentation. | Allow coffee to cool completely to room temperature (68-78°F) before adding SCOBY. |
| Insufficient starter liquid | Slower fermentation, increased risk of mold or contamination. | Use at least 1-2 cups of starter liquid per gallon of brew. |
| Using tap water | Chlorine or minerals can inhibit fermentation or create off-flavors. | Always use filtered or spring water. |
| Not dissolving sugar completely | Uneven fermentation, potential for mold growth, less sweet final product. | Stir vigorously until all sugar is fully dissolved. |
| Using an airtight lid for F1 | Prevents necessary airflow, can lead to pressure buildup and spoilage. | Always use a breathable cloth cover secured with a rubber band. |
| Contaminated equipment | Mold growth, off-flavors, or complete spoilage of the batch. | Thoroughly clean and sanitize all equipment before brewing. |
| Overly strong decaf coffee | Can result in a very tart or vinegary kombucha, even with shorter fermentation. | Start with a moderate coffee concentration and adjust based on taste preferences. |
| Not tasting during fermentation | Over-fermented, excessively sour kombucha. | Taste your brew regularly starting around day 7 to find your ideal tartness. |
| Overfilling bottles for F2 | Risk of exploding bottles due to excessive carbonation. | Leave adequate headspace (about 1 inch) in each bottle. |
| Not burping bottles during F2 | Can lead to dangerous pressure buildup and potential bottle explosions. | Open bottles daily during the second fermentation to release excess gas. |
| Using decaf coffee with chemicals | Potential for unwanted chemical residues in the final product. | Opt for naturally processed decaf options like Swiss Water or CO2 Process. |
| Not enough sugar | Insufficient food for the SCOBY, leading to weak fermentation. | Use the recommended amount of sugar (typically 1 cup per gallon). |
Decision Rules
- If the coffee smells musty or off, then discard the batch and start over because this indicates contamination.
- If you see fuzzy mold on the surface, then discard the batch and start over because mold is a sign of spoilage.
- If the brew is too sweet after 10 days, then continue fermenting for a few more days because it needs more time to convert sugars.
- If the brew is too tart after 7 days, then bottle it for the second fermentation or refrigerate it because it has fermented enough for your taste.
- If you are new to kombucha brewing, then start with a less concentrated coffee brew because it’s more forgiving for beginners.
- If your SCOBY is struggling to form a new layer, then check your starter liquid quality and fermentation temperature because these are critical factors.
- If you want a more pronounced coffee flavor, then try a cold brew decaf concentrate as your base because it can extract different flavor compounds.
- If you experience excessive foam during the first fermentation, then ensure your breathable cover is secure to prevent overflow because this is a normal sign of active fermentation.
- If the decaf coffee has a chemical aroma, then it’s best to avoid it for kombucha brewing because those chemicals might interfere with fermentation or be undesirable in the final drink.
- If you are sensitive to even trace amounts of caffeine, then ensure your decaf coffee is certified truly caffeine-free by checking the packaging.
FAQ
Can I use any decaf coffee?
Generally, yes, but it’s best to use decaf coffee processed using methods like the Swiss Water Process or CO2 Process. These methods are chemical-free and tend to preserve more of the coffee’s original flavor compounds, which can translate better into your kombucha.
Will my decaf coffee kombucha taste like regular coffee kombucha?
It will likely have a more subtle coffee flavor. Decaffeination processes remove much of the coffee’s oils and flavor compounds, so expect a less intense coffee profile in your final brew.
How long does it take to make decaf coffee kombucha?
The first fermentation typically takes 7-14 days, depending on the temperature and your desired tartness. The second fermentation for carbonation usually takes an additional 1-3 days.
Is decaf coffee kombucha completely caffeine-free?
Most decaf coffee contains trace amounts of caffeine, usually less than 3% of the original amount. If you are extremely sensitive, you might still react, but for most people, it will be negligible.
What if my SCOBY doesn’t grow a new layer?
This can happen if the coffee base is too weak, the starter liquid is insufficient, or the temperature is too low. Ensure you’re using a strong brew, enough starter liquid, and maintaining a consistent room temperature.
Can I add flavorings to my decaf coffee kombucha?
Yes, absolutely. After the first fermentation, you can add fruits, herbs, spices, or extracts to the bottles for a second fermentation. This is a great way to enhance the flavor profile.
What does the coffee do in kombucha?
Coffee provides nutrients (sugars, nitrogen, acids) for the SCOBY to consume, driving the fermentation process. It also contributes to the flavor profile of the final kombucha.
How do I store my decaf coffee kombucha?
Once carbonated to your liking, store it in airtight bottles in the refrigerator. This slows down fermentation and keeps it fizzy.
What This Page Does Not Cover (and Where to Go Next)
- Detailed scientific explanations of decaffeination processes.
- Specific brand recommendations for decaf coffee beans or kombucha ingredients.
- Advanced techniques for flavor pairing or troubleshooting complex fermentation issues.
- Recipes for specific flavor combinations beyond the basic brewing process.