Making Dalgona Coffee With A Stand Mixer
Quick answer
- Yes, a stand mixer is an excellent tool for making dalgona coffee, significantly reducing effort compared to manual whisking.
- Use the whisk attachment for optimal aeration and speed.
- Start on a low speed and gradually increase to medium-high.
- Aim for stiff peaks that hold their shape when the whisk is lifted.
- Don’t overmix, as this can cause the foam to collapse.
- Ensure your ingredients are at room temperature for best results.
For optimal aeration and speed when making dalgona coffee, ensure you’re using the right tool. A stand mixer whisk attachment is perfect for this task, significantly reducing the effort required compared to manual whisking.
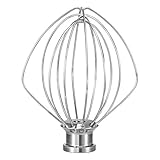
- THICKER 6 WIRES: the whisk consists of six strengthened and thicker wires, which is durable and last an extended life for making fluffy whipped cream, perfect boiled frostings and cakes with whipped egg whites
- DISHWASHER SAFE: the whole whisk is made from premier 18/8 (304) stainless steel, which is rustproof and corrosion resistant. You’ll have no worry to put the whisk into a dishwasher to clean
- PRECISE COMPATIBILITY: the whisk is manufactured up to original standards and it will perfectly fit KitchenAid K45, K45SS, KSM75, KSM90, KSM95, KSM100, KSM103, KSM110 stand mixer models
- REINFORCED: with the solid stainless steel hub the stainless steel wires can be firmly pushed in the hub and avoid that the wires detach from the hub while the mixer spinning
Who this is for
- Home baristas looking for an easier way to achieve perfect dalgona coffee foam.
- Those who want to make larger batches of dalgona coffee without arm fatigue.
- Anyone with a stand mixer who wants to explore its versatility beyond baking.
What to check first
Brewer type and filter type
While this guide focuses on dalgona coffee, which is a whipped topping, the base coffee you use can be made with various methods. If you’re brewing coffee for the base of your dalgona, ensure your brewing device (drip machine, pour-over, French press) and its corresponding filter are clean and ready. For dalgona itself, no specific brewer or filter is required, only the ingredients and a way to whip them.
Water quality and temperature
For the coffee base, use filtered water if your tap water has a strong taste. The ideal temperature for brewing coffee is typically between 195°F and 205°F. For the whipped topping, room temperature water is usually sufficient.
Grind size and coffee freshness
If brewing a coffee base, the grind size depends on your chosen brewing method. Drip machines generally use a medium grind, while French presses use a coarse grind. Freshly roasted and ground coffee beans will yield the best flavor for your base. For the dalgona foam, instant coffee is standard, so freshness is less of a concern than for brewed coffee.
Coffee-to-water ratio
The standard ratio for brewed coffee is often around 1:15 to 1:18 (coffee to water by weight). For the dalgona topping, the ratio of instant coffee, sugar, and hot water is typically 1:1:1 by volume. Adjusting this can change the sweetness and intensity of the coffee flavor in your foam.
Cleanliness/descale status
A clean stand mixer bowl and whisk attachment are crucial for successful whipping. Any grease or residue can prevent the foam from forming properly. If you haven’t used your stand mixer in a while, give the bowl and whisk a thorough wash.
Step-by-step (brew workflow)
1. Gather your ingredients: You will need instant coffee, granulated sugar, hot water, and milk (dairy or non-dairy).
- What “good” looks like: All ingredients are measured and within reach.
- Common mistake: Not measuring ingredients beforehand. This can lead to an unbalanced flavor or texture.
- How to avoid: Measure everything into separate bowls or cups before you start.
2. Add ingredients to the stand mixer bowl: Place the measured instant coffee, granulated sugar, and hot water into the clean bowl of your stand mixer.
- What “good” looks like: All three ingredients are in the bowl, ready to be mixed.
- Common mistake: Using cold water. This will make it much harder for the ingredients to dissolve and emulsify.
- How to avoid: Ensure your water is hot, but not boiling, to help dissolve the sugar and coffee quickly.
3. Attach the whisk: Secure the whisk attachment to your stand mixer.
- What “good” looks like: The whisk is firmly in place.
- Common mistake: Forgetting to attach the whisk or using the wrong attachment.
- How to avoid: Double-check that the whisk is locked into the mixer head.
4. Start mixing on low speed: Begin mixing the ingredients on the lowest speed setting of your stand mixer.
- What “good” looks like: The ingredients are just starting to combine without splashing excessively.
- Common mistake: Starting on high speed. This will cause a significant mess as the dry ingredients can fly out of the bowl.
- How to avoid: Always start slow and gradually increase the speed.
5. Gradually increase speed: As the mixture starts to combine, slowly increase the speed to medium-high.
- What “good” looks like: The mixture is visibly aerating and beginning to lighten in color.
- Common mistake: Leaving the mixer on a low speed. This will take a very long time to achieve the desired foam consistency.
- How to avoid: Don’t be afraid to ramp up the speed to medium-high to speed up the process.
6. Whip until stiff peaks form: Continue whipping until the mixture thickens considerably and forms stiff peaks. This means when you lift the whisk, the foam should hold its shape without drooping.
- What “good” looks like: The mixture has transformed into a thick, glossy, light brown foam that stands upright.
- Common mistake: Under-whipping. The foam will be too thin and will quickly dissolve into your milk.
- How to avoid: Whip until the mixture is noticeably thick and holds its shape. This usually takes several minutes.
7. Stop and scrape down the bowl (if needed): Periodically, you might need to stop the mixer and scrape down the sides of the bowl with a spatula to ensure all ingredients are incorporated.
- What “good” looks like: All the mixture is incorporated into the whipped foam.
- Common mistake: Not scraping down the sides. Unmixed ingredients can lead to an inconsistent foam.
- How to avoid: Use a spatula to push any clinging ingredients from the sides into the main mixture.
8. Overmixing warning: Be mindful not to overmix. Overmixing can cause the foam to become dry, grainy, or even collapse.
- What “good” looks like: The foam is thick, glossy, and holds its shape.
- Common mistake: Continuing to whip after stiff peaks have formed. This can break down the structure of the foam.
- How to avoid: Stop mixing as soon as you achieve stiff peaks.
9. Prepare your serving glass: Fill a glass with ice and your desired milk.
- What “good” looks like: The glass is ready to receive the coffee foam.
- Common mistake: Not having the milk and glass ready. The foam can start to deflate if left sitting too long.
- How to avoid: Prepare your milk and glass while the foam is whipping or immediately after.
10. Top with dalgona foam: Spoon the whipped dalgona coffee foam generously over the milk.
- What “good” looks like: A beautiful, fluffy layer of coffee foam sits atop the milk.
- Common mistake: Trying to pour the foam. Spooning gives you more control and preserves the foam’s texture.
- How to avoid: Use a spoon to gently place the foam onto the milk.
11. Stir before drinking: Encourage the drinker to stir the foam into the milk before enjoying.
- What “good” looks like: The layers are beginning to blend, creating a delicious drink.
- Common mistake: Not stirring. This results in separate layers of very sweet foam and plain milk.
- How to avoid: Remind whoever is drinking it to stir to combine the flavors.
Common mistakes (and what happens if you ignore them)
| Mistake | What it causes | Fix |
|---|---|---|
| Using cold ingredients | Foam won’t emulsify properly, takes much longer to whip, may never reach peaks. | Ensure instant coffee, sugar, and water are at room temperature or warm (water should be hot, but not boiling). |
| Starting mixer on high speed | Splattering dry ingredients everywhere, creating a mess. | Always start on the lowest speed and gradually increase to medium-high. |
| Not using enough whisking time | Foam is thin, watery, and collapses quickly into the milk. | Whip for several minutes until stiff peaks form; this is the most critical step for texture. |
| Overmixing the foam | Foam becomes dry, grainy, or breaks down and deflates. | Stop whipping as soon as stiff peaks form; do not continue past this point. |
| Using brewed coffee instead of instant | Brewed coffee does not contain the necessary emulsifiers to create stable foam. | Dalgona traditionally uses instant coffee. If you prefer brewed, you’d need a different recipe or technique. |
| Not cleaning the stand mixer bowl/whisk | Fat or residue can prevent the foam from forming or create an off-flavor. | Wash the bowl and whisk thoroughly before use, ensuring no grease is present. |
| Incorrect coffee-to-sugar-to-water ratio | Foam is too sweet, not sweet enough, or too weak/strong in coffee flavor. | Stick to the 1:1:1 ratio by volume for instant coffee, sugar, and hot water as a starting point and adjust to your preference. |
| Trying to pour the foam | Foam can break apart and lose its airy texture. | Use a spoon to gently scoop and place the foam on top of the milk for best presentation and texture. |
| Not preparing milk and glass first | Foam can deflate while you’re busy preparing the base. | Have your milk, ice, and glass ready before you finish whipping the foam. |
| Using old or stale instant coffee | Foam may not whip as well or may have a less pleasant flavor. | Use fresh, good-quality instant coffee for the best results. |
Decision rules (simple if/then)
- If the foam is not thickening after 3 minutes on medium-high speed, then check if your water was hot enough because heat helps dissolve ingredients and start the emulsification process.
- If the foam looks too liquidy and is collapsing, then continue whipping for another 1-2 minutes because it likely just needs more time to reach stiff peaks.
- If the foam looks dry and crumbly, then you have overmixed, and it’s best to start over because the structure has been damaged.
- If you see large sugar granules at the bottom of the bowl, then stop and scrape down the sides because they haven’t been incorporated into the foam.
- If your foam has a grainy texture, then it’s likely due to undissolved sugar or overmixing, so try to re-whip gently or start again with warmer water.
- If the foam is very airy but collapses almost immediately, then it might be under-whipped, so give it another minute or two on medium-high speed.
- If you want a less sweet dalgona, then reduce the sugar by a quarter or a third, but be aware this might slightly affect the foam’s stability.
- If you prefer a stronger coffee flavor, then use a slightly higher ratio of instant coffee (e.g., 1.5 parts coffee to 1 part sugar and water), but this can also affect foam texture.
- If your stand mixer has a splash guard, then use it to minimize mess, especially when starting on low speed.
- If the foam seems too stiff and hard to spoon, then you can add a tiny splash of water (1/2 teaspoon) and whip briefly to loosen it.
- If you’re making a larger batch, then you might need to whip for a longer duration, but always watch for the stiff peak stage.
- If you’re using a very powerful stand mixer, then you might reach stiff peaks faster, so keep a close eye on the mixture.
FAQ
Can I use regular coffee instead of instant coffee for dalgona?
No, dalgona coffee specifically relies on instant coffee. Instant coffee has properties that allow it to emulsify and whip into a stable foam, which brewed coffee cannot achieve.
How long does it take to make dalgona coffee with a stand mixer?
Typically, it takes about 5-10 minutes of whipping time on medium-high speed, depending on your mixer’s power and the ingredients’ starting temperature.
What kind of sugar should I use?
Granulated white sugar is the most common and works best. You can experiment with other sugars, but they may affect the texture and stability of the foam.
Can I make dalgona coffee ahead of time?
The whipped foam is best used immediately after whipping for optimal texture. If stored, it can deflate or dry out.
My foam is collapsing. What did I do wrong?
This usually happens if the foam is under-whipped, over-whipped, or if the ingredients weren’t properly combined initially. Ensure you whip until stiff peaks form and stop as soon as they do.
What milk is best for dalgona coffee?
Any milk works, including dairy milk, almond milk, oat milk, or soy milk. The choice depends on your personal preference for taste and dietary needs.
Can I adjust the sweetness of the dalgona foam?
Yes, you can adjust the sugar. However, significantly reducing sugar might impact the foam’s ability to hold its shape.
Is it possible to make dalgona coffee without a stand mixer?
Yes, you can make it by hand with a whisk, but it requires significant arm strength and time, often 10-15 minutes or more of vigorous whisking.
What this page does NOT cover (and where to go next)
- Detailed recipes for brewed coffee bases (e.g., pour-over, French press).
- Specific recommendations for brands of instant coffee.
- Advanced techniques for creating latte art with the dalgona foam.
- Nutritional information or calorie counts for dalgona coffee.
- Troubleshooting for issues with stand mixer mechanics.