Make Cold Brew Coffee At Home Using Instant Coffee
Quick Answer: How to Make Homemade Cold Brew with Instant Coffee
- Instant coffee is a surprisingly effective shortcut for cold brew, offering convenience without sacrificing flavor.
- The key is to dissolve the instant coffee thoroughly in a small amount of hot water before adding cold water and ice.
- Aim for a concentrated brew by using more instant coffee than you would for a regular cup.
- Allow at least 12-24 hours for steeping, even with instant coffee, to develop its characteristic smooth, low-acidity profile.
- Adjust the coffee-to-water ratio to achieve your desired strength, remembering that instant coffee can be potent.
- Always taste and adjust sweetness or creaminess before serving.
Who This Is For
- Busy individuals who want delicious cold brew but have limited time for traditional brewing methods.
- Beginner home baristas looking for a foolproof way to experiment with cold brew without specialized equipment.
- Anyone who enjoys the smooth, less acidic taste of cold brew but wants a quick and easy recipe using readily available instant coffee.
What to Check First
Before you start, a few checks will ensure your instant coffee cold brew turns out great.
Brewer Type and Filter Type
While this recipe focuses on instant coffee, the concept of steeping still applies. You’ll primarily be using a jar or pitcher.
- Container: A clean glass jar with a lid or a pitcher is ideal. Ensure it’s large enough to hold your desired amount of liquid and ice.
- Filtering (Optional): If you choose to strain out any fine coffee particles, a fine-mesh sieve or a cheesecloth can be helpful, though often unnecessary with instant coffee.
For this recipe, a clean glass jar with a lid is ideal for steeping your cold brew. You can find a great selection on Amazon.
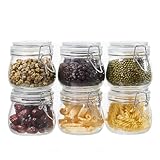
- 【Premium Glass Jars with Airtight Lids】These airtight glass jars feature a wire clip fastening system with clear preserving seals, locking in freshness and flavor. Ideal for dry goods and long-term food storage.
- 【Perfect Size: 17 oz Capacity – Set of 6】Each jar holds 17oz, just right for storing beans, flour, sugar, cereal, pasta, or snacks. Comes as a 6 pack to organize your kitchen efficiently.
- 【Durable & Safe Food Storage Containers】Made from thick, lead-free, glass food storage containers that are BPA-free, odor-resistant, and safe for everyday use.
- 【Multi-Purpose Glass Canisters for Kitchen & Pantry】Great for kitchen canning and pickling jars – also suitable for DIY jam, honey, kimchi, spices, and more. A functional and elegant solution for pantry storage jars.
- 【Stylish & Practical Storage Jars】Sleek square design saves space and looks beautiful on shelves. These glass storage jars are easy to stack and clean, combining utility with minimalist decor.
Water Quality and Temperature
Water is the main ingredient, so its quality matters.
- Quality: Use filtered water if your tap water has a strong taste or odor. This will prevent off-flavors from impacting your cold brew.
- Temperature: You’ll start with a small amount of hot water to dissolve the instant coffee, then add cold water. The initial hot water should be hot enough to dissolve the coffee but not boiling – around 180-200°F (82-93°C) is sufficient. The majority of the water will be cold.
Grind Size and Coffee Freshness
For instant coffee, these concepts are interpreted differently.
- “Grind” Size: Instant coffee is already processed into fine granules or powder. The key is ensuring these granules fully dissolve.
- Freshness: While traditional coffee freshness is crucial, instant coffee generally has a longer shelf life. However, older instant coffee might lose some of its aromatic qualities. Use a product that smells fresh.
Coffee-to-Water Ratio
This is where you’ll customize the strength of your cold brew.
- Concentration: For cold brew, you typically want a concentrate that you’ll dilute later. A good starting point is a ratio of 1 part instant coffee to 4-6 parts total liquid (including water and any milk you might add later).
- Experimentation: This is a guideline. If you prefer stronger coffee, use more instant coffee. If you prefer it milder, use less.
Cleanliness/Descale Status
A clean brewing environment is essential for good-tasting coffee.
- Container: Wash your jar or pitcher thoroughly with soap and water. Any residue from previous uses can impart unwanted flavors.
- Equipment: Ensure any utensils or strainers you use are also clean.
Step-by-Step: Instant Coffee Cold Brew Workflow
This process simplifies cold brew by leveraging the instant nature of the coffee.
1. Measure Instant Coffee:
- What to do: Measure your instant coffee granules or powder. For a concentrate, start with about 2-3 tablespoons per 8 oz of total liquid you plan to make.
- What “good” looks like: You have a measured amount of instant coffee ready to be dissolved.
- Common mistake: Using too little instant coffee, resulting in a weak brew. Avoid this by measuring generously for a concentrate.
2. Add Hot Water:
- What to do: Pour a small amount of hot (not boiling) water into your container, just enough to cover the instant coffee.
- What “good” looks like: The instant coffee is submerged in a small pool of hot water.
- Common mistake: Using cold water initially, which makes dissolving instant coffee difficult and can lead to clumps. Always use a little hot water first.
3. Dissolve the Coffee:
- What to do: Stir the hot water and instant coffee vigorously until all granules are completely dissolved and no clumps remain.
- What “good” looks like: A smooth, dark liquid with no visible coffee particles.
- Common mistake: Incomplete dissolution, leaving gritty coffee at the bottom. Stir thoroughly until perfectly smooth.
4. Add Cold Water:
- What to do: Pour in the remaining cold, filtered water according to your desired ratio.
- What “good” looks like: You have a mixture of dissolved coffee and cold water, creating your base cold brew.
- Common mistake: Adding too much water too quickly, which can make it harder to judge the final strength. Add gradually if unsure.
5. Stir to Combine:
- What to do: Stir the mixture well to ensure the dissolved coffee concentrate is evenly distributed throughout the cold water.
- What “good” looks like: A uniform color throughout the liquid, indicating thorough mixing.
- Common mistake: Uneven mixing, leading to some parts of the brew being stronger than others. Stir until consistent.
6. Cover and Steep:
- What to do: Securely cover your container with a lid. Place it in the refrigerator.
- What “good” looks like: The container is sealed and stored in a cool, dark place.
- Common mistake: Leaving the container uncovered, allowing other odors from the fridge to contaminate the brew. Always seal tightly.
7. Steeping Time:
- What to do: Let the mixture steep for at least 12 hours, but ideally 18-24 hours, in the refrigerator.
- What “good” looks like: The coffee has had ample time to develop its smooth, rich flavor.
- Common mistake: Under-steeping, which results in a less developed, possibly still slightly harsh flavor. Be patient; longer steeping is key for cold brew.
8. Taste and Adjust (Optional but Recommended):
- What to do: After steeping, pour a small amount into a glass. Taste it as is.
- What “good” looks like: You have a sense of the base flavor and strength of your concentrate.
- Common mistake: Not tasting before diluting, potentially creating an overly weak or strong final drink. Always sample your concentrate.
9. Dilute to Serve:
- What to do: Pour the concentrate over ice in a glass. Dilute with more cold water, milk, or dairy-free alternative to your preferred strength. A common starting point is 1:1 ratio of concentrate to diluent.
- What “good” looks like: A perfectly balanced cold brew that suits your taste.
- Common mistake: Diluting with too much liquid, making the final drink too weak. Start with less diluent and add more as needed.
10. Add Sweetener/Creamer (Optional):
- What to do: Add your desired sweeteners (sugar, syrup) or creamers. Stir well.
- What “good” looks like: Your cold brew is customized to your personal preference.
- Common mistake: Adding sweeteners or creamers to the entire batch before tasting, only to find you don’t like the combination. Adjust in your serving glass first.
Common Mistakes (and What Happens If You Ignore Them)
| Mistake | What It Causes | Fix |
|---|---|---|
| Using cold water to dissolve instant coffee | Clumpy coffee, undissolved grounds, weak flavor | Always use a small amount of hot water first to dissolve the instant coffee completely. |
| Not stirring enough | Uneven flavor distribution, gritty texture, weak spots in the brew | Stir vigorously until all instant coffee is fully dissolved and the mixture is uniform. |
| Under-steeping (too short) | Harsh, acidic, or underdeveloped flavor; not smooth enough | Steep for at least 12 hours, ideally 18-24 hours, for full flavor development. |
| Over-steeping (too long with instant) | Can sometimes lead to a slightly bitter or stale taste (less common) | Stick to the recommended 12-24 hour range; longer isn’t always better with instant coffee. |
| Using tap water with strong flavors | Off-flavors, metallic taste, or chemical notes in the final brew | Use filtered water for a cleaner, purer coffee taste. |
| Not sealing the container properly | Absorption of fridge odors, stale coffee smell | Always use a tightly fitting lid to protect the brew from external smells. |
| Diluting too much at once | A final drink that is too weak and watery | Start with less diluent (water or milk) than you think you need, then add more to taste. |
| Not tasting before serving | Over-sweetening or over-diluting the entire batch | Taste your concentrate before diluting, and taste your diluted brew before adding final touches. |
| Using stale instant coffee | Muted flavor, lack of aroma, less vibrant taste | Use fresh-smelling instant coffee; check the packaging date if available. |
Decision Rules: How to Perfect Your Instant Coffee Cold Brew
- If your instant coffee is clumping, then you didn’t use enough hot water initially, because hot water is necessary to break down the granules.
- If your cold brew tastes weak, then you need to increase the amount of instant coffee for the next batch, because the coffee-to-liquid ratio determines strength.
- If your cold brew tastes bitter, then try steeping for a shorter period (around 12-16 hours), because prolonged steeping can sometimes extract unwanted flavors.
- If your cold brew has an off-flavor, then ensure you used filtered water, because tap water impurities can significantly affect taste.
- If you notice sediment at the bottom of your container, then you didn’t dissolve the instant coffee completely, because thorough stirring is crucial for a smooth brew.
- If your cold brew smells like other fridge items, then your container wasn’t sealed properly, because odors can easily transfer to the coffee.
- If you want a stronger concentrate to dilute later, then use more instant coffee and less water in your initial mixture, because this creates a more potent base.
- If your final drink is too strong after diluting, then add more cold water or milk, because you can always dilute more but can’t un-dilute.
- If you want a sweeter cold brew, then add your preferred sweetener to your individual serving, because this allows for precise sweetness control.
- If you’re new to this, then start with a moderate amount of instant coffee (e.g., 2 tablespoons per 8 oz liquid) and adjust in future batches, because it’s easier to add more coffee than to fix a weak brew.
- If you want a smoother finish, then ensure the initial hot water step is done thoroughly, because any undissolved particles will remain even after steeping.
FAQ
Can I really use instant coffee for cold brew?
Yes, absolutely! Instant coffee is a fantastic shortcut for making cold brew at home. It dissolves easily, allowing you to achieve a smooth, low-acid coffee concentrate quickly.
How much instant coffee should I use?
A good starting point for a concentrate is about 2-3 tablespoons of instant coffee per 8 oz of total liquid. You can adjust this based on your preference for strength.
Do I need to steep instant coffee for as long as regular coffee?
While instant coffee dissolves quickly, steeping still allows the flavors to meld and develop. Aim for at least 12 hours, but 18-24 hours will yield the best cold brew profile.
What kind of instant coffee is best?
Any good quality instant coffee will work. Look for one that smells fresh. Specialty instant coffees are also available and can offer more nuanced flavors.
What happens if I use boiling water?
Using boiling water can sometimes scald the coffee grounds and lead to a more bitter taste, even with instant coffee. Hot, but not boiling, water (around 180-200°F) is ideal for dissolving.
How do I dilute my instant coffee cold brew?
Pour your concentrate over ice and add cold water, milk, or your favorite dairy-free alternative to taste. A common ratio is 1:1 concentrate to diluent, but adjust as needed.
Can I make a larger batch?
Yes, simply scale up the ingredients proportionally. Ensure your container is large enough to hold all the liquid.
Will it taste the same as traditional cold brew?
It will be very similar in its smooth, low-acid profile. While the specific flavor notes might differ slightly from bean-based cold brew, it’s a delicious and convenient alternative.
What This Page Does Not Cover (And Where to Go Next)
- Specific brand recommendations for instant coffee: Explore different brands to find your favorite.
- Advanced flavor infusions: Learn how to add spices, fruits, or liqueurs to your cold brew.
- Detailed explanations of coffee bean origins and their impact on cold brew: Research how different coffee beans contribute to flavor profiles in traditional cold brew.
- The science behind coffee extraction and acidity: Dive deeper into the chemistry of brewing if you’re interested in the technical aspects.
- Using coffee makers for cold brew: While this guide focuses on a simple method, some automated cold brew makers exist.