Make A Cappuccino From Instant Coffee Easily
Quick answer
- Use good quality instant coffee. It makes a difference.
- Heat your milk to a frothy texture. Don’t boil it.
- Mix your instant coffee with hot water to create a strong base.
- Combine the coffee base and frothed milk.
- Sweeten to your taste. Sugar, syrup, whatever works.
- A pinch of cocoa or cinnamon on top is a nice touch.
Who this is for
- Folks who want a quick cappuccino fix without a fancy machine.
- Campers or travelers who need a coffee boost on the go.
- Anyone curious about making a decent cappuccino with just instant coffee.
What to check first
This isn’t about brewing coffee beans, so we’re skipping a few steps. But there are still things to consider.
Instant Coffee Quality
Not all instant coffee is created equal. Some can taste bitter or just… weird. Look for brands that reviewers say have a decent flavor profile. It’s a small upgrade that pays off.
Milk Type
Whole milk froths up the best, but skim or even non-dairy options can work. You might need to experiment a bit to get the right texture with alternative milks.
Water Quality and Temperature
Even for instant coffee, good water matters. Filtered water is always a safe bet. You want hot water, but not boiling. Boiling water can scorch the coffee grounds and make it taste harsh. Aim for around 195-205°F, or just let your kettle sit for a minute after it boils.
Sweetener and Flavorings
What do you like in your coffee? Sugar, honey, simple syrup, vanilla extract? Have it ready.
Step-by-step (how to make cappuccino from instant coffee)
Let’s get this done.
1. Gather your gear. You’ll need your instant coffee, a mug, a spoon, milk, a way to heat the milk (a small saucepan, a microwave, or a frother), and your sweetener.
- What “good” looks like: Everything is within easy reach. No scrambling mid-process.
- Common mistake: Forgetting the sweetener or a key ingredient. Double-check your stash.
Don’t forget a sturdy and stylish coffee mug to enjoy your homemade cappuccino. A good mug enhances the experience!
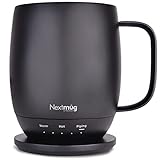
- ALWAYS THE PERFECT TEMPERATURE – The Nextmug will keep your hot coffee, tea or preferred beverage at the perfect temperature wherever you are. Simply select Warm (130° F), Hot (140° F), or Piping (150° F) and enjoy for hours.
- SMART MUG TECHNOLOGY – Long-lasting battery maintains your ideal temperature. LED lights display battery life & real-time temperature. Includes Spill-Resistant Lid & Charging Coaster.
- SUPER SIMPLE – On-board Control Button easily turns mug On/Off & sets the temperature. Takes only seconds to set the mug to your perfect temperature. No app required - no passwords, re-booting or security concerns.
- THE PERFECT GIFT - Give the gift for him and the gift for her that is certain to delight. Perfect for everyone on your list…moms, dads, grandmas, grandpas, teachers, birthdays, graduations and more!
- NEXTMUG CARES - Nextmug cares about our communities and our customers. We care by donating Nextmugs to teachers and first responders . We’re also committed to sustainable packaging by using 100% recyclable materials with all our products. Our dedicated customer service agents are based in the USA and always ready to help.
2. Heat your milk. Pour your desired amount of milk into a saucepan or microwave-safe container. Heat it gently.
- What “good” looks like: The milk is hot but not boiling. You should see tiny bubbles forming around the edge.
- Common mistake: Overheating the milk until it scalds or boils. This ruins the texture and taste. Keep an eye on it.
3. Froth the milk. If using a saucepan, whisk the milk vigorously until it gets foamy. If using a microwave, heat it, then use a handheld frother or whisk. If you have an electric frother, follow its instructions.
- What “good” looks like: A nice layer of foam has formed on top of the hot milk. It should look light and airy.
- Common mistake: Not frothing enough. You want that distinct cappuccino foam layer, not just warm milk.
4. Prepare the coffee base. Add 1-2 teaspoons of instant coffee to your mug. The amount depends on how strong you like it.
- What “good” looks like: The coffee granules are sitting in the mug, ready for water.
- Common mistake: Adding too much coffee. You can always add more later, but you can’t take it out.
5. Add hot water. Pour a small amount of hot, not boiling, water over the instant coffee. Just enough to dissolve it.
- What “good” looks like: The coffee dissolves quickly into a concentrated liquid.
- Common mistake: Using too much water. This dilutes your coffee base too much. Aim for a thick, espresso-like consistency.
6. Stir the coffee base. Mix the coffee and water thoroughly until all the grounds are dissolved and you have a smooth, dark liquid.
- What “good” looks like: No gritty bits left. It’s a uniform, dark brown color.
- Common mistake: Not stirring enough. Leftover undissolved coffee tastes bitter and unpleasant.
7. Sweeten your coffee base (optional). Add your preferred sweetener to the coffee mixture and stir until dissolved.
- What “good” looks like: The sweetener is fully incorporated.
- Common mistake: Adding sweetener after the milk. It’s harder to dissolve in the thicker, foamy mixture.
8. Combine coffee and milk. Gently pour the frothed milk over the coffee base. Try to hold back some of the foam with a spoon, then spoon the rest on top.
- What “good” looks like: You have a distinct layer of coffee at the bottom and a layer of frothy milk on top.
- Common mistake: Dumping it all in at once. This will just mix everything into a latte-like drink, losing the cappuccino layers.
9. Add toppings (optional). Sprinkle a little cocoa powder or cinnamon on top of the foam.
- What “good” looks like: A nice visual flourish and a hint of extra flavor.
- Common mistake: Going overboard with toppings. A little goes a long way.
For that perfect finishing touch, a sprinkle of high-quality cocoa powder can elevate your cappuccino’s flavor and presentation.

- REACH YOUR RICHEST CHOCOLATE FLAVOR: Experience this cocoa powder's fabulous high fat content of 22-24% that'll give you the freedom to create rich, fudgy creations with chocolate depth and intensity like never before. Whether it's a decadent dessert or a dreamy drink, this Dutch processed cocoa powder will bestow bold and beautiful chocolate flavor.
- DUTCHED FOR DELICIOUSNESS: Drift into a Dutch processed dreamland where bitterness is banished and blissful baking begins. Our cocoa powder is Dutch processed, which helps to remove bitterness and create smooth, chocolatey flavor.
- MEET YOUR NEW GO-TO COCOA COMPANION: No cocoa connoisseur's collection is complete without a pouch of our culinary grade Dutch processed cocoa powder. With its unmatched versatility, it’s the cocoa powder companion for righteously rich brownies, marvelously moist cakes, and sensationally silky frostings that’ll have you saying ‘fudge yeah’ with every bite.
- NON-GMO, FAIR TRADE, UNSWEETENED, DUTCH PROCESSED COCOA POWDER: We sourced the globe to find the highest quality, all-natural, non-GMO cocoa beans for use in our 22-24% fat culinary grade cocoa powder. Our Dutch Cocoa is fair-trade certified by Fair Trade USA, enabling you to feel confident in the sustainable, supportive supply chain that brings cocoa from us to you. Savor the satisfaction of starting with premium, wholesome ingredients for all of your chocolate baking needs.
- BAKE A DIFFERENCE WITH US: When you purchase Modern Mountain products, your great baking helps to give back to people and our planet. Our Rise Up Baking Scholarship supports aspiring bakers with a bit of dough for their first year of a Baking & Pastry Arts program. Additionally, our partnership with 1% for the Planet means that a portion of every purchase is donated to environmental causes that help to heal and support our Earth.
10. Enjoy. Sip your homemade cappuccino.
- What “good” looks like: A warm, frothy, satisfying coffee drink.
- Common mistake: Not enjoying it. Take a moment. You earned it.
Common mistakes (and what happens if you ignore them)
| Mistake | What it causes | Fix |
|---|---|---|
| Using low-quality instant coffee | Bitter, chemical, or weak flavor | Try a different brand, look for “premium” or “gourmet” instant. |
| Boiling the milk | Scalded taste, ruined foam texture | Heat milk gently, don’t let it bubble vigorously. |
| Not frothing the milk enough | Lacks the signature cappuccino foam layer | Whisk or froth longer until a good layer of foam forms. |
| Using too much water for the coffee base | Diluted, weak coffee flavor | Start with a small amount of water, add more only if needed. |
| Not dissolving the instant coffee fully | Gritty texture, bitter taste | Stir until completely smooth and dissolved. |
| Adding sweetener to the frothed milk | Difficult to dissolve, uneven sweetness | Sweeten the coffee base before adding milk. |
| Pouring milk too quickly | Coffee and milk mix completely, losing layers | Pour gently, use a spoon to hold back foam, then spoon foam on top. |
| Using cold milk | No foam, lukewarm drink | Always heat the milk first. |
| Over-extracting the coffee base | Bitter, harsh coffee taste | Use just enough hot water to dissolve, don’t let it sit long. |
| Not cleaning equipment | Lingering stale coffee flavors, poor foam | Rinse your mug and frothing tools after each use. |
Decision rules (simple if/then)
- If your instant coffee tastes bland, then try using slightly more next time because a stronger base is key.
- If your milk isn’t frothing well, then try whole milk next time because it has more fat to create stable foam.
- If you prefer a sweeter drink, then add your sweetener to the coffee base before adding milk because it dissolves better.
- If your cappuccino tastes too bitter, then ensure your water isn’t boiling hot because boiling water can scorch the coffee.
- If you want a smoother texture, then stir the coffee and water mixture until completely dissolved because undissolved grounds are gritty.
- If you want distinct layers, then pour the frothed milk gently and spoon the foam on top because dumping it in will mix everything.
- If you’re in a hurry, then use a microwave to heat and froth milk because it’s often faster than a stovetop.
- If you don’t have a frother, then a whisk or even a French press can work to create foam because agitation is the goal.
- If your cappuccino seems weak, then try using a darker roast instant coffee next time because roast level impacts flavor intensity.
FAQ
Can I use decaf instant coffee?
Yeah, absolutely. If you’re looking for the cappuccino experience without the caffeine kick, decaf instant coffee works just fine. The process and results will be very similar.
How much instant coffee should I use?
It really depends on your personal preference for strength. Start with 1-2 teaspoons per mug and adjust from there. You can always add more if it’s not strong enough.
What’s the best way to froth milk without a frother?
A good old-fashioned whisk works well if you heat the milk on the stovetop. For microwaved milk, a handheld frother is great, or you can try vigorously whisking it in a jar.
Will regular milk work better than skim?
Generally, yes. Whole milk has more fat, which helps create a richer, more stable foam. Skim milk can froth, but the foam might be lighter and disappear faster.
Can I add flavored syrups?
For sure! Add them to your coffee base along with your sweetener. It’s an easy way to customize your cappuccino.
Is there a difference between a cappuccino and a latte made this way?
Yes. A cappuccino traditionally has more foam than a latte. This method aims for that thicker foam layer on top of the coffee.
What if my instant coffee tastes burnt?
This usually happens if the water used to dissolve it was too hot. Make sure your water is hot but not actively boiling. Let the kettle sit for a minute after it boils.
Can I make this ahead of time?
It’s best enjoyed fresh. The foam will dissipate, and the flavors won’t be as vibrant if it sits for too long.
What this page does NOT cover (and where to go next)
- Making espresso from scratch.
- Using specific commercial espresso machines.
- Advanced latte art techniques.
- Deep dives into coffee bean origins and roasting profiles.