Improvised Coffee Brewing: Using a Sock as a Filter
Quick answer
- You can make coffee with a sock in a pinch.
- Use a clean sock, preferably cotton or a blend.
- Heat your water, but don’t boil it.
- Grind your coffee beans medium-coarse.
- Place coffee grounds in the sock, then suspend over a mug.
- Slowly pour hot water over the grounds.
- Let it steep for a few minutes.
- Remove the sock and enjoy your resourceful brew.
Who this is for
- The camper who forgot their coffee filter.
- The traveler in a hotel with no brewing gear.
- Anyone facing a coffee emergency with limited supplies.
If you’re frequently in situations where brewing coffee is a challenge, investing in a compact portable coffee maker can ensure you always have access to a great cup, no matter where you are.

- 【LIGHTWEIGHT & PORTABLE】: OutIn Portable Espresso Machine weighs only 670 grams. Made of food-grade stainless steel and sustainable materials, OutIn espresso maker Easy to disassemble and wash.
- 【FAST SELF-HEATING & RICH CREMA】: OutIn Nano coffee machine heats 1.7oz of 77°F room temperature water to 198°F within 200 seconds. 20-bar pressure ensures a smooth extraction with rich crema comparable to results from professional desktop coffee machines!
- 【PREMIUM BATTERY CAPACITY 】: Travel espresso maker comes with 3 × 2500mAh lithium batteries, compatible with 10–15 watts USB-C car chargers for universal charging, which supports up to 5 hot shots with 1.7oz 77°F room temperature water or 200+ shots with hot water.
- 【2-in-1 BREWER & ONE-BUTTON CLICK】: Compatible with both Ground Coffee & Capsule, the camping coffee maker has been tested with hundreds of designs to ensure ease of use. With just ONE-BUTTON CLICK, you can enjoy perfect espresso in just 3-4 minutes.
- 【OutIn SERVICE】 The OutIn Nano portable espresso machine is equipped with a leak-proof and insulated design, providing a 12-month support period. If you have any questions, you can consult our Amazon OutIn Store.
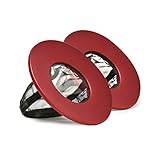
For campers and travelers who often find themselves without their usual gear, a dedicated travel coffee filter can be a lifesaver, offering a more reliable and hygienic solution than a sock.
- Note: 1)Too coarse a grind, too little coffee, or insufficiently tamping the grounds before brewing can all lead to inadequate pressure for a proper brew. 2)It is important to note that the amount of espresso extracted will vary depending on the grind size and amount and reprogramming may be needed when the size and amount are adjusted
- COFFEE ON THE GO - Anytime, anywhere. Easy and convenient personal brewing system designed for the active coffee lover. The portable, slim line design allows you to brew anywhere you go in as little as 30 seconds. Perfect for everyday use at home, the office, traveling or camping.
- INNOVATIVE DESIGN - Patented brewing technology for a smooth and rich coffee experience. This reusable extra-fine mesh filter ensures no grounds end up in your cup. Fits most coffee cups or mugs including your travel mug.
- EASY TO USE - All you need is coffee, a cup or mug and hot water for your perfect single cup of coffee. Simply place the Brew Buddy over your cup, add your own coffee or tea blend, pour hot water and brew until your desired strength is reached.
- EASY TO CLEAN - Dishwasher safe. Simply dispose of used coffee grinds and rinse or place inside a dishwasher.
What to check first
Brewer type and filter type
This is an improvised method, so your “brewer” is whatever you can rig up. The “filter” is your sock. Make sure the sock is clean. A clean cotton sock is usually best. Avoid synthetic materials if possible, as they might impart weird flavors.
Water quality and temperature
Good coffee starts with good water. If your tap water tastes off, use bottled water. Heat your water to about 200°F (93°C). Don’t use boiling water; it scorches the grounds and makes bitter coffee. A minute or two off a rolling boil should do it.
Grind size and coffee freshness
You want a medium-coarse grind, similar to sea salt. Too fine and it’ll clog the sock and over-extract. Too coarse and you’ll get weak coffee. Freshly ground beans are always better. If you have whole beans, grind them right before brewing.
Coffee-to-water ratio
A good starting point is about 1:15 or 1:17. That means 1 gram of coffee for every 15-17 grams of water. For a standard mug (about 8-10 oz), try 2-3 tablespoons of grounds. You can adjust this to your taste.
Cleanliness/descale status
This is critical for improvised brewing. Your sock must be clean. Wash it without strong detergents or fabric softener. If you’re using a makeshift pour-over cone, ensure that’s clean too. Any residual gunk will ruin your coffee.
Step-by-step (brew workflow)
1. Gather your gear. You’ll need coffee grounds, a clean sock, hot water, and a mug. A way to suspend the sock over the mug is also helpful.
- What “good” looks like: Everything is ready to go. No frantic searching.
- Common mistake: Realizing halfway through you don’t have a clean sock. Avoid this by checking your sock before heating water.
While a sock works in a pinch, having proper camping coffee gear, like a portable press or pour-over set, will significantly elevate your outdoor coffee experience.
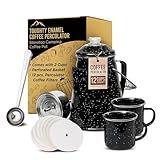
- STURDY ENAMEL BUILD: Crafted from heavy-duty metal and coated with kiln-hardened enamel, this coffee percolator resists scratches, chips, and wear. Ideal for rugged outdoor adventures or daily brewing needs.
- IDEAL FOR CAMPING BREWS: This stovetop coffee maker is designed for use over campfires, grills, or stovetops, delivering rich, flavorful coffee wherever you are. Ideal for camping, hiking, or outdoor gatherings.
- SEE-THROUGH GLASS KNOB FOR PRECISION: The heat-resistant, glass knob lets you monitor the brewing process, offering the ability to adjust the strength of your coffee and adding a classic, nostalgic touch to your brewing experience.
- 12-CUP CAPACITY WITH 2 CUPS AND COFFEE FILTERS INCLUDED: Brew up to 12 cups of coffee, ideal for groups or family. The set includes two enamel cups and 12 coffee filters, making it ideal for sharing coffee during your outdoor adventures.
- VERSATILE AND EASY TO CLEAN: This non-electric coffee maker works on gas, electric, or open fire stovetops. Its simple design ensures hassle-free cleanup, making it the great coffee companion for your outdoor and home brewing needs.
2. Prepare the sock. Turn the sock inside out. This gives you a cleaner surface to hold the grounds.
- What “good” looks like: The sock is clean and ready for coffee.
- Common mistake: Using a sock that’s already been worn today. That’s a one-way ticket to questionable coffee.
3. Add coffee grounds. Place your measured coffee grounds into the toe of the sock.
- What “good” looks like: A neat pile of grounds inside the sock.
- Common mistake: Dumping all the grounds in one spot. Try to spread them out a bit for more even saturation.
4. Secure the sock. Fold the opening of the sock over the grounds to create a pouch. You can tie a knot if it helps, but it’s not always necessary.
- What “good” looks like: The grounds are contained and won’t spill out easily.
- Common mistake: Not securing it well. Grounds escaping into your mug is not ideal.
5. Position the brewer. Drape the sock over your mug. You might need to tie the cuff around the rim or use a piece of string or wire to hold it in place.
- What “good” looks like: The sock is suspended securely over the mug, with space for coffee to drip through.
- Common mistake: Letting the sock touch the sides of the mug too much. This can lead to uneven flow.
6. Bloom the coffee (optional but recommended). Pour a small amount of hot water (just enough to wet the grounds) over the coffee. Wait 30 seconds.
- What “good” looks like: The grounds puff up and release CO2, looking bubbly.
- Common mistake: Skipping the bloom. You miss out on better flavor development.
7. Begin pouring. Slowly and steadily pour the rest of your hot water over the grounds in the sock. Use a circular motion.
- What “good” looks like: A steady stream of dark coffee is dripping into your mug.
- Common mistake: Pouring too fast. This can cause water to bypass the grounds and result in weak coffee.
8. Continue pouring. Keep pouring until you’ve used all your hot water. Don’t overfill the sock.
- What “good” looks like: All the water has passed through the grounds.
- Common mistake: Pouring too much water at once, causing overflow. Patience is key here.
9. Let it drip. Allow all the liquid to finish dripping into the mug. This might take a few minutes.
- What “good” looks like: The dripping has slowed to a stop.
- Common mistake: Squeezing the sock. This pushes bitter compounds and sediment into your coffee.
10. Remove the sock. Carefully lift the sock out of the mug. Dispose of the grounds.
- What “good” looks like: The sock is removed, leaving you with brewed coffee.
- Common mistake: Letting the sock drip for too long. This can make the coffee bitter.
11. Serve and enjoy. Your improvised coffee is ready.
- What “good” looks like: A hot mug of coffee.
- Common mistake: Drinking it too fast and burning your tongue. Let it cool slightly.
Common mistakes (and what happens if you ignore them)
| Mistake | What it causes | Fix |
|---|---|---|
| Using a dirty sock | Tastes like feet, dirt, or detergent. | Use a clean, washed sock with minimal/no detergent. |
| Using boiling water | Bitter, over-extracted coffee. | Let water cool for 1-2 minutes off the boil (around 200°F/93°C). |
| Coffee grounds too fine | Clogged sock, slow drip, bitter coffee. | Use a medium-coarse grind (like sea salt). |
| Coffee grounds too coarse | Weak, watery coffee. | Use a medium-coarse grind. Experiment with slightly finer if needed. |
| Pouring water too fast | Water bypasses grounds, weak coffee. | Pour slowly and steadily in a circular motion. |
| Not blooming the coffee | Less flavorful, potentially gassier brew. | Pour a little water to wet grounds, wait 30 seconds. |
| Squeezing the sock | Bitter compounds and sediment in coffee. | Let it drip naturally. Don’t wring it out. |
| Not securing the sock properly | Grounds spill into your mug. | Tie the cuff or use string to secure it over the mug. |
| Using a sock with strong detergent residue | Chemical taste in your coffee. | Use a sock washed with minimal, unscented detergent. Rinse thoroughly. |
| Not letting it drip completely | Coffee still drips after you remove the sock. | Wait until dripping stops before removing the sock. |
Decision rules (simple if/then)
- If your sock smells weird, then don’t use it for coffee because it will taste bad.
- If your coffee tastes weak, then try using slightly finer grounds or a bit more coffee next time because that will increase extraction.
- If your coffee tastes bitter, then try using coarser grounds or slightly cooler water because that will reduce over-extraction.
- If the water is dripping too fast, then try tamping the grounds down a little or using slightly finer grounds because that will slow the flow.
- If the water is dripping too slow or not at all, then your grounds might be too fine or packed too tight; gently loosen them or use coarser grounds next time because that will improve flow.
- If you don’t have a way to suspend the sock, then try holding it carefully with tongs or a sturdy stick because that will keep it steady.
- If you only have pre-ground coffee, then use it, but know that it might not be the ideal grind size for this method because freshness is already compromised.
- If you’re worried about sediment, then let the coffee sit for a minute after brewing before drinking because the fine particles will settle to the bottom.
- If you want a stronger cup, then increase your coffee-to-water ratio slightly because that will result in a more concentrated brew.
- If you’re in a dire situation and only have a very thin sock, then consider folding it over itself a couple of times to create a thicker filter layer because that can help catch more fines.
FAQ
Can I use any sock?
Ideally, use a clean cotton or cotton-blend sock. Avoid synthetics or anything with strong detergent smells. A clean sock is paramount.
How much coffee should I use?
Start with about 2-3 tablespoons of grounds for a standard 8-10 oz mug. Adjust based on how strong you like it.
What if my coffee is too bitter?
Your grind might be too fine, or your water too hot. Try a coarser grind or let your water cool a bit longer off the boil.
What if my coffee is too weak?
Your grind might be too coarse, or you didn’t use enough coffee. Try a finer grind (but not too fine!) or increase the amount of coffee grounds.
Is it safe to drink coffee made this way?
Yes, as long as your sock is clean and you’re using potable water. The main concern is taste and quality, not safety.
Will this taste as good as regular coffee?
Probably not. Improvised methods are for necessity. It’s better than no coffee, but don’t expect gourmet results.
How do I clean the sock afterward?
Just rinse it out thoroughly with water. You can wash it properly later with your laundry.
What if I don’t have a way to heat water?
This method requires hot water. If you can’t heat water, you can’t make hot coffee this way. Cold brew is an option if you have time and cold water.
What this page does NOT cover (and where to go next)
- Specific coffee-to-water ratio calculations for precise brewing.
- Advanced brewing techniques like espresso or cold brew.
- Detailed guides on coffee bean origins or roast profiles.
- Reviews or comparisons of commercial coffee makers.
- Troubleshooting specific flavor defects beyond basic bitterness/weakness.