How To Make Your Own Cold Brew Coffee Maker
Quick answer
- You can absolutely make your own cold brew coffee maker using simple household items.
- Common methods involve a jar or pitcher, coffee grounds, and a filter.
- The key is to steep coarsely ground coffee in cold water for an extended period.
- A good starting point for ratio is 1:4 coffee to water by weight.
- Patience is essential; cold brew typically steeps for 12 to 24 hours.
- Straining the grounds thoroughly is crucial for a smooth, sediment-free concentrate.
Who this is for
- Coffee enthusiasts who enjoy cold brew but want a more cost-effective or customizable brewing experience.
- Individuals looking for a simple, DIY project using readily available kitchen supplies.
- Those who prefer to control the strength and flavor profile of their cold brew concentrate.
What to check first
Brewer type and filter type
The simplest DIY cold brew “maker” relies on a combination of a steeping vessel and a filtering method. Your steeping vessel can be anything from a large glass jar to a pitcher. For filtering, you’ll need something to separate the coffee grounds from the liquid. Common options include cheesecloth, fine-mesh sieves, paper coffee filters (though these can clog easily with cold brew), or even a French press if you have one. Ensure your chosen vessel is clean and your filter material is fine enough to catch the coffee grounds effectively without letting too much sediment through.
For the steeping vessel, a large glass jar with a lid is an excellent and readily available option. It’s perfect for holding your coffee grounds and water during the steeping process.
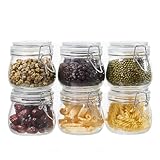
- 【Premium Glass Jars with Airtight Lids】These airtight glass jars feature a wire clip fastening system with clear preserving seals, locking in freshness and flavor. Ideal for dry goods and long-term food storage.
- 【Perfect Size: 17 oz Capacity – Set of 6】Each jar holds 17oz, just right for storing beans, flour, sugar, cereal, pasta, or snacks. Comes as a 6 pack to organize your kitchen efficiently.
- 【Durable & Safe Food Storage Containers】Made from thick, lead-free, glass food storage containers that are BPA-free, odor-resistant, and safe for everyday use.
- 【Multi-Purpose Glass Canisters for Kitchen & Pantry】Great for kitchen canning and pickling jars – also suitable for DIY jam, honey, kimchi, spices, and more. A functional and elegant solution for pantry storage jars.
- 【Stylish & Practical Storage Jars】Sleek square design saves space and looks beautiful on shelves. These glass storage jars are easy to stack and clean, combining utility with minimalist decor.
Water quality and temperature
The water you use is a significant factor in the final taste of your cold brew. Filtered water is highly recommended, as tap water can contain minerals and chlorine that impart off-flavors. For cold brew, the temperature is obviously cold, typically ranging from refrigerator temperature (around 35-40°F) to room temperature (around 70°F). Using colder water will result in a slower extraction, while slightly warmer (but still cold) water can speed it up marginally. Avoid using hot water, as this defeats the purpose of cold brewing and can lead to bitterness.
Grind size and coffee freshness
The grind size for cold brew is critical. You want a coarse grind, similar to breadcrumbs or coarse sea salt. A fine grind will over-extract, leading to a bitter and muddy brew, and will also make filtering much more difficult. Freshly roasted and ground coffee will always yield the best results. Aim to grind your beans just before brewing. If you’re using pre-ground coffee, ensure it’s a coarse grind specifically intended for cold brew or French press if possible. Stale coffee will result in a flat, uninspired cold brew regardless of your method.
Coffee-to-water ratio
The ratio of coffee to water is what determines the strength of your cold brew concentrate. A common starting point for DIY cold brew is a ratio of 1:4 (coffee to water) by weight. For example, if you use 8 ounces of coffee grounds, you would use 32 ounces of water. This will produce a concentrate that is typically diluted with water or milk before serving. You can adjust this ratio to your preference; a 1:5 ratio will be less concentrated, while a 1:3 ratio will be stronger. Experimentation is key to finding your ideal strength.
Cleanliness/descale status
Ensuring all your brewing equipment is clean is paramount. Coffee oils can build up over time and become rancid, imparting unpleasant flavors to your brew. Wash your steeping vessel, any strainers, and storage containers thoroughly with soap and water after each use. If you’re using a French press, make sure to clean the plunger and mesh thoroughly. For any automatic brewers you might adapt, check the manual for descaling instructions. Mineral buildup can affect brewing temperature and flow, leading to inconsistent results.
Step-by-step (brew workflow)
1. Measure your coffee grounds: Weigh out your coarsely ground coffee.
- What “good” looks like: Accurately measured grounds, ensuring consistency.
- Common mistake: Guessing the amount. This leads to inconsistent strength. Always use a scale for best results.
2. Place grounds in steeping vessel: Put the measured coffee grounds into your clean jar or pitcher.
- What “good” looks like: All grounds are contained within the vessel, ready for water.
- Common mistake: Spilling grounds. Be careful to keep the vessel opening clear.
3. Add cold water: Pour cold, filtered water over the coffee grounds. Start with about half the total water volume and stir.
- What “good” looks like: All grounds are saturated with water.
- Common mistake: Not saturating all the grounds. This leads to uneven extraction and weak spots.
4. Stir gently: Use a spoon to gently stir the mixture, ensuring all grounds are fully wet and no dry pockets remain.
- What “good” looks like: A uniform slurry of coffee and water.
- Common mistake: Over-stirring or stirring too vigorously. This can break up grounds and create sediment.
5. Add remaining water: Pour in the rest of the cold water, reaching your desired total volume based on your ratio.
- What “good” looks like: The vessel is filled to the appropriate level for your chosen ratio.
- Common mistake: Overfilling the vessel, making it difficult to stir or seal.
6. Cover and steep: Cover the vessel tightly with a lid or plastic wrap.
- What “good” looks like: The vessel is sealed to prevent oxidation and evaporation.
- Common mistake: Leaving it uncovered. This can lead to off-flavors from exposure to air and potential contaminants.
7. Refrigerate or steep at room temp: Place the covered vessel in the refrigerator or at cool room temperature.
- What “good” looks like: The brew is steeping undisturbed.
- Common mistake: Steeping for too short or too long a time without understanding the impact. Aim for 12-24 hours.
8. Begin filtering: After the steeping period, prepare your filtering setup. Place a fine-mesh sieve lined with cheesecloth or a paper filter over another clean container.
- What “good” looks like: Your filtering station is ready to catch grounds cleanly.
- Common mistake: Using a filter that’s too fine for the initial coarse grounds, leading to immediate clogging.
9. Slowly pour and filter: Gently pour the steeped coffee mixture through your filter setup. Allow gravity to do the work.
- What “good” looks like: The liquid is slowly dripping into the clean container, leaving grounds behind.
- Common mistake: Pouring too quickly, which can overwhelm the filter and push fine sediment through.
10. Double-filter if necessary: If the first filtering results in sediment, you may need to strain it again, perhaps through a cleaner paper filter or a finer cloth.
- What “good” looks like: The final concentrate is clear or has minimal sediment.
- Common mistake: Settling for a cloudy concentrate. This indicates incomplete filtering.
11. Store the concentrate: Pour the finished cold brew concentrate into a clean, airtight container.
- What “good” looks like: The concentrate is safely stored and ready for dilution.
- Common mistake: Storing in an unsealed container. This will cause it to lose flavor and absorb odors.
12. Dilute and serve: Before drinking, dilute the concentrate with cold water, milk, or your preferred beverage to taste.
- What “good” looks like: A delicious, refreshing cold brew drink.
- Common mistake: Drinking the concentrate straight. It’s very strong and not intended to be consumed as is.
Common mistakes (and what happens if you ignore them)
| Mistake | What it causes | Fix |
|---|---|---|
| Using a fine coffee grind | Bitter, muddy coffee; difficult to filter | Use a coarse grind (like breadcrumbs); check your grinder settings. |
| Not using filtered water | Off-flavors from chlorine or minerals | Use filtered water or good quality bottled water. |
| Incorrect coffee-to-water ratio | Brew too weak or too strong | Use a scale to measure coffee and water; start with 1:4 and adjust. |
| Incomplete grounds saturation | Uneven extraction, weak spots, and bitterness | Stir gently after initial water addition to ensure all grounds are wet. |
| Steeping for too short a time | Weak, watery, and underdeveloped flavor | Steep for at least 12 hours, ideally 18-24 hours. |
| Steeping for too long a time | Bitter, astringent, and over-extracted taste | Avoid steeping beyond 24 hours; taste test to find your sweet spot. |
| Rushing the filtering process | Sediment in your final brew, cloudy appearance | Pour slowly and allow gravity to work; consider double-filtering. |
| Using dirty equipment | Rancid oils and off-flavors in the brew | Wash all equipment thoroughly with soap and water after each use. |
| Not covering the brew during steeping | Oxidation, evaporation, and potential contamination | Seal the vessel tightly to prevent air exposure and preserve flavor. |
| Storing the concentrate improperly | Flavor degradation, absorption of odors | Store in an airtight container in the refrigerator. |
Decision rules (simple if/then)
- If your cold brew tastes bitter, then you likely used too fine a grind or steeped for too long, because these lead to over-extraction.
- If your cold brew tastes weak, then you may have used too little coffee or steeped for too short a time, because insufficient coffee or extraction time results in a dilute flavor.
- If your cold brew has a lot of sediment, then your filter was too coarse or you poured too quickly, because the filter didn’t catch the grounds effectively or they were pushed through.
- If your cold brew has an unpleasant chemical taste, then you likely used tap water with impurities, because chlorine and minerals can impart off-flavors.
- If you want a stronger concentrate, then increase the amount of coffee grounds relative to water (e.g., move from 1:4 to 1:3), because a higher coffee-to-water ratio yields a more concentrated brew.
- If you want a less strong concentrate, then decrease the amount of coffee grounds relative to water (e.g., move from 1:4 to 1:5), because a lower coffee-to-water ratio yields a less concentrated brew.
- If your cold brew has a stale or flat taste, then your coffee beans were likely not fresh, because stale beans lack the aromatic compounds that create vibrant flavor.
- If you’re having trouble filtering, then your grind might be too fine or your filter is clogged, because fine particles can clog larger pores or overwhelm a fine filter.
- If you prefer a slightly faster brewing time, then consider steeping at a slightly warmer (but still cold) room temperature rather than in the refrigerator, because a slightly higher temperature can marginally increase extraction speed.
- If you want to avoid bitterness, then always use a coarse grind and steep for the appropriate duration, because these are the primary controls for extraction.
FAQ
Can I use any type of coffee bean for cold brew?
Yes, you can use any type of coffee bean. However, beans with chocolatey, nutty, or caramel notes often lend themselves well to the smooth, rich profile of cold brew. Lighter, more acidic roasts can sometimes result in a less desirable flavor profile for cold brew, but experimentation is encouraged.
How long does homemade cold brew concentrate last?
Homemade cold brew concentrate can typically last for 1 to 2 weeks when stored properly in an airtight container in the refrigerator. Beyond that, its flavor may start to degrade.
What is the best ratio for cold brew?
A good starting point for cold brew concentrate is a 1:4 ratio of coffee to water by weight. This means for every ounce of coffee grounds, you use four ounces of water. You can adjust this ratio to make a stronger or weaker concentrate based on your personal preference.
Why is my cold brew bitter?
Bitterness in cold brew usually stems from over-extraction. This can be caused by using a grind that is too fine, steeping for too long (beyond 24 hours), or using water that is too hot.
How do I dilute cold brew concentrate?
Cold brew concentrate is very strong and is meant to be diluted. A common dilution ratio is 1:1 with cold water or milk, but you can adjust this to your taste. Start with a 1:1 ratio and add more liquid if it’s still too strong.
Can I use hot water to speed up the cold brew process?
No, using hot water will turn your cold brew into regular hot coffee and will result in a bitter, over-extracted flavor. The “cold” in cold brew refers to the brewing temperature, which is crucial for its smooth, low-acid profile.
What’s the difference between cold brew concentrate and ready-to-drink cold brew?
Cold brew concentrate is a very strong, undiluted brew that needs to be mixed with water or milk before drinking. Ready-to-drink cold brew has already been diluted to a drinkable strength, often with water.
How do I get rid of coffee grounds in my cold brew?
Thorough and patient filtering is key. Use a fine-mesh sieve lined with cheesecloth or a paper coffee filter. Pour slowly and consider a second filtering if you still see sediment.
What this page does NOT cover (and where to go next)
- Specific brand recommendations for coffee beans or brewing equipment.
- Detailed chemical explanations of extraction processes.
- Advanced techniques like nitrogen-infused cold brew.
Next steps could include exploring different coffee bean origins, experimenting with various steeping times, or learning about commercial cold brew makers if you decide DIY isn’t for you.