How To Make Iced Coffee In A Blender
Quick answer
- Chill your brewed coffee completely before blending.
- Use a high-powered blender for the smoothest results.
- Start with a 1:1 ratio of coffee to ice, adjusting to your preference.
- Add sweeteners or flavorings before blending for even distribution.
- Blend in short bursts to avoid over-diluting the coffee.
- Consider using coffee ice cubes to prevent a watery drink.
While this guide focuses on using a blender, if you’re looking for a dedicated appliance, an iced coffee maker can also be a great option for brewing chilled coffee.

- BREW BY THE CUP OR CARAFE: Brews both K-Cup pods and coffee grounds.
- MULTISTREAM TECHNOLOGY: Saturates the grounds evenly to extract full flavor and aroma in every cup, hot or cold.
- BREW OVER ICE: Adjusts temperature for maximum flavor and less ice melt for single-cup iced coffees and teas.
- STRONG BREW & EXTRA HOT FUNCTIONALITY: Brews a stronger, more intense-flavored cup and the extra hot feature brews a hotter single cup.
- MULTIPLE BREW SIZES: Brew 6, 8, 10, or 12oz single cups or 6, 8, 10, or 12-cup carafes. 12-cup glass carafe specially designed to limit dripping.
For the smoothest results when making iced coffee in a blender, it’s best to use a high-powered blender.
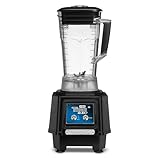
- Blend three 16 oz. margaritas in 8 seconds or less
- High performance, 2 HP, 2-speed motor with 24,000 max RPM
- Durable, stainless steel, user-replaceable drive coupling
- 64 oz., stackable, BPA-free, copolyester jar
- cETLus, NSF
Who this is for
- Coffee drinkers looking for a quick and easy way to make iced coffee at home.
- Those who own a blender and want to experiment with different coffee preparations.
- Individuals who enjoy a frothy, blended iced coffee texture.
What to check first
Brewer type and filter type
The type of coffee maker you used to brew your base coffee doesn’t significantly impact the final blended iced coffee, but the filter can. Paper filters generally produce a cleaner cup with fewer oils. French presses or cold brew methods might result in a slightly richer, more full-bodied coffee base. Ensure your chosen brewing method is producing coffee you enjoy.
Water quality and temperature
Start with good-tasting water. If your tap water has a strong taste or odor, it will come through in your coffee. Filtered water is often recommended for brewing coffee. For blended iced coffee, the initial temperature of your brewed coffee is critical. It must be completely chilled. Hot coffee will melt the ice too quickly, resulting in a weak, watery drink.
Grind size and coffee freshness
While the grind size is crucial for brewing, for making iced coffee in a blender, the focus is on the coffee itself. Use freshly roasted and ground coffee for the best flavor. If you’re brewing coffee specifically for this purpose, a medium grind is generally suitable for most drip or pour-over methods. Pre-ground coffee can work, but its flavor will be less vibrant.
Coffee-to-water ratio
The ratio used when brewing your initial coffee will affect the final taste. A common starting point for hot brewed coffee is a ratio of 1:15 to 1:18 (coffee to water by weight). For iced coffee, you might want to brew it slightly stronger, perhaps 1:14, to account for the dilution from melting ice. However, since you’re blending, you’ll be adding ice, which will further dilute the drink.
Cleanliness/descale status
Ensure your blender is clean. Any residual flavors from previous uses can taint your iced coffee. If you use your blender for other things, a quick rinse might not be enough; a wash with soap and water is recommended. If your blender has been sitting for a while, check for any dust or debris.
Step-by-step (brew workflow)
1. Brew Coffee: Prepare your coffee using your preferred method. Aim for a slightly stronger brew than you might normally drink hot, as the ice will dilute it.
- What “good” looks like: A flavorful, well-extracted cup of coffee.
- Common mistake: Brewing a weak coffee base, which will result in a watery iced coffee.
- How to avoid: Use a slightly higher coffee-to-water ratio (e.g., 1:14 instead of 1:17) or use slightly less water than usual for your standard coffee recipe.
2. Chill Coffee: Allow the brewed coffee to cool down completely. Refrigerating it for at least 2-4 hours, or until cold, is ideal.
- What “good” looks like: Cold coffee, no longer steaming.
- Common mistake: Pouring warm or hot coffee directly into the blender with ice.
- How to avoid: Be patient. You can speed this up by pouring the coffee into a metal container and placing it in an ice bath in the sink.
3. Prepare Blender: Ensure your blender jar is clean and dry.
- What “good” looks like: A clean blender jar ready for ingredients.
- Common mistake: Using a dirty blender, which can impart off-flavors.
- How to avoid: Wash the blender jar thoroughly with soap and water after each use, and rinse well.
4. Add Ice: Fill your blender jar with ice. A good starting point is to fill it about halfway to two-thirds full.
- What “good” looks like: A sufficient amount of ice to chill and create a frosty texture.
- Common mistake: Using too little ice, leading to a less frosty drink.
- How to avoid: Experiment with the amount of ice. If you want a thicker, icier drink, add more.
5. Add Chilled Coffee: Pour the completely chilled brewed coffee over the ice in the blender.
- What “good” looks like: Cold coffee now in the blender with the ice.
- Common mistake: Pouring in hot or even lukewarm coffee.
- How to avoid: Double-check that your coffee is thoroughly chilled before proceeding.
6. Add Sweeteners/Flavorings (Optional): If you plan to add sugar, syrup, milk, cream, or flavor extracts, add them now.
- What “good” looks like: All desired additions are in the blender.
- Common mistake: Adding ingredients like milk or cream after blending, leading to uneven distribution.
- How to avoid: Incorporate all liquid sweeteners and flavorings with the coffee and ice before blending.
7. Secure Lid: Place the lid firmly on the blender jar.
- What “good” looks like: The lid is securely fastened.
- Common mistake: Forgetting to put the lid on or not securing it properly.
- How to avoid: Always ensure the lid is locked into place before turning on the blender.
8. Blend in Bursts: Start blending on a low speed, then gradually increase. Blend in short bursts, pulsing the machine rather than running it continuously.
- What “good” looks like: The ice and coffee are breaking down and combining into a smooth, frosty mixture.
- Common mistake: Blending for too long continuously.
- How to avoid: Use the pulse function or blend for 15-30 second intervals, checking consistency. This prevents over-dilution and overheating.
9. Check Consistency: Stop blending and check the texture. If it’s too thick, add a splash more coffee. If it’s too thin, add a few more ice cubes and blend again briefly.
- What “good” looks like: A smooth, consistent, frosty texture.
- Common mistake: Not checking the consistency and ending up with a drink that’s too watery or too chunky.
- How to avoid: Taste and visually inspect the mixture. Adjust as needed by adding more ice or a little more liquid.
10. Serve: Pour the blended iced coffee into a glass.
- What “good” looks like: A refreshing, frosty beverage poured into your serving glass.
- Common mistake: Leaving it in the blender too long, causing it to melt.
- How to avoid: Serve immediately after achieving your desired consistency.
Common mistakes (and what happens if you ignore them)
| Mistake | What it causes | Fix |
|---|---|---|
| Using hot or warm coffee | Over-diluted, watery, weak flavor | Chill coffee completely before blending. |
| Not chilling coffee enough | Melts ice too quickly, results in a watery drink | Refrigerate coffee for at least 2-4 hours, or use an ice bath. |
| Using too little ice | Less frosty, more liquid texture | Start with at least half the blender jar full of ice and adjust as needed. |
| Using too much ice | Overly thick, difficult to blend, can be icy chunks | Add ice gradually and blend in short bursts. |
| Blending continuously for too long | Over-dilution from friction heat, watery drink | Blend in short bursts, pulsing the blender. |
| Not securing the blender lid | Messy kitchen, coffee sprayed everywhere | Always ensure the lid is firmly locked before operating the blender. |
| Adding milk/cream before blending | Uneven distribution, can create a curdled texture | Add liquid sweeteners, milk, and cream after blending, or just before the final short blend. |
| Using stale or pre-ground coffee | Flat, less vibrant flavor | Use freshly roasted and ground coffee for the best taste. |
| Not cleaning the blender thoroughly | Off-flavors from previous ingredients | Wash blender jar with soap and water after each use. |
| Not brewing coffee strong enough | Weak, watery final product | Brew coffee slightly stronger than usual, knowing ice will dilute it. |
| Not using a powerful enough blender | Chunky texture, uneven blending | Use a high-powered blender; for less powerful models, ensure coffee is very cold and blend in smaller batches. |
| Not serving immediately | Drink melts and becomes watery | Pour and enjoy your blended iced coffee right after blending. |
Decision rules (simple if/then)
- If your blended iced coffee tastes too watery, then add more ice and blend again briefly because ice is the primary component for texture and chill.
- If your blended iced coffee is too thick to blend or pour, then add a tablespoon or two of chilled coffee or water because adding liquid will help it move.
- If you want a smoother, less icy texture, then blend for slightly longer in short bursts or use a high-powered blender because more blending action breaks down ice finer.
- If you’re concerned about a watery drink, then consider making coffee ice cubes because these will melt and add coffee flavor rather than diluting it.
- If your blender is struggling to break down the ice, then let the ice sit for a minute or two to slightly soften because slightly softened ice is easier to blend.
- If you prefer a creamier texture, then add a splash of milk, cream, or non-dairy creamer before the final blend because these ingredients will emulsify and create a smoother mouthfeel.
- If you want to add sugar or syrup and ensure it’s fully dissolved, then add it with the coffee before blending because the blending action will help incorporate it evenly.
- If your coffee tastes bland, then ensure you used freshly roasted beans and brewed it to your preferred strength because the coffee base is the foundation of the flavor.
- If you notice an odd flavor in your blended iced coffee, then thoroughly clean your blender jar because residual flavors from other foods can transfer.
- If you want a stronger coffee flavor without adding more coffee, then brew your coffee using a method that extracts more flavor, like a concentrated cold brew, before chilling.
- If you’re making this for multiple people, then brew a larger batch of coffee and chill it ahead of time because this saves you from brewing multiple small batches.
FAQ
Can I use instant coffee to make blended iced coffee?
Yes, you can use instant coffee. Dissolve the instant coffee granules in a small amount of cold water according to package directions, then chill this mixture before blending with ice. The flavor might be different from brewed coffee, so adjust to your preference.
What kind of ice is best for blended iced coffee?
Standard ice cubes made from water work well. For a less diluted drink, consider making coffee ice cubes by freezing leftover brewed coffee in an ice cube tray. This way, as the cubes melt, they add more coffee flavor instead of watering down your drink.
How can I make my blended iced coffee sweeter?
You can add sweeteners like simple syrup, granulated sugar, honey, or maple syrup to the blender along with the coffee and ice. Simple syrup tends to incorporate the best, as it’s already liquid and won’t create gritty texture. Add your sweetener of choice before blending.
What if I don’t have a high-powered blender?
If you have a standard blender, ensure your coffee is thoroughly chilled and consider using slightly less ice. Blend in smaller batches if necessary, and use the pulse function frequently to avoid straining the motor. You might end up with a slightly less smooth texture, but it will still be refreshing.
Can I add alcohol to my blended iced coffee?
Yes, you can add alcohol to create an adult beverage. A shot of rum, vodka, or a coffee liqueur can be a delicious addition. Add it to the blender with the coffee and ice before blending.
How much ice should I use?
A good starting point is to fill your blender jar about halfway to two-thirds full with ice. You can adjust this based on your desired consistency. More ice will result in a thicker, frostier drink, while less ice will make it more liquid.
How long does blended iced coffee last?
Blended iced coffee is best enjoyed immediately after preparation. Once blended, the ice will start to melt, making the drink watery over time. If you must store it, pour it into a chilled container and keep it in the freezer, but be aware that the texture will change.
Can I add fruit or other flavors?
Absolutely. You can add ingredients like chocolate syrup, caramel sauce, fruit purees, or even a scoop of ice cream to your blender for a flavored blended iced coffee. Add these along with your coffee and ice before blending.
What this page does NOT cover (and where to go next)
- Detailed instructions on specific coffee brewing methods (e.g., pour-over, espresso).
- Recipes for homemade syrups or flavor infusions.
- Advanced techniques for creating latte art or elaborate coffee shop-style drinks.
- Information on commercial-grade blenders or professional coffee equipment.