How to Make Coffee Fertilizer for Healthier Plants
Quick answer
- Coffee grounds add nitrogen, potassium, and phosphorus to soil.
- They also improve soil structure and drainage.
- Use fresh or used grounds, but rinse them if they’re heavily sweetened or flavored.
- Mix grounds directly into soil or compost them first.
- Don’t overdo it; too much can make soil too acidic.
- Observe your plants for any signs of stress.
Who this is for
- Gardeners looking for a natural way to boost plant health.
- Coffee drinkers who want to reduce waste.
- Anyone wanting to improve their soil’s nutrient content organically.
What to check first
Brewer type and filter type
Think about your coffee setup. Are you using a drip machine, a French press, or a pour-over? This matters for the grounds you’ll get. Drip machines and pour-overs usually use paper filters, which you can compost separately. French presses leave you with wet, loose grounds. Some people even use espresso pucks, but those are often more concentrated.
Water quality and temperature
For brewing coffee itself, good water is key. For using the grounds as fertilizer, it’s less critical. However, if your coffee is loaded with sugar or cream, you’ll want to rinse those grounds. Plain water is best for your plants. The temperature of the water used to brew the coffee doesn’t really affect the fertilizer value of the grounds.
Grind size and coffee freshness
The size of your coffee grounds doesn’t significantly impact their fertilizer use. Fine espresso grounds or coarser French press grounds both work. Freshness is also not a major concern for fertilizer. Whether the grounds are a day old or a week old, their nutrient content for plants remains largely the same.
Coffee-to-water ratio
This is crucial for your morning cup, but not so much for the grounds as fertilizer. You’re not aiming for a specific strength of “coffee tea” for your plants. You’re using the spent grounds for their mineral content and soil-improving properties. So, don’t stress about the ratio here.
Cleanliness/descale status
This is more about your coffee maker than your plants. If your brewer is full of old coffee oils or mineral buildup, it’s probably time for a clean. While this won’t directly harm your plants if you use the grounds, a clean machine makes better coffee and runs more efficiently. A quick vinegar rinse usually does the trick for most machines.
Step-by-step (brew workflow)
Here’s how to get those grounds from your mug to your garden.
1. Brew your coffee.
- What to do: Make your usual cup of coffee using your preferred method.
- What “good” looks like: A delicious cup of coffee for you. The spent grounds are the byproduct we’re after.
- Common mistake: Using grounds that are heavily sweetened or have dairy added. These can attract pests or create mold.
- How to avoid it: Stick to black coffee, or rinse grounds if they have additives.
2. Collect the spent grounds.
- What to do: After brewing, gather the used coffee grounds. If using a filter, let it drain well.
- What “good” looks like: Damp, but not soaking wet, grounds. If using a French press, scoop them out.
- Common mistake: Leaving grounds sitting in a wet pile for too long. This can lead to mold.
- How to avoid it: Spread them out on a tray or in a single layer on a newspaper to dry slightly before storing or using.
3. Rinse if necessary.
- What to do: If your grounds have sugar, milk, or cream, rinse them thoroughly with plain water.
- What “good” looks like: Clean grounds free of any sticky or oily residue.
- Common mistake: Skipping the rinse with sweetened/flavored grounds.
- How to avoid it: Just a quick rinse under the tap is fine.
4. Dry the grounds (optional but recommended).
- What to do: Spread the rinsed grounds thinly on a baking sheet, newspaper, or a clean cloth. Let them air dry for a day or two.
- What “good” looks like: Dry, crumbly grounds that are easy to handle.
- Common mistake: Storing wet grounds.
- How to avoid it: Always dry them out to prevent mold and clumping.
5. Choose your application method.
- What to do: Decide if you’ll mix grounds directly into the soil, add them to your compost pile, or make a “coffee tea.”
- What “good” looks like: You have a plan that suits your gardening style.
- Common mistake: Applying grounds too thickly around plant stems.
- How to avoid it: Always dilute or mix them well.
6. Apply to soil (Method 1).
- What to do: Gently fork dried coffee grounds into the top 2-4 inches of soil around your plants. Avoid piling them directly against the stems.
- What “good” looks like: Grounds are evenly distributed and mixed into the soil.
- Common mistake: Applying grounds in a thick layer on the soil surface.
- How to avoid it: This can create a water-repellent crust and prevent air circulation. Mix them in.
Gently fork dried coffee grounds into the top 2-4 inches of soil around your plants using your favorite gardening tools. This ensures even distribution and proper aeration.
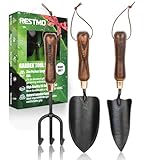
- 𝐏𝐫𝐞𝐦𝐢𝐮𝐦 𝟑-𝐢𝐧-𝟏 𝐆𝐚𝐫𝐝𝐞𝐧 𝐄𝐬𝐬𝐞𝐧𝐭𝐢𝐚𝐥 𝐓𝐨𝐨𝐥𝐬: Our complete 3-in-1 set includes a garden trowel, transplanter, and cultivator, crafted from strong carbon steel and polished wood. Everything you need to dig, weed, turn soil, aerate, and transplant with confidence. Each tool features a delicately engraved logo for a touch of understated elegance, making it perfect for dedicated gardeners and thoughtful gift-givers alike, whether they’re experts or just getting started.
- 𝐒𝐮𝐩𝐞𝐫𝐢𝐨𝐫 𝟓𝟎# 𝐂𝐚𝐫𝐛𝐨𝐧 𝐒𝐭𝐞𝐞𝐥: While most garden tools are made from ordinary #40 carbon steel, we use premium #50 carbon steel for exceptional strength and durability. Harder and more resilient, it boasts a 45 HRC hardness rating and supports up to 55 lbs, far outperforming standard tools that bend or break under pressure. The polished, oxidized finish adds an antique-inspired look while protecting against wear, keeping your tools looking timeless through years of use.
- 𝐄𝐫𝐠𝐨𝐧𝐨𝐦𝐢𝐜 𝐏𝐫𝐞𝐦𝐢𝐮𝐦 𝐖𝐨𝐨𝐝 𝐇𝐚𝐧𝐝𝐥𝐞: Designed for a natural, comfortable grip, our handles are carved from quality wood that absorbs shock and reduces hand fatigue. Each handle is carefully oxidized and textured to highlight the wood’s natural grain, beautiful, durable, and built to last. Unlike plastic handles that can warp in heat, ours stay sturdy and stylish season after season.
- 𝐑𝐞𝐢𝐧𝐟𝐨𝐫𝐜𝐞𝐝 𝐖𝐞𝐥𝐝𝐢𝐧𝐠 𝐟𝐨𝐫 𝐔𝐥𝐭𝐫𝐚 𝐃𝐮𝐫𝐚𝐛𝐢𝐥𝐢𝐭𝐲: We go beyond ordinary welding. Through a specialized reinforcement process, we craft joints so strong they can withstand the weight of an SUV without breaking. It’s a testament to durability, a promise that these tools are made to serve you reliably long time.
- 𝐓𝐡𝐞 𝐏𝐞𝐫𝐟𝐞𝐜𝐭 𝐆𝐚𝐫𝐝𝐞𝐧𝐢𝐧𝐠 𝐆𝐢𝐟𝐭, 𝐑𝐞𝐚𝐝𝐲 𝐭𝐨 𝐆𝐢𝐯𝐞: Presented in an elegant gift-ready box, this set is more than just garden tools, it’s a statement of quality. Every detail reflects artistry and durability, making it a ideal gift for Christmas, New Year, birthday, women, men, gardener.
7. Add to compost (Method 2).
- What to do: Toss your used grounds into your compost bin. They are considered a “green” material, so balance them with “brown” materials like leaves or cardboard.
- What “good” looks like: Grounds are mixed in with other compost materials.
- Common mistake: Adding too many grounds without enough carbon-rich material.
- How to avoid it: This can make your compost too wet and smelly. Aim for a good mix.
8. Make “Coffee Tea” (Method 3 – use sparingly).
- What to do: Steep about 2 cups of used grounds in a gallon of water for a few hours or overnight. Strain the liquid.
- What “good” looks like: A weak, brownish liquid that smells faintly of coffee.
- Common mistake: Using this concentrated liquid directly on plants.
- How to avoid it: Always dilute this “tea” with plain water (at least 1:1 ratio) before watering your plants.
9. Water your plants.
- What to do: Water your plants normally after applying the grounds or coffee tea.
- What “good” looks like: The soil is moist and the nutrients can start breaking down.
- Common mistake: Overwatering, especially if grounds were applied thickly.
- How to avoid it: Check soil moisture before watering.
10. Observe your plants.
- What to do: Keep an eye on your plants for the next few weeks.
- What “good” looks like: Plants look healthy, vibrant, and are growing well.
- Common mistake: Not noticing signs of stress.
- How to avoid it: Regularly check leaf color, growth rate, and overall plant vigor.
Common mistakes (and what happens if you ignore them)
| Mistake | What it causes | Fix |
|---|---|---|
| Applying grounds too thickly on surface | Creates a water-repellent crust, hinders air flow, can promote fungal growth. | Fork grounds into the top few inches of soil or mix with compost. |
| Using sweetened or flavored grounds | Attracts pests (ants, flies), can lead to mold, introduces unwanted sugars. | Rinse grounds thoroughly with plain water before use. |
| Piling grounds directly against plant stems | Can burn or damage delicate stem tissues, encourages rot. | Keep grounds at least an inch or two away from the base of the plant. |
| Not drying grounds before storage | Leads to mold growth, clumping, and a generally unpleasant, unusable mess. | Spread grounds thinly to air dry for a day or two before storing. |
| Over-applying grounds to sensitive plants | Can make soil too acidic, potentially harming plants that prefer alkaline soil. | Use sparingly, especially on acid-sensitive plants like lavender or hydrangeas. |
| Using “coffee tea” without dilution | Can shock plant roots with acidity or excess nitrogen, causing leaf burn. | Always dilute coffee tea with at least an equal part of plain water. |
| Adding only grounds to compost | Creates a wet, anaerobic (oxygen-deprived) compost pile that smells bad. | Balance coffee grounds (greens) with carbon-rich brown materials (leaves, paper). |
| Ignoring plant stress signals | Missed opportunities to correct issues, leading to unhealthy or dying plants. | Regularly inspect plants for yellowing leaves, wilting, or stunted growth. |
| Using grounds from heavily processed coffee | Some additives might not be beneficial for soil or plants. | Stick to plain, unflavored coffee grounds. |
Decision rules (simple if/then)
- If your plants are in pots, then use coffee grounds sparingly because they can compact the soil and affect drainage.
- If your soil is already acidic, then avoid using coffee grounds or use them in very small amounts because they can lower the pH further.
- If you have acid-loving plants (like blueberries or azaleas), then coffee grounds can be beneficial because they help create the acidic environment they thrive in.
- If you are starting seeds, then hold off on using coffee grounds directly because their nitrogen content can be too strong for delicate seedlings.
- If you notice a white, powdery mold forming on the surface of your soil after applying grounds, then you’ve likely applied them too thickly or they weren’t dried properly because mold thrives in damp, stagnant conditions.
- If your coffee grounds are heavily sweetened or contain milk, then rinse them thoroughly with water before applying to soil because sugars and fats can attract pests and promote unwanted microbial growth.
- If you are unsure about your soil’s pH, then test it before adding significant amounts of coffee grounds because you don’t want to make an already acidic soil even more so.
- If you want to maximize nutrient availability, then composting grounds before adding them to the garden is a good idea because the composting process breaks them down into more readily available forms.
- If you are using a drip coffee maker with a paper filter, then you can compost both the grounds and the paper filter together because they are both organic materials.
- If your plants are showing signs of nitrogen deficiency (pale green leaves, slow growth), then adding coffee grounds can help because they are a good source of nitrogen.
- If you notice your plants looking a bit “tired” or lacking vigor, then a light application of coffee grounds can provide a nutrient boost.
If your plants are showing signs of nitrogen deficiency (pale green leaves, slow growth), then adding coffee grounds can help because they are a good source of nitrogen, much like a high-quality nitrogen rich soil.

- NEW PACKAGE - Same Amazing Product that Plants & Customers LOVE!
- A LITTLE DOES A LOT - Easy to use compressed soil granules quickly expand up to 4X and make up to 3 gallons of soil. Light, compact, easy to carry, resealable bag saves space.
- NOURISH & SEE THEM FLOURISH - Packed with every essential nutrient plus 55+ trace minerals, this concentrated super soil feeds and grows strong beautiful vibrant plants better than ever!
- FAST ACTING & LONG LASTING - Easy to wet and stays moist 3X longer. Living soil gets water, air and nutrients to roots on demand. Perfect for all seeds, starts, transplants, containers, raised beds and gardens!
- TRULY ORGANIC YOU CAN TRUST - 100% Natural ground coconut coir, worm castings, compost, humic acids, amino acids, kelp and beneficial GroBiotics including mycorrhizae give your soil, flower, vegetable, herb, fruit, tree, shrub, raised bed, outdoor or indoor potted house plants and more a super-boost.
FAQ
Are coffee grounds good for all plants?
Most plants benefit from the nutrients in coffee grounds, especially those that prefer slightly acidic soil. However, some plants, like those that prefer alkaline soil (e.g., lilacs, some vegetables), might not do as well. It’s always best to know your plant’s preferences.
How often can I use coffee grounds as fertilizer?
You don’t need to go overboard. Applying coffee grounds once every month or two is usually sufficient. Overuse can lead to soil imbalances, especially with acidity.
Can I put coffee grounds directly on my lawn?
Yes, you can lightly sprinkle used coffee grounds on your lawn. They add nitrogen and improve soil structure. Just make sure to spread them thinly so they don’t mat together and block sunlight or air.
Will coffee grounds attract bugs?
Plain coffee grounds generally won’t attract pests. However, if you use grounds with sugar or milk, or if they start to mold, you might see ants or flies. Rinsing and drying are key.
How much coffee fertilizer should I use?
A good rule of thumb is about 1-2 cups of dried grounds per 10 square feet of garden space. For potted plants, use a thinner layer mixed into the top inch of soil. Always start with less and observe your plants.
Can I use grounds from flavored coffee?
It’s best to stick with plain coffee grounds. Flavored coffees often contain artificial ingredients or sugars that aren’t ideal for your soil or plants. If you must use them, rinse them well.
Do coffee grounds help with pest control?
Some gardeners believe that the grounds can deter certain pests like slugs and snails due to their texture and acidity. While not a foolproof method, it might offer some minor benefits.
What if my coffee grounds turn moldy?
Mold usually means the grounds were too wet when stored or applied too thickly. Scrape away the moldy layer, and ensure you dry your grounds thoroughly in the future. Mix them into compost or soil well.
What this page does NOT cover (and where to go next)
- Specific soil pH requirements for every plant species.
- Detailed composting techniques for large-scale operations.
- The chemical breakdown processes of nutrients in soil.
- Using coffee grounds for non-gardening purposes.
- Advanced soil amendment strategies beyond basic organic additions.