Homemade Nitro Cold Brew Coffee Guide
Quick answer
- Ensure your cold brew concentrate is properly extracted and free of sediment.
- Use a high-quality nitro cold brew system, often including a keg, gas blend, and tap.
- Charge the keg with a blend of nitrogen and CO2 (usually around 70% nitrogen, 30% CO2) for the best cascading effect.
- Shake the keg vigorously to properly infuse the gas into the cold brew.
- Serve immediately after charging and shaking for optimal texture and taste.
- Store the keg in a refrigerator to maintain freshness and carbonation.
For the best cascading effect and creamy texture, ensure you’re using a high-quality nitrogen gas blend specifically designed for nitro cold brew systems. This is key to replicating that cafe-style experience at home.
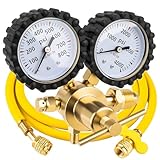
- HVAC Essential: Siasky Nitrogen Regulator is a must-have for HVAC professionals, ensuring accurate pressure testing and leak detection in AC systems
- Precise Regulation: Equipped with 0-800 PSI Delivery Pressure and a 78.7" Hose, this regulator provides precise control for all your nitrogen testing needs
- Reliable Performance: The CGA580 Inlet and 1/4-Inch Male Flare Outlet Connection ensure a secure fit, while the durable construction guarantees long-lasting use in any HVAC setting
- Leak Detection Made Easy: Easily monitor pressures with the 0-800 PSI low pressure gauge and 0-4000 PSI high pressure gauge, making leak detection and troubleshooting a breeze.NOTE: The gauge shows 800 PSI that you can rate them at 600 PSl, but they are able to go up to 600 PSI
- Versatile Kit: Whether you're working with nitrogen tanks, pressure tests, or AC systems, the Siasky Nitrogen Regulator is the ultimate solution for all your HVAC needs. Get yours today and experience top-tier performance
Who this is for
- Coffee enthusiasts looking to replicate the creamy texture and smooth taste of cafe-style nitro cold brew at home.
- Home baristas who have mastered basic cold brewing and want to elevate their coffee experience.
- Individuals who enjoy the sensory appeal of nitro cold brew and want to save money by making it themselves.
What to check first
Brewer type and filter type
The foundation of good nitro cold brew is a well-made cold brew concentrate. Whether you use a French press, a dedicated cold brew maker, or even a simple jar with a cheesecloth filter, the method matters.
- What to check: Ensure your chosen method is designed to produce a smooth concentrate. For nitro, a very fine sediment can clog your nitro system or create an unpleasant mouthfeel.
- Good looks like: A clear, dark liquid with minimal to no fine coffee grounds or sediment.
- Common mistake: Using a brewing method that allows too much sediment through, or not filtering the concentrate sufficiently before transferring it to your nitro keg. This can lead to a cloudy final product and potential equipment issues.
Water quality and temperature
The water you use for your initial cold brew is as important as the coffee itself.
- What to check: Use filtered water. Tap water can contain minerals or chlorine that negatively impact flavor. The brewing temperature for cold brew is ambient, typically between 65-75°F.
- Good looks like: Clean, neutral-tasting water.
- Common mistake: Using straight tap water, which can impart off-flavors. Overheating or underheating water during the initial brew (though cold brew is less sensitive to temperature fluctuations than hot coffee, consistency is key).
Grind size and coffee freshness
The grind size determines how efficiently coffee grounds extract flavor. Freshness ensures that flavor is vibrant.
- What to check: For cold brew, a coarse grind is generally recommended, similar to what you’d use for a French press. Use freshly roasted, whole bean coffee and grind it just before brewing.
- Good looks like: Uniformly coarse grounds. Coffee that smells rich and aromatic.
- Common mistake: Using a pre-ground coffee that is too fine, leading to over-extraction and bitterness, or using stale coffee that will result in a flat, uninspired concentrate.
Coffee-to-water ratio
This ratio dictates the strength and flavor profile of your cold brew concentrate.
- What to check: A common starting point is a 1:4 to 1:8 ratio of coffee to water by weight (e.g., 1 lb of coffee to 4-8 lbs of water). Experiment to find your preference.
- Good looks like: A concentrate that is strong but not overwhelmingly bitter. It should be palatable on its own but also able to withstand dilution from the nitrogen infusion.
- Common mistake: Using a ratio that’s too weak, resulting in a watery concentrate that won’t stand up to the gas infusion, or too strong, leading to a bitter, unpleasantly concentrated brew.
Cleanliness/descale status
A clean system is crucial for both flavor and the proper functioning of your nitro equipment.
- What to check: Ensure your cold brew maker, any straining equipment, and especially your nitro keg and tap system are thoroughly cleaned. Descale your equipment regularly if recommended by the manufacturer.
- Good looks like: No residual coffee oils or odors.
- Common mistake: Neglecting to clean the nitro keg or tap lines, which can lead to off-flavors, bacterial growth, and clogs. This is particularly important for the nitro system, as coffee oils can affect the gas infusion and tap performance.
Step-by-step (brew workflow)
1. Prepare your cold brew concentrate:
- What to do: Grind your coffee beans to a coarse consistency. Combine coffee grounds and filtered water in your cold brew maker (e.g., a 1:5 ratio of coffee to water by weight is a good starting point). Stir gently to ensure all grounds are saturated.
- What “good” looks like: Evenly saturated coarse grounds in water, forming a slurry.
- Common mistake: Not ensuring all grounds are wet, leading to uneven extraction. Stir gently to avoid over-agitating.
2. Steep the coffee:
- What to do: Cover your cold brew maker and let it steep at room temperature or in the refrigerator for 12-24 hours. Longer steeping times generally result in a stronger, more flavorful concentrate.
- What “good” looks like: A rich, dark liquid has formed.
- Common mistake: Steeping for too short a time, resulting in a weak brew, or too long, potentially leading to bitterness. Experiment to find your ideal time.
3. Filter the concentrate:
- What to do: Carefully strain the coffee concentrate to remove as much sediment as possible. You may need to filter it multiple times through a fine-mesh sieve, cheesecloth, or a dedicated cold brew filter.
- What “good” looks like: A clear, dark liquid with no visible grounds.
- Common mistake: Not filtering thoroughly enough. This is critical for nitro, as fine particles can clog your system.
4. Chill the concentrate:
- What to do: Transfer the filtered concentrate to an airtight container and refrigerate it for at least a few hours, or until thoroughly chilled (ideally below 40°F).
- What “good” looks like: A cold, smooth concentrate.
- Common mistake: Skipping this step. Cold brew is best served cold, and the gas infusion works more effectively with a chilled liquid.
5. Prepare the nitro keg:
- What to do: Ensure your nitro keg is clean and dry. Connect your gas manifold or regulator to your CO2/Nitrogen tank. For nitro, you’ll typically use a blend of about 70% nitrogen and 30% CO2.
- What “good” looks like: The keg is ready to be filled, and the gas system is properly connected.
- Common mistake: Using 100% CO2, which will result in a different texture and carbonation level, or an improperly connected gas system, which can lead to leaks.
6. Fill the keg:
- What to do: Pour your chilled, filtered cold brew concentrate into the nitro keg. Leave some headspace at the top for the gas.
- What “good” looks like: The keg is filled with cold brew concentrate, with adequate room for gas.
- Common mistake: Overfilling the keg, which leaves no room for gas infusion and can lead to over-carbonation or spills.
7. Charge the keg with gas:
- What to do: Connect your gas line to the keg. For nitro, charge the keg with your nitrogen/CO2 blend to the recommended pressure (check your system’s manual, but often around 30-40 PSI).
- What “good” looks like: The keg is pressurized with the correct gas blend.
- Common mistake: Using the wrong pressure. Too low and you won’t get enough infusion; too high and you risk over-carbonation or damage to the keg.
8. Shake the keg:
- What to do: Disconnect the gas line and seal the keg. Vigorously shake the keg for 30-60 seconds. This helps dissolve the gas into the liquid.
- What “good” looks like: You can feel the liquid moving freely inside, indicating good gas dispersion.
- Common mistake: Not shaking enough. Insufficient shaking leads to poor gas infusion and a less creamy texture.
9. Purge and re-pressurize (optional but recommended):
- What to do: Briefly release some pressure from the keg to vent excess CO2, then re-charge with your nitro blend to the desired serving pressure (often lower than charging pressure, around 15-25 PSI).
- What “good” looks like: The keg is at an optimal serving pressure for a smooth pour.
- Common mistake: Skipping this step can lead to a very foamy pour if too much CO2 is present.
10. Serve:
- What to do: Connect your nitro tap and pour the cold brew. The nitrogen will create the characteristic cascading effect and creamy head.
- What “good” looks like: A smooth, velvety pour with a rich, creamy head.
- Common mistake: Pouring too quickly or from too high, which can disrupt the nitro effect and create excessive foam.
Common mistakes (and what happens if you ignore them)
| Mistake | What it causes | Fix