Homemade Keto Coffee Ice Cream Recipe
Quick answer
- Use a good quality keto-friendly sweetener like erythritol or xylitol.
- Opt for full-fat coconut milk or heavy cream for richness.
- Brew strong coffee or use espresso for a bold flavor.
- Avoid added sugars and high-carb ingredients.
- Chill your base thoroughly before churning.
- Taste and adjust sweetness before freezing.
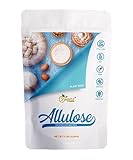
For the best results, use a high-quality keto-friendly sweetener like erythritol or xylitol. This ensures your ice cream is sweet without the carbs.
- 【AMAZING TASTE AND CALORIE-FREE】 Allulose is a monosaccharide or simple sugar that naturally exists in some fruits. It closely resembles the flavor of regular sugar but without any unpleasant aftertaste. Allulose is about 70% as sweet as sugar, but contains less than 10% of the calories found in sucrose, making it virtually calorie-free while still providing the natural sweetness of sugar.
- 【GREAT TEXTURE, VOLUME, AND CARAMELIZATION】 Allulose virtually replicates the texture and volume of sugar, while also demonstrating similar caramelization and thickening properties when used in baking and cooking. These exceptional characteristics set allulose apart as an excellent ingredient for achieving desired outcomes in a wide range of culinary applications that align with your healthy lifestyle.
- 【MORE ALLULOSE BLENDS】 Going beyond Allulose, G-Sweetz Allulose sweeteners broaden your options by blending with a variety of intensive sweeteners such as Monk Fruit extract, Stevia Extract, a combination of both, or the classic sucralose. Each sweetener series, derived from Allulose blends, provides a range of sweetness levels from 1X to 20X, ensuring both your sweet tooth and budget are perfectly catered to!
- 【HEALTHY CHOICES】 Upgrade your sweet experience with a sugary-tasting sweetener that's Keto-friendly, containing 0 net carbs. Our allulose is derived from natural ingredients and is free of GMOs, additives, artificial flavors, soy, and gluten. This sweetener is also vegan-friendly, tooth-friendly, and has zero sugar. Enjoy its delicious taste without worrying about any negative side effects.
- 【US QUALITY】 Our products are made and tested in accordance with approved product standards. Our facilities are registered with the FDA and comply with the regulations and licensing requirements of the New Jersey Department of Health and Earth Kosher. For any product inquiries, our US-based live support team is available to assist you.
Who this is for
- Anyone following a ketogenic diet who craves a sweet treat.
- Coffee lovers looking for a homemade, guilt-free dessert.
- Home cooks who enjoy experimenting with low-carb recipes.
What to check first
Brewer type and filter type
This recipe relies on a good coffee flavor. A drip coffee maker or an espresso machine will work. If you’re using a French press, make sure your filter is fine enough to keep grounds out of your ice cream base. A paper filter is generally best for a clean brew.
Water quality and temperature
Use filtered water for your coffee. Tap water can sometimes have off-flavors that will come through in your ice cream. For brewing, aim for water that’s around 195-205°F. Too cool, and you won’t extract enough flavor. Too hot, and you can scorch the grounds.
Grind size and coffee freshness
A medium grind is usually good for drip coffee makers. If you’re using an espresso machine, you’ll need a finer grind. Freshly roasted beans, ground just before brewing, will give you the best flavor. Stale coffee just tastes flat, and nobody wants flat ice cream.
Coffee-to-water ratio
For a strong coffee base, you’ll want to use more coffee grounds than usual. A good starting point is a ratio of about 1:15 (coffee to water by weight). So, for 15 oz of water, use about 1 oz of coffee. This will give you a concentrated brew to stand up to the other ingredients.
Cleanliness/descale status
Make sure your coffee maker is clean. Old coffee oils can go rancid and make your ice cream taste bitter or stale. If you haven’t descaled your machine in a while, give it a good cleaning before you start. A clean machine means cleaner flavor.
Step-by-step (brew workflow)
1. Brew strong coffee: Brew about 1.5 cups of very strong coffee. Use your favorite method, but make sure it’s concentrated.
- What “good” looks like: A rich, dark liquid with a robust aroma. No watery appearance.
- Common mistake: Brewing weak coffee. This is the flavor backbone, so don’t skimp. Use more grounds or less water than you normally would.
2. Cool the coffee: Let the hot coffee cool down completely. You can speed this up by placing the container in an ice bath.
- What “good” looks like: The coffee is at room temperature or cooler.
- Common mistake: Adding hot coffee to the dairy base. This can affect the texture and potentially “cook” some of the ingredients. Patience here.
3. Combine base ingredients: In a bowl, whisk together 1 can (13.5 oz) of full-fat coconut milk, 1 cup of heavy cream, and your keto-friendly sweetener. Start with about 1/2 cup of sweetener and add more to taste.
- What “good” looks like: A smooth, well-combined liquid with no grainy sweetener residue.
- Common mistake: Not dissolving the sweetener fully. Give it a good whisk until it’s completely incorporated.
4. Add coffee and vanilla: Pour in the cooled strong coffee and 1 teaspoon of vanilla extract. Whisk everything together until thoroughly combined.
- What “good” looks like: A uniform, pale brown liquid.
- Common mistake: Forgetting the vanilla. It really rounds out the coffee flavor.
5. Taste and adjust: Taste the mixture. Add more sweetener if needed, or a pinch of salt to enhance the flavors.
- What “good” looks like: The sweetness level is to your liking, and the flavors are balanced.
- Common mistake: Under-sweetening. Remember that freezing mutes sweetness, so make it a little sweeter than you think you need.
6. Chill the base: Cover the bowl and refrigerate the mixture for at least 4 hours, or preferably overnight. The colder the base, the better it will churn.
- What “good” looks like: The mixture is very cold to the touch.
- Common mistake: Churning a warm base. This will result in icy ice cream and a longer churning time.
7. Churn the ice cream: Pour the chilled base into your ice cream maker and churn according to the manufacturer’s instructions.
- What “good” looks like: The mixture thickens to a soft-serve consistency.
- Common mistake: Over-churning. Stop when it reaches a soft-serve stage; it will firm up in the freezer.
Once your base is perfectly chilled, pour it into your ice cream maker and churn according to the manufacturer’s instructions. A good ice cream maker is key to achieving that perfect creamy texture.

- DOUBLE-INSULATED FREEZER BOWL: This Cuisinart Cuisinart Ice Cream Maker Machine with double-insulated freezer bowl holds a generous 2 quarts of your favorite frozen dessert treats, including ice cream, frozen yogurt, sorbet, sherbet, and frozen drinks.
- SUPERIOR FUNCTIONALITY: The brushed stainless steel ice cream machine features a fully automatic heavy-duty motor to make frozen desserts or drinks in under 30 minutes.
- MUST-HAVE FEATURES: Large ingredient spout for easily adding favorite mix-ins, including retractable cord storage that keeps countertops clutter-free.
- WHAT’S INCLUDED: Frozen yogurt machine comes with a double-insulated freezer bowl that holds up to 2 quarts of frozen dessert, paddle, instructions, and a recipe book.
- LIMITED 3-YEAR WARRANTY: The BPA-free Cuisinart Ice Cream Maker Machine ICE30BCP1 comes with a limited 3-year warranty.
8. Add mix-ins (optional): If you want to add chocolate chips or nuts, stir them in during the last few minutes of churning.
- What “good” looks like: Evenly distributed additions.
- Common mistake: Adding mix-ins too early. They can break down or get chopped too finely.
9. Freeze to firm up: Transfer the churned ice cream to a freezer-safe container. Press plastic wrap directly onto the surface to prevent ice crystals. Freeze for at least 2-4 hours until firm.
- What “good” looks like: A scoopable, firm consistency.
- Common mistake: Not covering the surface. This leads to dreaded ice crystals and a less smooth texture.
Common mistakes (and what happens if you ignore them)
| Mistake | What it causes | Fix |
|---|---|---|
| Using weak coffee | Flat, uninspired coffee flavor | Brew stronger coffee; use more grounds or less water. |
| Not chilling the base enough | Icy texture, long churn time, poor consistency | Chill base for at least 4 hours, ideally overnight. |
| Using low-fat dairy or milk alternatives | Thin, watery ice cream with poor mouthfeel | Stick to full-fat coconut milk or heavy cream for richness. |
| Adding hot ingredients to the base | Affects texture, can curdle ingredients | Ensure all additions, especially coffee, are cooled completely. |
| Not dissolving sweetener properly | Gritty texture, uneven sweetness | Whisk thoroughly until sweetener is fully incorporated before chilling. |
| Over-churning the ice cream | Stiff, gummy texture | Stop churning when it reaches a soft-serve consistency. |
| Not covering ice cream surface | Ice crystals form, leading to a grainy texture | Press plastic wrap directly onto the surface before freezing. |
| Using stale coffee beans | Dull, bitter, or off-flavors in the final product | Use freshly roasted beans and grind them just before brewing. |
| Adding too much liquid | Watery ice cream that doesn’t freeze well | Be mindful of the total liquid volume; strong coffee is concentrated. |
| Not tasting and adjusting sweetness | Bland or overly sweet ice cream | Taste the base before chilling; remember freezing dulls sweetness. |
Decision rules (simple if/then)
- If your coffee tastes weak, then add more coffee grounds next time because a strong coffee flavor is crucial.
- If your ice cream is too icy, then ensure your base is thoroughly chilled before churning because a cold base churns better.
- If the texture is too thin, then use heavier cream or a thicker coconut milk next time because fat content is key to richness.
- If you detect a bitter note, then check your coffee brewing temperature or bean freshness because scorching or stale beans can cause bitterness.
- If the sweetness isn’t quite right, then add a touch more sweetener before freezing because freezing mutes sweetness.
- If you want a bolder coffee punch, then use espresso instead of brewed coffee because espresso is more concentrated.
- If you notice a grainy texture, then make sure your sweetener is fully dissolved before chilling because undissolved sweetener causes grittiness.
- If the ice cream seems too hard to scoop, then let it sit at room temperature for a few minutes before serving because it will be very firm after freezing.
- If you’re using a new sweetener, then start with a smaller amount and taste as you go because different sweeteners have varying sweetness levels.
- If you find the flavor a bit flat, then add a tiny pinch of salt to the base before chilling because salt enhances sweetness and coffee notes.
FAQ
Can I use decaf coffee?
Yes, you can use decaf coffee. Just brew it strong, as you would regular coffee, to ensure a good flavor profile.
What kind of sweetener is best for keto coffee ice cream?
Erythritol, xylitol (be cautious if you have pets, as it’s toxic to dogs), or a blend of monk fruit and erythritol are good choices. They offer sweetness without the carbs.
Can I make this dairy-free?
Absolutely. Use full-fat canned coconut milk and ensure any other ingredients you add are also dairy-free.
Why is my ice cream not freezing properly?
Likely causes include a base that wasn’t chilled enough, too much liquid, or an issue with your ice cream maker. Make sure it’s properly pre-frozen if it’s a freezer-bowl model.
How long does homemade keto ice cream last?
It’s best consumed within 1-2 weeks. After that, the texture can start to degrade, becoming icier.
Can I add other flavors?
Sure. A bit of unsweetened cocoa powder, some sugar-free chocolate chips, or a swirl of sugar-free caramel could be delicious additions.
My ice cream is too sweet, what did I do wrong?
You likely added too much sweetener. It’s always better to start with less and add more, as freezing can sometimes intensify sweetness.
What’s the deal with the plastic wrap?
Pressing plastic wrap directly onto the surface of the ice cream before freezing prevents air from getting in, which is the main cause of ice crystal formation.
What this page does NOT cover (and where to go next)
- Detailed troubleshooting for specific ice cream maker models.
- Advanced flavor infusions or techniques for ultra-smooth texture.
- Nutritional breakdowns for specific sweetener combinations.
- Recipes for sugar-free mix-ins like chocolate chips or cookie dough.