Homemade Coffee Bean Extract: Flavorful Recipes
Quick answer
- Use high-proof alcohol (like vodka or rum) as your solvent.
- Start with a 1:2 ratio of coffee beans to alcohol by weight.
- Grind your beans coarsely.
- Store in a cool, dark place for at least 2 weeks, shaking daily.
- Taste and strain when the flavor is right for you.
- Store your finished extract in a sealed glass bottle.
Who this is for
- Home baristas looking to elevate their coffee game.
- Bakers and cooks who want to infuse desserts and drinks with pure coffee flavor.
- DIY enthusiasts who enjoy making their own pantry staples.
What to check first
Brewer type and filter type
This isn’t about brewing coffee, but making an extract. So, no brewer or filter is directly involved. The “extraction” happens through steeping the beans in alcohol.
Water quality and temperature
Again, not directly applicable here. You’re using alcohol, not water, as your primary solvent. The quality of your alcohol matters, though. Stick with something neutral and high-proof for a clean flavor.
Grind size and coffee freshness
This is important. You want a coarse grind. Think French press grind. This prevents over-extraction and bitterness. Freshly roasted beans are best for the most vibrant flavor. Stale beans will give you a dull extract.
Coffee-to-water ratio
For coffee extract, we’re talking coffee-to-alcohol ratio. A good starting point is 1:2 by weight. So, if you use 4 oz of coffee beans, use 8 oz of alcohol. You can adjust this later based on how strong you want it.
Cleanliness/descale status
Your equipment needs to be clean. You’re making a food-grade product. Use clean jars, funnels, and storage bottles. No one wants funky flavors in their homemade extract.
Step-by-step (brew workflow)
1. Gather your ingredients and equipment.
- What to do: Get your whole coffee beans, high-proof neutral alcohol (like 80-100 proof vodka or white rum), a clean glass jar with a tight-fitting lid, and a funnel.
- What “good” looks like: Everything is clean and ready to go. No dust bunnies in sight.
- Common mistake: Using a jar that’s too small or doesn’t seal well. You’ll end up with a mess or a weak extract.
For combining your ingredients, a clean glass jar with a tight-fitting lid is essential. Consider this highly-rated glass jar with lid for your extraction process.
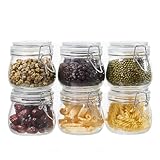
- 【Premium Glass Jars with Airtight Lids】These airtight glass jars feature a wire clip fastening system with clear preserving seals, locking in freshness and flavor. Ideal for dry goods and long-term food storage.
- 【Perfect Size: 17 oz Capacity – Set of 6】Each jar holds 17oz, just right for storing beans, flour, sugar, cereal, pasta, or snacks. Comes as a 6 pack to organize your kitchen efficiently.
- 【Durable & Safe Food Storage Containers】Made from thick, lead-free, glass food storage containers that are BPA-free, odor-resistant, and safe for everyday use.
- 【Multi-Purpose Glass Canisters for Kitchen & Pantry】Great for kitchen canning and pickling jars – also suitable for DIY jam, honey, kimchi, spices, and more. A functional and elegant solution for pantry storage jars.
- 【Stylish & Practical Storage Jars】Sleek square design saves space and looks beautiful on shelves. These glass storage jars are easy to stack and clean, combining utility with minimalist decor.
2. Measure your coffee beans.
- What to do: Weigh your whole coffee beans. A 1:2 ratio of beans to alcohol by weight is a solid starting point. For example, 4 oz of beans.
- What “good” looks like: Accurate measurement ensures consistent results.
- Common mistake: Guessing the amount. This leads to inconsistent strength and flavor.
3. Grind your coffee beans.
- What to do: Grind the beans coarsely. You want particles about the size of coarse sea salt.
- What “good” looks like: The grounds are uniform and not powdery.
- Common mistake: Grinding too fine. This can lead to a cloudy extract and bitter flavors.
4. Combine beans and alcohol in the jar.
- What to do: Add the ground coffee to your clean glass jar. Pour the measured alcohol over the grounds, ensuring they are fully submerged.
- What “good” looks like: All the coffee grounds are covered by the alcohol.
- Common mistake: Not using enough alcohol to cover the grounds. This will result in uneven extraction.
5. Seal the jar tightly.
- What to do: Screw the lid on securely.
- What “good” looks like: No leaks. The seal is airtight.
- Common mistake: A loose lid. This allows alcohol to evaporate and can let in unwanted contaminants.
6. Store in a cool, dark place.
- What to do: Find a pantry shelf or cupboard away from direct sunlight and heat.
- What “good” looks like: A stable environment that won’t degrade the ingredients.
- Common mistake: Storing it on the counter where it’s exposed to light and temperature fluctuations.
7. Shake the jar daily.
- What to do: Give the jar a good shake every day for the first week, then a few times a week after that.
- What “good” looks like: The grounds are agitated, promoting better extraction.
- Common mistake: Forgetting to shake it. This means the flavor won’t fully develop.
8. Let it steep for at least 2 weeks.
- What to do: Patience is key. Let the mixture sit and infuse.
- What “good” looks like: The alcohol starts to take on a deep brown color.
- Common mistake: Straining too early. You won’t get the full flavor potential.
9. Taste test.
- What to do: After 2 weeks, carefully open the jar and taste a tiny amount (dilute with a drop of water if needed).
- What “good” looks like: The flavor is intense and tastes like coffee.
- Common mistake: Tasting directly from the jar without diluting. It will be way too strong.
10. Continue steeping if needed.
- What to do: If the flavor isn’t strong enough, let it steep for another week or two, tasting periodically.
- What “good” looks like: You’re getting closer to your desired flavor intensity.
- Common mistake: Over-steeping and extracting bitter compounds.
11. Strain the extract.
- What to do: Once you’re happy with the flavor, strain the liquid through a fine-mesh sieve lined with cheesecloth or a coffee filter into a clean bowl or another jar.
- What “good” looks like: Clear liquid, free of coffee grounds.
- Common mistake: Not straining thoroughly. You’ll end up with sediment in your finished extract.
12. Bottle and store.
- What to do: Pour the strained extract into clean, airtight glass bottles. Label them with the contents and date.
- What “good” looks like: Beautiful, concentrated coffee extract ready for use.
- Common mistake: Using plastic containers. Alcohol can react with plastic over time.
Common mistakes (and what happens if you ignore them)
| Mistake | What it causes | Fix |
|---|---|---|
| Using low-proof alcohol | Weak flavor, potential for spoilage | Use 80-proof (40% ABV) or higher alcohol. |
| Grinding coffee too finely | Cloudy extract, bitter taste, sediment | Stick to a coarse grind, like for French press. |
| Not fully submerging grounds | Uneven extraction, weak spots in flavor | Ensure all coffee grounds are covered by alcohol. |
| Straining too early | Underdeveloped flavor | Steep for at least 2 weeks, tasting periodically. |
| Not shaking the jar | Inconsistent flavor extraction | Shake daily for the first week, then a few times a week. |
| Using stale coffee beans | Dull, flat, or oxidized flavor | Use freshly roasted whole beans for the best aroma and taste. |
| Not cleaning equipment | Off-flavors, potential contamination | Use clean jars, funnels, and bottles for all stages. |
| Storing in direct sunlight | Degrades flavor compounds, can cause spoilage | Keep your extract in a cool, dark pantry or cupboard. |
| Not tasting and adjusting | Extract is too weak or too strong for your needs | Taste periodically and steep longer if needed, or dilute later. |
| Using non-airtight containers | Evaporation of alcohol, loss of potency, spoilage | Always use jars and bottles with tight-fitting, airtight lids. |
Decision rules (simple if/then)
- If your extract tastes weak, then steep it longer because the flavor compounds haven’t fully infused into the alcohol.
- If your extract tastes bitter, then you likely ground the beans too fine or steeped for too long, so consider straining and diluting.
- If your extract is cloudy, then you probably didn’t strain it thoroughly enough, so strain it again through a finer filter like a coffee filter.
- If you want a more intense coffee flavor, then use a higher ratio of coffee beans to alcohol (e.g., 1:1.5 by weight).
- If you want a milder coffee flavor, then use a lower ratio of coffee beans to alcohol (e.g., 1:3 by weight) or dilute the finished extract with more alcohol.
- If you’re using flavored coffee beans, then expect those flavors to be present in your extract as well.
- If you want to speed up the process slightly, then a slightly finer grind (but not too fine!) can help, but don’t overdo it.
- If you notice any off-smells or mold, then discard the batch immediately because it’s not safe to consume.
- If you’re making this for baking, then a darker roast bean will give a more robust flavor, while a lighter roast will be more nuanced.
- If you’re making this for cocktails, then a medium roast often works best for a balanced profile.
FAQ
What kind of alcohol is best for coffee extract?
A neutral, high-proof spirit like vodka or white rum (80-100 proof) is ideal. It won’t impart its own strong flavors, letting the coffee shine.
How long does homemade coffee extract last?
When stored properly in an airtight glass bottle in a cool, dark place, it can last for a year or even longer due to the alcohol acting as a preservative.
Can I use pre-ground coffee?
While you can, it’s not recommended. Pre-ground coffee loses its volatile aromas quickly. Whole beans, ground just before use, will give you a much more vibrant and fresh flavor.
What’s the difference between coffee extract and coffee liqueur?
Coffee extract is a pure infusion of coffee flavor into alcohol, with no added sugar. Coffee liqueur is typically sweetened and often has a lower alcohol content.
How do I use coffee extract in recipes?
You use it sparingly, much like vanilla extract. Start with a teaspoon or two in baked goods, sauces, marinades, or cocktails to add a deep coffee note.
Can I make this with decaf beans?
Yes, you can absolutely make coffee extract with decaf beans if you want the flavor without the caffeine kick.
What if my extract tastes too strong?
No worries. You can dilute it with a bit more of the same alcohol you used to make it, or even a neutral spirit like plain vodka, until it reaches your desired intensity.
Should I use dark or light roast beans?
It depends on the flavor profile you’re going for. Dark roasts offer a bolder, more intense, sometimes smoky flavor. Light roasts will give you a brighter, more nuanced, and acidic coffee note.
What this page does NOT cover (and where to go next)
- Specific recipes for using coffee extract in cocktails or desserts. (Look for “coffee extract recipes” or “coffee-infused desserts”.)
- The science behind solvent extraction in detail. (Explore resources on food chemistry or extraction techniques.)
- Commercial production methods for coffee extracts. (This is a deep dive into industrial processes.)
- Making coffee-flavored syrups or simple syrups. (These involve sugar and water, not alcohol infusion.)