
Fixing A Leaking Coffee Maker: Common Solutions
Quick answer
- A leaking coffee maker is usually caused by a loose connection, a clogged component, or a damaged part.
- Most leaks can be resolved with simple cleaning, tightening, or replacing common parts.
- Always unplug the coffee maker before attempting any repairs.
- Check the water reservoir’s seal and ensure it’s properly seated.
- Inspect the brew basket and carafe for cracks or misalignment.
- Regular descaling and cleaning are key to preventing future leaks.
What this problem usually is (and is not)
- This guide addresses common leaks originating from the coffee maker’s exterior or dripping during the brewing process.
- It is not intended for internal electrical issues or problems with the heating element itself.
- We assume you are experiencing water leaking out of the machine, not just excess steam.
- This guide focuses on standard drip coffee makers. Other types (espresso, pod machines) may have different troubleshooting steps.
- If the leak is significant and accompanied by sparks or unusual noises, unplug the machine immediately and contact the manufacturer or a qualified repair person.
Likely causes (triage list)
Water Reservoir Issues:
- Loose or Cracked Reservoir: Check if the water reservoir is seated correctly and if there are any visible cracks or damage. A loose reservoir won’t seal properly, leading to leaks.
- Faulty Reservoir Seal: The rubber gasket or seal where the reservoir connects to the machine might be worn, cracked, or dislodged.
If you suspect the water reservoir is the source of the leak, ensure it’s properly seated and check for any visible cracks or damage. A faulty or cracked coffee maker water reservoir will need to be replaced.
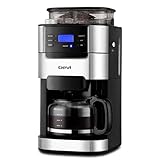
- 【𝟐-𝟏𝟎 𝐂𝐮𝐩 𝐅𝐥𝐞𝐱𝐢𝐛𝐥𝐞 𝐂𝐚𝐩𝐚𝐜𝐢𝐭𝐲】Our drip coffee maker with built-in grinder lets you brew anywhere from 2 to 10 cups. Simply use the “POWDER 2-10” button to adjust the ratio of coffee to water for your perfect strength.
- 【𝐂𝐮𝐬𝐭𝐨𝐦𝐢𝐳𝐚𝐛𝐥𝐞 𝐁𝐫𝐞𝐰 & 𝐆𝐫𝐢𝐧𝐝】This all-in-one machine with a burr grinder offers 3 grind strength levels and 8 adjustable settings. Grind fresh whole beans right before brewing for consistently smooth, flavorful coffee.
- 【𝐑𝐞𝐮𝐬𝐚𝐛𝐥𝐞 & 𝐄𝐚𝐬𝐲-𝐂𝐥𝐞𝐚𝐧 𝐅𝐢𝐥𝐭𝐞𝐫】The coffee maker includes a durable reusable filter that is easy to clean—just rinse with water for quick maintenance and less waste.
- 【𝐈𝐦𝐩𝐨𝐫𝐭𝐚𝐧𝐭 𝐍𝐨𝐭𝐞】Product dimensions: 12.36"D x 8.38"W x 16.93"H. Please measure your countertop and cabinet space beforehand to ensure proper fit.
- 【𝐏𝐫𝐞-𝐁𝐫𝐞𝐰 𝐄𝐱𝐭𝐫𝐚𝐜𝐭𝐢𝐨𝐧 𝐓𝐞𝐜𝐡𝐧𝐨𝐥𝐨𝐠𝐲】Featuring advanced pre-brew technology, this black & silver coffee maker evenly saturates coffee grounds through precise temperature control, unlocking richer flavor and aroma before full brewing.
Brew Basket and Filter Holder:
- Clogged Brew Basket: Coffee grounds or mineral buildup can block the drainage holes in the brew basket.
- Overfilled Brew Basket: Using too much coffee grounds can cause water to overflow the basket.
- Incorrect Filter Placement: A filter that is folded, torn, or not seated correctly can allow water to bypass the grounds and leak.
- Cracked Brew Basket/Holder: Inspect the plastic components for any signs of damage.
Carafe and Lid:
- Misaligned Carafe: If the carafe isn’t placed correctly under the brew basket, brewed coffee can spill out.
- Damaged Carafe Lid: A cracked or improperly fitted lid can cause overflow or leaks from the carafe itself.
Internal Plumbing and Connections:
- Clogged Water Lines: Mineral deposits (scale) can build up inside the machine, restricting water flow and causing pressure to build up, leading to leaks.
- Loose Hose Connections: Internal hoses connecting the water reservoir to the heating element and brew head can become loose or develop small cracks.
Machine Setup and Placement:
- Uneven Surface: Placing the coffee maker on an uneven surface can cause water to pool and leak from one side.
Fix it step-by-step (brew workflow)
1. Unplug the Coffee Maker:
- What to do: Disconnect the power cord from the electrical outlet.
- What “good” looks like: The machine is completely powered off and safe to handle.
- Common mistake: Forgetting to unplug, which is a serious safety hazard. Always make this the first step.
2. Empty and Inspect the Water Reservoir:
- What to do: Remove the water reservoir. Empty any remaining water and carefully examine it for cracks or damage. Check the seal at the base of the reservoir.
- What “good” looks like: The reservoir is intact, and the seal is present, clean, and free of tears.
- Common mistake: Not removing the reservoir to inspect it thoroughly, assuming the leak is elsewhere.
3. Clean the Water Reservoir and Seal:
- What to do: Wash the reservoir with mild soap and water. Clean the seal area on both the reservoir and the machine where it connects.
- What “good” looks like: All debris and residue are removed from the reservoir and its connection point.
- Common mistake: Reinstalling a reservoir with mineral buildup or a dirty seal, which can still cause a poor connection.
4. Ensure Proper Reservoir Seating:
- What to do: Reinsert the water reservoir firmly, ensuring it clicks or locks into place according to your model’s design.
- What “good” looks like: The reservoir is flush against the machine and feels secure, with no gaps.
- Common mistake: Rushing this step and not pushing the reservoir in all the way, leading to a persistent leak.
5. Remove and Inspect the Brew Basket:
- What to do: Take out the brew basket. Check for any cracks or blockages in the drainage holes.
- What “good” looks like: The brew basket is clean, and all holes are clear.
- Common mistake: Overlooking small clogs in the drainage holes, which can cause water to back up.
6. Clean the Brew Basket and Holder:
- What to do: Wash the brew basket thoroughly. Use a small brush or toothpick to clear any stubborn grounds from the drainage holes.
- What “good” looks like: The basket is free of grounds and debris, and water can flow freely through the holes.
- Common mistake: Not cleaning the drainage holes adequately, which can lead to overflow during brewing.
7. Check Filter Placement:
- What to do: When ready to brew, ensure you are using the correct size and type of filter. Make sure it’s fully open and seated correctly within the brew basket, not folded or torn.
- What “good” looks like: The filter sits snugly in the basket, creating a proper barrier.
- Common mistake: Using a filter that’s too small, too large, or improperly inserted, allowing water to escape the basket.
8. Inspect the Carafe and Lid:
- What to do: Examine the carafe for cracks. Check the lid for damage and ensure it fits securely onto the carafe.
- What “good” looks like: The carafe and lid are intact and free of damage.
- Common mistake: Assuming the carafe is fine when a small crack or a loose lid is the source of the overflow.
9. Ensure Correct Carafe Placement:
- What to do: Place the carafe onto the warming plate, ensuring it’s positioned directly under the brew basket’s drip spout.
- What “good” looks like: The carafe is seated properly and ready to catch the brewed coffee.
- Common mistake: Not pushing the carafe all the way in, causing coffee to miss the carafe and spill.
10. Run a Water-Only Brew Cycle (Test):
- What to do: Fill the reservoir with fresh water (no coffee grounds). Place the empty carafe on the warming plate and run a full brew cycle.
- What “good” looks like: No leaks are observed during the entire cycle.
- Common mistake: Skipping this test and immediately trying to brew coffee, potentially making the same mistake again if the issue wasn’t fully resolved.
11. Address Potential Internal Clogs (If leak persists):
- What to do: If leaks continue, mineral buildup might be the cause. Follow your manufacturer’s instructions for descaling. This typically involves running a solution of vinegar or a descaling agent through the machine.
- What “good” looks like: After descaling and rinsing, leaks are resolved.
- Common mistake: Not descaling regularly, allowing mineral deposits to build up and cause internal blockages.
Prevent it next time
- Descale Regularly: Follow your manufacturer’s recommendations, typically every 1-3 months depending on water hardness and usage.
- Use Filtered Water: This reduces mineral buildup, prolonging the life of your machine and improving taste.
- Clean After Every Use: Rinse the brew basket and carafe daily. Wipe down the exterior.
- Check Reservoir Seal: Periodically inspect the rubber seal on the water reservoir for wear or damage.
- Don’t Overfill: Use the recommended amount of coffee grounds for your brew size.
- Proper Filter Use: Always use the correct size and type of filter and ensure it’s seated flat.
- Secure Components: Ensure the water reservoir, brew basket, and carafe are properly seated before brewing.
- Wipe Down Drip Area: Keep the area around the brew basket and carafe clean to prevent clogs.
- Inspect for Cracks: Periodically check the reservoir, brew basket, and carafe for any signs of damage.
- Store Power Cord Safely: Ensure the cord isn’t frayed or damaged.
Common mistakes (and what happens if you ignore them)
| Mistake | What it causes | Fix |
|---|---|---|
| Not unplugging before inspection | Electric shock, damage to machine | Always unplug the machine first. |
| Forgetting to inspect the reservoir | Continued leaks from the reservoir connection | Remove and thoroughly inspect the water reservoir for cracks and seal integrity. |
| Not cleaning brew basket drainage holes | Overflowing brew basket, water spills | Use a brush or toothpick to clear all coffee grounds from the basket’s holes. |
| Using the wrong filter size/type | Water bypasses grounds, spills over the basket | Ensure you are using the correct filter shape and size for your machine. |
| Carafe not seated properly | Coffee spills onto the warming plate or counter | Make sure the carafe is pushed fully under the brew basket. |
| Skipping descaling | Internal clogs, slow brewing, leaks, poor taste | Perform regular descaling cycles as recommended by the manufacturer. |
| Using tap water with high mineral content | Accelerated scale buildup, potential clogs, leaks | Use filtered or distilled water. |
| Forcing a misaligned part | Cracks or breakage of plastic components | Gently align parts; if they don’t fit easily, recheck their orientation. |
| Ignoring small drips | Can worsen over time, lead to larger issues | Address small leaks promptly; they are often indicators of a developing problem. |
| Not running a test cycle after repair | Reinstalling a faulty component or missing a step | Always run a water-only cycle to confirm the leak is resolved before brewing coffee. |
Decision rules (simple if/then)
- If water leaks from the bottom front of the machine, then check the brew basket and carafe placement first because these are common overflow points.
- If water leaks from the back or sides near the reservoir, then inspect the water reservoir and its seal for cracks or improper seating because this is where water enters the brewing system.
- If leaks occur only during brewing, then the issue is likely related to the brew basket, filter, or overfilling because water is under pressure.
- If leaks occur after brewing or when the machine is off, then check the carafe or reservoir seal for residual drips because components may not be fully emptied or sealed.
- If the leak is a slow drip and the machine is older, then mineral buildup (scale) is a likely culprit, so descale the machine because scale can obstruct water flow.
- If you see water pooling around the base and the brew basket seems fine, then suspect a loose internal hose connection or a crack in the reservoir housing, and consider professional help or replacement if not easily accessible.
- If the machine is brand new and leaking, then it’s likely a manufacturing defect, so contact the retailer or manufacturer for a replacement or warranty service.
- If the leak persists after cleaning and reseating all removable parts, then the problem may be internal, and descaling or a closer inspection of internal connections is needed.
- If the leak is significant and sudden, and the machine is making unusual noises, then unplug it immediately and do not attempt further troubleshooting as it could be an electrical or major component failure.
- If you’ve tried descaling and cleaning, and the leak continues from the brew head area, then the shower screen or internal plumbing might be blocked or damaged, requiring specific cleaning or parts replacement.
FAQ
Q: My coffee maker is leaking from the base. What should I do?
A: Unplug the machine. Check if the water reservoir is seated correctly and free of cracks. Inspect the brew basket for clogs or damage. Ensure the carafe is properly positioned.
Q: Can I use vinegar to fix a leak?
A: Vinegar is primarily for descaling, which can prevent leaks caused by mineral buildup. It doesn’t directly fix a leak from a cracked part or loose connection.
Q: Is it safe to repair a leaking coffee maker myself?
A: For simple issues like cleaning components, reseating the reservoir, or replacing a filter, it’s generally safe as long as the machine is unplugged. Avoid attempting internal electrical repairs.
Q: My coffee maker leaks only when it’s full. What’s wrong?
A: This usually indicates an issue with the water reservoir’s seal or a clog in the brew basket that causes water to back up and overflow. Ensure the reservoir is sealed tightly and the brew basket is clear.
Q: How often should I descale my coffee maker?
A: This depends on your water hardness and usage. A general guideline is every 1-3 months. Check your manufacturer’s manual for specific recommendations.
Q: My coffee maker leaks from the carafe lid. Why?
A: The lid might be damaged, not properly attached, or the carafe itself could have a crack. Ensure the lid is securely in place and inspect the carafe for any damage.
Q: What if the leak is caused by a cracked water reservoir?
A: If the reservoir is cracked, it needs to be replaced. You can usually order a replacement part from the manufacturer’s website or a reputable appliance parts dealer.
Q: I see water dripping from the underside of the machine. What could it be?
A: This could be a loose internal hose connection or a crack in the housing. If you’ve ruled out external issues, it might require professional inspection.
What this page does NOT cover (and where to go next)
- Internal Electrical Issues: If you see sparks, smell burning, or the machine won’t power on, this guide does not cover electrical repair. Contact the manufacturer or a qualified technician.
- Complex Internal Component Failure: For leaks stemming from a failed heating element, pump, or internal valve, professional repair or replacement of the machine is usually recommended.
- Espresso Machine Specific Leaks: The troubleshooting steps for espresso machines, with their higher pressures and different components, vary significantly. Consult your espresso machine’s manual.
- Troubleshooting for Pod/Capsule Machines: These machines have unique mechanisms and seals that require specific diagnostic steps found in their user guides.
- Warranty Claims: If your machine is under warranty and you suspect a defect, contact the manufacturer directly for repair or replacement options before attempting DIY fixes that might void the warranty.