Easy Ways To Make Cold Coffee
Quick answer
- Use yesterday’s hot coffee, chilled.
- Brew it stronger, then dilute with ice.
- Try cold brew for a smoother, less acidic taste.
- Make a big batch of cold brew concentrate.
- Add your favorite milk, cream, or sweetener.
- Experiment with different coffee beans.
- Don’t forget to chill your brewing vessel if possible.
Who this is for
- Anyone who wants a refreshing coffee drink without the heat.
- Coffee lovers looking for a simple way to beat the summer heat.
- Home brewers who want to expand their coffee repertoire beyond hot drinks.
What to check first
Brewer type and filter type
Are you using a pour-over, French press, or an automatic drip machine? Each has its own way of brewing. For cold coffee, especially cold brew, a coarser grind is usually best. Paper filters are fine for some methods, but metal filters can let more oils through, which adds flavor. If you’re improvising, make sure your filter can handle the coffee grounds without letting too much sludge into your cup.
Water quality and temperature
Good coffee starts with good water. If your tap water tastes off, your cold coffee will too. Filtered water is always a solid choice. For hot brewing that you’ll chill, use water around 200°F. For cold brew, the water is at room temperature, which is key to its different flavor profile.
Grind size and coffee freshness
Freshly ground beans make a world of difference. For cold brew, a coarse grind is king. Think breadcrumbs or coarse sea salt. If your grind is too fine, you’ll get a muddy, over-extracted mess. For hot coffee you’ll chill, use the grind size recommended for your brewer. Stale coffee tastes flat, hot or cold.
Coffee-to-water ratio
This is crucial for strength. For cold brew, you’ll often use a higher coffee-to-water ratio than for hot coffee, like 1:4 or 1:5. This makes a concentrate you can dilute later. For brewing hot coffee to chill, stick to your usual ratio and just brew it a little stronger, maybe adding a bit more coffee for the same amount of water.
Cleanliness/descale status
Nobody wants funky flavors from a dirty brewer. Make sure your coffee maker and any storage containers are squeaky clean. If you haven’t descaled your machine in a while, now’s a good time. Mineral buildup can affect taste and performance. A clean machine means clean coffee.
Step-by-step (brew workflow)
Here’s a basic workflow for making cold brew concentrate. It’s pretty foolproof.
1. Gather your gear: You’ll need a large jar or container, a filter (cheesecloth, fine-mesh sieve, or cold brew bag), and your coffee.
- What “good” looks like: Everything is clean and ready to go. No last-minute scrambling.
- Common mistake: Forgetting a clean filter. You’ll end up with grounds in your coffee. Have it ready before you brew.
For gathering your gear, a large glass jar with a lid is perfect for steeping your cold brew. This glass jar with a lid is ideal for both brewing and storing your concentrate.
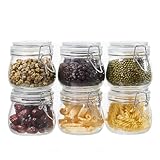
- 【Premium Glass Jars with Airtight Lids】These airtight glass jars feature a wire clip fastening system with clear preserving seals, locking in freshness and flavor. Ideal for dry goods and long-term food storage.
- 【Perfect Size: 17 oz Capacity – Set of 6】Each jar holds 17oz, just right for storing beans, flour, sugar, cereal, pasta, or snacks. Comes as a 6 pack to organize your kitchen efficiently.
- 【Durable & Safe Food Storage Containers】Made from thick, lead-free, glass food storage containers that are BPA-free, odor-resistant, and safe for everyday use.
- 【Multi-Purpose Glass Canisters for Kitchen & Pantry】Great for kitchen canning and pickling jars – also suitable for DIY jam, honey, kimchi, spices, and more. A functional and elegant solution for pantry storage jars.
- 【Stylish & Practical Storage Jars】Sleek square design saves space and looks beautiful on shelves. These glass storage jars are easy to stack and clean, combining utility with minimalist decor.
2. Grind your coffee: Use a coarse grind. Think coarse sea salt.
- What “good” looks like: Uniformly coarse grounds.
- Common mistake: Using a fine grind. This leads to bitterness and sediment. Stick to coarse for cold brew.
3. Add coffee to your vessel: Put your coarse grounds into your clean jar or container.
- What “good” looks like: Grounds are loosely packed, not jammed in.
- Common mistake: Overfilling the container. You need space for the water to circulate.
4. Add water: Pour in cold or room-temperature filtered water. A common ratio is 1 part coffee to 4 parts water for concentrate. For example, 1 cup of coffee grounds to 4 cups of water.
- What “good” looks like: All the grounds are saturated.
- Common mistake: Not saturating all the grounds. Some might stay dry and not contribute to the flavor. Stir gently if needed.
5. Stir gently: Give it a good, but gentle, stir to make sure all the coffee grounds are wet.
- What “good” looks like: A uniform slurry of coffee and water.
- Common mistake: Vigorous stirring. This can break up the grounds and lead to a muddier brew.
6. Cover and steep: Cover the container tightly and let it steep. Room temperature is fine, but a cool spot works too. Steep for 12-24 hours. Longer steeping means stronger flavor.
- What “good” looks like: The coffee has had plenty of time to extract.
- Common mistake: Under-steeping. You won’t get full flavor. 12 hours is a minimum for most people.
7. Filter the coffee: Slowly pour the mixture through your filter into another clean container. You might need to do this in batches.
- What “good” looks like: Clear, dark liquid with minimal sediment.
- Common mistake: Rushing the filtering. This can force fine grounds through the filter. Be patient.
8. Discard grounds: Dispose of the used coffee grounds.
- What “good” looks like: Clean grounds, no coffee left behind.
- Common mistake: Leaving grounds in the filter too long. They can get sticky and hard to clean.
9. Store the concentrate: Pour the cold brew concentrate into a clean, airtight container. It’ll keep in the fridge for up to two weeks.
- What “good” looks like: A well-sealed container in the fridge.
- Common mistake: Leaving it uncovered. It can absorb odors from other food.
10. Serve: To drink, dilute the concentrate with water or milk. A 1:1 ratio is a good starting point, but adjust to your taste. Serve over ice.
- What “good” looks like: A perfectly balanced, refreshing coffee drink.
- Common mistake: Not diluting enough. Cold brew concentrate is potent! You might get a jolt you weren’t expecting.
Common mistakes (and what happens if you ignore them)
| Mistake | What it causes | Fix |
|---|---|---|
| Using hot water for cold brew | Over-extraction, bitterness, and acidity | Always use cold or room-temperature water for cold brew. |
| Using a fine grind for cold brew | Sediment, muddy taste, over-extraction | Stick to a coarse grind, like coarse sea salt. |
| Under-steeping cold brew | Weak, watery coffee, underdeveloped flavor | Steep for at least 12 hours, up to 24 hours for stronger flavor. |
| Over-steeping cold brew | Bitter, overly strong, unpleasant taste | Start with 12-18 hours and adjust based on your preference. |
| Not diluting cold brew concentrate | Extremely strong, potentially unpleasant taste | Dilute with water or milk, usually 1:1, to taste. |
| Using stale coffee beans | Flat, dull flavor, lack of aroma | Use freshly roasted beans, ideally ground right before brewing. |
| Using dirty equipment | Off-flavors, stale taste, potential mold | Clean all brewing gear thoroughly after each use. Descale regularly. |
| Using poor quality water | Off-flavors, muted coffee taste | Use filtered water for the best results. |
| Brewing hot coffee too weak to chill | Watery, unsatisfying cold coffee | Brew hot coffee a bit stronger than usual if you plan to chill it. |
| Not chilling hot coffee before serving | Diluted drink, melts ice too fast, lukewarm | Chill brewed coffee in the fridge before adding ice. |
Decision rules (simple if/then)
- If you want a smooth, low-acid coffee, then use the cold brew method because the cold water extracts fewer bitter compounds.
- If you have leftover hot coffee, then chill it in the fridge for a quick cold coffee because it’s the easiest way to get started.
- If your cold brew tastes bitter, then try a coarser grind or a shorter steep time because those are the most common culprits.
- If your cold brew is too weak, then try a finer grind (but still coarse), a longer steep time, or a higher coffee-to-water ratio because you need more extraction.
- If you’re in a hurry, then brew hot coffee extra strong and pour it over ice because it’s faster than cold brew.
- If you prefer a richer, more viscous texture, then use less water when diluting your cold brew concentrate because you’ll keep more of the coffee’s natural oils.
- If your cold brew has a muddy texture, then you likely used too fine a grind or didn’t filter it properly because those are the main causes of sediment.
- If you want to avoid a watery drink, then pre-chill your hot coffee in the fridge before serving it over ice because it will melt the ice slower.
- If you want to make a large batch of cold coffee easily, then make cold brew concentrate because it stores well and can be diluted as needed.
- If your coffee tastes metallic, then check your water quality and the cleanliness of your brewer because those are common sources of metallic off-flavors.
FAQ
What’s the fastest way to make cold coffee?
The quickest method is to brew your regular hot coffee, let it cool slightly, then pour it over ice. For an even colder drink, chill the brewed coffee in the fridge for an hour or two before serving over ice.
Can I just put hot coffee in the fridge?
Yes, you absolutely can. Brew your coffee as usual, let it cool down on the counter for a bit, then transfer it to an airtight container and refrigerate it. It’s a simple way to have cold coffee ready.
How long does cold brew last?
Cold brew concentrate, when stored properly in an airtight container in the refrigerator, can last for about one to two weeks. It’s best to drink it within the first week for optimal flavor.
Do I need a special machine for cold brew?
Nope. You can make excellent cold brew with just a jar, some coffee grounds, water, and a filter like cheesecloth or a fine-mesh sieve. There are dedicated cold brew makers, but they aren’t essential.
What kind of coffee beans are best for cold brew?
Medium to dark roasts often work well for cold brew because they tend to have richer, chocolatey, or nutty flavors that come through nicely. However, lighter roasts can also produce interesting results, often with more fruit-forward notes. Experiment to find your favorite.
How much coffee do I use for cold brew?
A common starting point for cold brew concentrate is a 1:4 ratio of coffee grounds to water by weight. For example, 100 grams of coffee to 400 grams (or ml) of water. You can adjust this ratio based on how strong you like your concentrate.
Is cold brew less acidic than hot coffee?
Generally, yes. The cold water extraction process pulls out fewer of the acidic compounds compared to hot water brewing, resulting in a smoother, less acidic taste that many people prefer.
Can I use my French press for cold brew?
Absolutely. A French press is a fantastic tool for cold brew. You use the same coarse grind and steeping process, then press the plunger down to separate the grounds. Just be sure to filter it one more time through a fine sieve or cheesecloth to catch any smaller particles.
What this page does NOT cover (and where to go next)
- Specific coffee bean origins and their impact on cold coffee flavor profiles.
- Advanced cold brew techniques like Japanese iced coffee (flash chilling).
- Detailed recipes for cold coffee drinks like lattes, frappes, or mocktails.
- Commercial cold brew equipment reviews or comparisons.
- The science behind coffee extraction and acidity levels in detail.