Easy Homemade Coffee Syrup Recipes For Drinks
Quick Answer
- Store-bought syrups are fine, but homemade is way better. You control the sugar and flavor.
- A simple syrup base is just sugar and water. That’s it.
- You can add almost anything to that base: spices, extracts, fruit. Get creative.
- Keep it in the fridge. It’ll last a few weeks.
- Use it for iced coffee, lattes, or even drizzled on pancakes.
- Making your own syrup is a game-changer for your morning brew.
Who This Is For
- Coffee drinkers who like a little something extra in their cup.
- Anyone tired of the same old plain coffee.
- Home baristas looking to up their game without a huge investment.
What To Check First
- Your Ingredients: Are they fresh? Good quality sugar and water make a difference. Don’t use tap water if it tastes funky. Filtered is best.
- Your Equipment: You need a saucepan, a whisk or spoon, and a clean jar or bottle for storage. That’s about it.
- Your Flavor Ideas: What do you want your syrup to taste like? Vanilla? Cinnamon? A little bit of both? Jot down your ideas.
Step-by-Step: How to Make Coffee Syrup
This is for a basic simple syrup, the foundation for everything else.
1. Measure Your Sugar and Water: Start with a 1:1 ratio. For example, 1 cup of granulated sugar and 1 cup of water.
- Good looks like: Even measurements. No guessing.
- Common mistake: Eyeballing it. This can lead to syrup that’s too thick or too thin. Measure carefully.
2. Combine in a Saucepan: Pour the sugar and water into a clean saucepan.
- Good looks like: Everything in the pan, ready to go.
- Common mistake: Using a dirty pan. You’ll end up with off-flavors. Always start clean.
3. Heat Gently: Place the saucepan over medium heat.
- Good looks like: Gentle heat, not a rolling boil.
- Common mistake: Blasting it with high heat. This can scorch the sugar before it dissolves. Patience, friend.
4. Stir Until Dissolved: Stir the mixture constantly with a whisk or spoon. Keep stirring until all the sugar crystals are completely gone.
- Good looks like: A clear, smooth liquid. No gritty bits at the bottom.
- Common mistake: Stopping stirring too soon. Undissolved sugar can recrystallize later, making your syrup grainy.
5. Simmer Briefly (Optional but Recommended): Once the sugar is dissolved, let it simmer for about 1-2 minutes. This helps to slightly thicken the syrup and ensures everything is fully incorporated.
- Good looks like: A gentle simmer, not a vigorous boil.
- Common mistake: Boiling it for too long. This will make it too thick, like candy.
6. Remove from Heat: Take the saucepan off the burner.
- Good looks like: Heat source is off.
- Common mistake: Forgetting about it on the hot stove. It can keep cooking.
7. Add Flavorings (If Using): This is where the magic happens. Stir in extracts (like vanilla or almond), spices (like cinnamon sticks or star anise), or citrus zest. For fruit syrups, you’d simmer fruit in the syrup.
- Good looks like: Even distribution of flavor.
- Common mistake: Adding flavorings too early or too late. Extracts are best added off the heat to preserve their aroma. Spices can simmer longer.
8. Cool Down: Let the syrup cool completely in the saucepan.
- Good looks like: Room temperature. No steam rising.
- Common mistake: Pouring hot syrup into a cold jar. This can crack glass or cause condensation issues.
9. Strain (If Needed): If you added spices, zest, or fruit, strain the syrup through a fine-mesh sieve into your storage container.
- Good looks like: A clean, smooth syrup. No bits.
- Common mistake: Using a sieve that’s too coarse. You’ll still get bits in your syrup.
10. Transfer to Storage: Pour the cooled syrup into a clean, airtight jar or bottle.
- Good looks like: A clean container, sealed tight.
- Common mistake: Using a dirty container. This will make your syrup go bad faster.
Pour the cooled syrup into a clean, airtight jar or bottle for storage. This ensures your homemade syrup stays fresh and delicious.
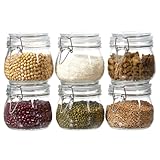
- Complete 6 Pack, 17oz Each – Includes 6 individual 17oz jars, perfect for storing all your dry goods. Organize your kitchen with a set of 6 that keeps ingredients tidy and easy to access.
- Airtight Clear Preserving Seal – Each jar features a wire clip fastening lid with a clear preserving seal, providing a strong airtight closure to maintain flavor, freshness, and crunch.
- Durable Glass for Everyday Use – Made from thick, lead-free, BPA-free glass, these jars are safe, long-lasting, and allow you to see your ingredients clearly.
- Multi-Functional Storage & Pickling – Perfect as pickling jars, or as storage for kitchen canning. Ideal for flour, sugar, pasta, beans, cereal, and homemade preserves.
- Stackable & Space-Saving Design – Square, compact shape allows easy stacking on shelves or inside cabinets, maximizing pantry space while maintaining a clean, modern look.
11. Refrigerate: Store the syrup in the refrigerator.
- Good looks like: Cold and ready for action.
- Common mistake: Leaving it out on the counter. It needs to be chilled to last.
Common Mistakes (and What Happens If You Ignore Them)
| Mistake | What It Causes | Fix |
|---|---|---|
| Not measuring ingredients | Syrup too thick, too thin, or too sweet. | Use measuring cups and spoons. Get it right the first time. |
| Using tap water with bad taste | Off-flavors in your syrup. | Use filtered or bottled water. Your coffee deserves better. |
| Scorching sugar on high heat | Bitter, burnt taste in the syrup. | Use medium heat and stir constantly. Low and slow wins. |
| Not dissolving sugar completely | Gritty texture, syrup can crystallize. | Stir until the liquid is perfectly clear. No sugar bits allowed. |
| Boiling syrup for too long | Syrup becomes hard candy when cool. | Simmer briefly, just 1-2 minutes after dissolving. |
| Adding extracts to boiling syrup | Flavor evaporates, syrup tastes weak. | Stir in extracts after removing from heat. Preserve that goodness. |
| Not cooling syrup before storing | Condensation in jar, can promote spoilage. | Let it cool to room temp. Patience is a virtue. |
| Storing syrup in a dirty container | Syrup spoils quickly, develops mold. | Wash and dry jars thoroughly. Sterilize if possible. |
| Not refrigerating homemade syrup | Syrup ferments or spoils within days. | Always store in the fridge. It extends shelf life significantly. |
| Using stale spices or old extracts | Weak or unpleasant flavor in the syrup. | Check expiration dates and sniff your ingredients. Fresh is best. |
Decision Rules
- If your syrup tastes too thin, simmer it a little longer (but watch it closely!).
- If your syrup tastes too thick, add a splash more water and gently reheat to combine.
- If your syrup is too sweet, add a little more water to balance it out.
- If you want a stronger flavor, add more extract or spices next time, or let spices simmer a bit longer.
- If you’re making a fruit syrup, use ripe, flavorful fruit for the best taste.
- If you’re using delicate flavors like vanilla, add them off the heat to preserve their aroma.
- If you want to infuse spices like cinnamon or cardamom, let them steep in the warm syrup for about 15-30 minutes before straining.
- If you’re unsure about a flavor combination, start with a small amount and taste as you go.
- If your syrup looks cloudy, it might be from undissolved sugar or impurities; strain it again.
- If you want a sugar-free option, use a sugar substitute that’s designed for cooking and baking, but be aware the texture might be different.
FAQ
How long does homemade coffee syrup last?
When stored properly in an airtight container in the refrigerator, most basic simple syrups will last about 2-4 weeks. Flavored syrups might vary depending on the ingredients used.
Can I use different types of sugar?
Yes! You can use brown sugar for a caramel-like flavor or even honey for a different sweetness profile. Just be aware that different sugars will change the flavor and color of your syrup.
What’s the best way to store homemade syrup?
The best way is in a clean, airtight glass jar or bottle. Glass is non-reactive and easy to clean. Make sure it’s sealed tightly before refrigerating.
How do I make a sugar-free coffee syrup?
You can substitute granulated sugar with a sugar substitute like erythritol or xylitol (if you don’t have pets, as xylitol is toxic to dogs). Follow the same 1:1 ratio, but be aware that some substitutes might not dissolve or thicken quite the same way.
Can I add alcohol to my syrup?
Sure, you can add a splash of liqueur or brandy to your syrup for an adult twist. Add it after removing the syrup from the heat. It will also act as a preservative, potentially extending shelf life.
What if my syrup gets hard candy when it cools?
That means it was boiled too long. Next time, just simmer it for a minute or two after the sugar dissolves. You can often re-melt hard syrup with a little extra water.
How much syrup should I use in my coffee?
Start with 1-2 tablespoons per 8-12 oz cup of coffee and adjust to your taste. It’s easier to add more than to take it away.
Can I make fruit-flavored syrups?
Absolutely! Simmer fresh or frozen fruit (like berries or peaches) with your sugar and water mixture. Strain out the solids after simmering and cooling.
What This Page Does Not Cover (And Where to Go Next)
- Advanced Syrups: We focused on the basics. There are tons of complex flavor profiles and techniques out there.
- Specific Fruit Combinations: We touched on fruit, but dialing in specific fruit ratios and cooking times is a whole other ballgame.
- Dairy and Non-Dairy Creamer Syrups: These involve emulsions and stabilizers that are beyond simple syrup.
- Espresso Machine Specifics: This is all about adding flavor to brewed coffee, not the intricacies of pulling a perfect shot.
- Commercial Syrup Production: Scaling up requires different equipment and food safety considerations.