Creating Coffee-Dyed Paper With Writing
Quick answer
- Yes, you can create coffee-dyed paper with writing on it by brewing strong coffee, applying it to paper, and then writing on the dried paper.
- For best results, use a dark roast coffee and brew it concentrated.
- Apply the coffee evenly using a brush, sponge, or by soaking the paper.
- Allow the paper to dry completely before writing to prevent smudging.
- Use permanent ink pens or markers for writing to ensure longevity.
- Consider practicing your writing on scrap dyed paper first.
Who this is for
- Crafters and artists looking for unique paper effects.
- Individuals interested in vintage or aged aesthetics for journals, letters, or art projects.
- Anyone seeking a simple, at-home method to transform ordinary paper into something special.
What to check first
Brewer type and filter type
The type of coffee brewer you use will influence the strength and consistency of your coffee dye. Drip machines, French presses, and pour-over devices can all work. What matters most is the coffee-to-water ratio and brewing time to achieve a dark, concentrated liquid. For filtering, a fine mesh filter or cloth is usually sufficient to remove grounds.
Water quality and temperature
Using filtered water will result in a cleaner coffee dye and prevent any unwanted mineral tastes or discoloration from tap water. While exact brewing temperature isn’t critical for dyeing as it is for drinking, using hot water (around 195-205°F) will extract more color and flavor from the coffee grounds, leading to a richer dye.
Grind size and coffee freshness
A medium to coarse grind is generally suitable for brewing coffee for dyeing. If you use a grind that’s too fine, it might clog your filter or result in a muddy dye. Freshly roasted coffee beans will provide the most vibrant color. Stale coffee might produce a weaker, less appealing hue.
Coffee-to-water ratio
This is crucial for achieving a deep, rich color. For dyeing, you’ll want a much higher coffee-to-water ratio than you would for drinking. Aim for a ratio of at least 1:5 (one part coffee grounds to five parts water), or even stronger, like 1:3, for a darker stain. Experiment to find the intensity you prefer.
Cleanliness/descale status
Ensure your coffee maker and any brewing accessories are clean. Residue from old coffee oils or mineral buildup can affect the color and clarity of your coffee dye. A clean brewing environment will yield the best, most consistent results for your dyed paper.
Step-by-step (brew workflow)
1. Gather your supplies. You’ll need coffee grounds (dark roast recommended), water, a brewing device (like a French press or drip machine), a pot or container for brewing, paper, and application tools (brush, sponge, spray bottle).
- What “good” looks like: All necessary items are readily available and clean.
- Common mistake: Forgetting a key item like application tools or not having enough paper. Avoid this by making a checklist before you start.
Gather all your supplies, including the art paper you’ll be dyeing. Heavier weight papers work best, and you can find a variety of suitable art paper options on Amazon.

- Premium Artist Drawing Paper: Premium drawing pads and sketchbooks with a 9 x 12-inch size are ideal for artists of all skill levels. Each sketchpad contains 100 sheets, for a total of 100 high-quality paper sheets. Good texture for sketching and drawing. A lovely paper book gift for anyone who likes to write, paint, illustrate, sketch, or create art. Graphite pencils, colored pencils, charcoal, pens, soft oil pastels, sketching sticks, and more can all be used with this sketchbook. Graduation gift card,high school graduation gifts. college school supplies, school supplies, back to school.
- Thick Sketching Drawing Book Pad: With a standard weight of 68 pounds/100 grams, this sketchbook paper is pH neutral and acid-free. It is also thick and high quality. For clean artwork, it stops bleeding, smudging, and feathering. Maintain the quality of your artwork for many years to come, Perfect for kids sketching,drawing — thick enough for pencils, charcoal without bleed-through
- Suitable for All Types of Dry Media: All kinds of dry media, including pencils, pens, crayons, charcoal, pastels, and sketching sticks, can be used with our acid-free, natural white drawing paper. NOT for alcohol markers or watercolors, we have proffesional alcohol markers book, and watercolors book.
- Sturdy Spiral Bound: Both left-handed and right-handed users will find the top spiral binding to be pleasant and accommodating, since it makes it simple to turn pages and allows the pad to sit flat when opened. It will always preserve the paper in good condition and improve the writing and sketching quality thanks to the sturdy backboard and thick cardstock cover. Because each page is micro-perforated, removing a single page is simple
- Ideal for All Artists: For artists of all kinds, this large sketchpad is ideal for creating artwork and honing skills. Ideal gift for graduation gifts, Christmas art supplies, craft painting supplies. Simply notify us if the sketch drawing pad does not meet your needs, and we will help you with a solution.
To get started, you’ll need some coffee grounds, and a dark roast is recommended for the best color. You can find a great selection of coffee grounds on Amazon.

- Contains one (1) 28 Ounce Bag of Peet's French Roast Ground 100% Arabica Coffee
- Flavor and Roast: Medium Roast. Flavor notes of citrus and hints of brown sugar and cocoa.
- Brewing Methods: Our ground coffee is perfectly suited to make drip or a pour over in your Chemex. For other brewing methods - espresso, cold brew, or French press - consider our whole bean coffees and griding at home
- Sourcing With Impact: The coffee you buy can impact the welfare of the people and planet. Peet’s is actively engaged in driving positive impact in communities where our coffees are grown
- Rich. Complex. Incomparable. Masters of our craft for over 50 years, we hand roast the very best coffees in the world.
2. Brew a strong pot of coffee. Use a significantly higher coffee-to-water ratio than you normally would for drinking. Aim for a dark, concentrated brew.
- What “good” looks like: A very dark, almost inky liquid.
- Common mistake: Brewing regular-strength coffee. This will result in a faint, weak stain. Use more grounds or less water.
3. Let the coffee cool slightly. While hot water extracts the color, you don’t want to handle extremely hot liquid. Let it cool to a manageable temperature, still warm but not scalding.
- What “good” looks like: The coffee is warm to the touch but safe to handle.
- Common mistake: Applying boiling coffee to paper, which can warp or damage it unevenly. Let it cool for a few minutes.
4. Prepare your workspace. Lay down newspaper or a drop cloth to protect your surfaces from coffee stains.
- What “good” looks like: Your work area is covered and protected.
- Common mistake: Not protecting surfaces, leading to accidental stains on tables or floors.
5. Apply the coffee to the paper. Use a brush, sponge, or spray bottle to apply the coffee evenly across the surface of your paper. You can also soak the paper briefly in a shallow tray of coffee.
- What “good” looks like: The paper is thoroughly saturated with coffee, with no dry spots.
- Common mistake: Applying too little coffee, leaving blotchy or uneven color. Ensure full coverage.
6. Create patterns or effects (optional). While the paper is wet, you can gently blot areas with a paper towel, create drips by tilting the paper, or use a salt technique (sprinkling salt on wet coffee to create starburst patterns as it dries).
- What “good” looks like: Interesting textures and visual effects are emerging on the wet paper.
- Common mistake: Over-manipulating the wet paper, which can lead to tearing or muddying the intended effects.
7. Allow the paper to dry completely. This is a crucial step. Lay the paper flat on a clean surface or hang it to dry. This can take several hours depending on humidity and how much coffee was used.
- What “good” looks like: The paper is completely dry to the touch and has a uniform, slightly crinkled texture.
- Common mistake: Trying to write on damp paper. This will cause ink to feather, smudge, and bleed. Patience is key.
8. Iron the paper (optional). Once fully dry, you can iron the paper on a low-medium setting between two sheets of clean paper or a pressing cloth to flatten it and remove wrinkles.
- What “good” looks like: The paper is smooth and flat, ready for writing.
- Common mistake: Using too high a heat setting on the iron, which could scorch the paper.
9. Write on the dried, dyed paper. Use permanent ink pens, markers, or even a dip pen with appropriate ink. Test your writing tool on a scrap piece of dyed paper first.
- What “good” looks like: The ink flows smoothly and stays put without smudging or bleeding.
- Common mistake: Using water-based pens or markers that can reactivate the coffee stain or bleed.
Once your paper is completely dry, it’s time to write! For the best results, use permanent ink pens to ensure your writing doesn’t smudge or bleed into the coffee dye. These permanent ink pens are a great choice.
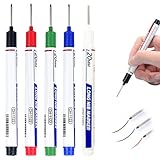
- Precision Tip for Hard-to-Reach Areas: Features a 20×1.5mm ultra-slim nib that easily marks deep holes, screw slots, and tight corners for accurate results in confined spaces
- Marks on Almost Any Surface: Writes smoothly on dry, dust-free surfaces including metal, wood, concrete, glass, plastic, and more; ideal for both indoor and industrial environments
- Fast-Drying and Waterproof Ink: Quick-drying, smudge-resistant, and waterproof ink ensures clean, durable marks that stay visible even under tough working conditions
- Built for Comfort and Durability: Made from sturdy PP material for long-lasting use; the ergonomic design offers a secure grip and includes a built-in ruler for quick measurements
- Perfect for DIY and Professional Use: A must-have for carpenters, builders, and hobbyists; delivers bold marks in narrow spots, enhancing precision in woodworking and installations
10. Seal your work (optional). For added longevity, especially if the paper will be handled frequently, you can spray a light coat of archival sealant once the ink is completely dry.
- What “good” looks like: The ink and coffee dye are protected from smudging and fading.
- Common mistake: Applying sealant too heavily, which can alter the paper’s texture or sheen.
Common mistakes (and what happens if you ignore them)
| Mistake | What it causes | Fix |
|---|---|---|
| Using regular strength coffee | Faint, weak color; paper looks barely stained. | Brew coffee with a much higher ratio of grounds to water (e.g., 1:3 or 1:4). |
| Applying coffee unevenly | Blotchy, splotchy appearance; inconsistent color depth. | Ensure thorough saturation with a brush or sponge, or soak the paper completely. |
| Writing on damp paper | Ink feathers, bleeds, and smudges; illegible writing. | Allow paper to dry <em>completely</em> before writing. This may take several hours. |
| Using water-based pens/markers | Ink reacts with the coffee dye, causing bleeding or smudging. | Use permanent, pigment-based inks or markers. Test on a scrap piece first. |
| Not protecting workspace | Permanent coffee stains on tables, floors, and clothing. | Lay down newspaper, a drop cloth, or use a large plastic tray. |
| Rushing the drying process | Wrinkled paper, potential for smudging if handled too soon. | Be patient. Allow paper to dry flat or hang it. Ironing can help flatten it after it’s fully dry. |
| Using old or low-quality coffee | Dull, muted color; less vibrant or interesting hue. | Use freshly roasted, dark roast coffee beans for the richest color extraction. |
| Over-manipulating wet paper | Tearing, creating muddy textures, or losing intended patterns. | Handle wet paper gently. Let the coffee do the work; avoid excessive blotting or stirring. |
| Not cleaning brewing equipment | Off-flavors or colors in the dye from old oils or residue. | Thoroughly clean your coffee maker, pots, and any other tools before brewing the dye. |
| Not testing writing tools | Unforeseen reactions between ink and coffee dye on the final piece. | Always test your chosen pen or marker on a scrap piece of coffee-dyed paper before committing to your main artwork. |
Decision rules (simple if/then)
- If you want a very dark, aged look, then use a dark roast coffee because it has more pigment.
- If your paper looks too light after the first application, then apply a second coat of coffee because you can build up color intensity.
- If you want to flatten wrinkled paper, then iron it on a low setting between protective cloths because high heat can scorch it.
- If you are using a spray bottle for application, then use a coarser grind of coffee to prevent clogging because fine grounds can get stuck.
- If you notice ink bleeding, then you are likely using a water-based ink or the paper isn’t fully dry, so switch to a permanent marker or wait longer for drying.
- If you want to create subtle variations in color, then partially blot the wet paper with a dry cloth because this will lift some coffee and create lighter areas.
- If you are concerned about the longevity of your writing, then use pigment-based archival inks because they are less likely to fade or react with the coffee dye.
- If you want to achieve a more uniform color, then soak the paper entirely in the coffee dye bath rather than brushing it on.
- If your coffee dye is too weak, then try brewing it with less water or letting the grounds steep for a longer period.
- If you notice splotches, then ensure you’re applying the coffee evenly across the entire surface of the paper.
- If you want to add texture, then sprinkle coarse salt onto the wet coffee-dyed paper and let it dry; the salt crystals will absorb coffee and leave a unique pattern.
FAQ
Can I use instant coffee to dye paper?
Yes, you can use instant coffee, but it might produce a less rich and nuanced color compared to brewed coffee. Dissolve a larger amount of instant coffee in hot water to achieve a concentrated dye.
How long does it take for the paper to dry?
Drying time varies greatly depending on the amount of coffee used, humidity, and air circulation. It can take anywhere from a few hours to overnight. Ensure it’s completely dry before writing.
Will the coffee smell eventually fade?
The coffee scent will likely diminish over time, especially if the paper is exposed to air. For a more permanent scent, you could consider adding a few drops of coffee essential oil to your dye solution or a sealant.
Can I use different types of paper?
Yes, most absorbent papers will work. Heavier weight papers like cardstock or watercolor paper tend to hold up better and wrinkle less than thin copy paper.
What kind of pens are best for writing on coffee-dyed paper?
Permanent ink pens, such as gel pens, rollerball pens, or pigment-based markers, are ideal. Avoid ballpoint pens or fountain pens with very fluid, water-based inks, as they may feather.
How can I achieve a lighter or more subtle coffee stain?
Use a weaker coffee brew (more water, fewer grounds) or apply it very sparingly with a dry brush. You can also dilute your strong coffee dye with water.
Can I combine coffee dyeing with other techniques?
Absolutely! Once the coffee dye is dry, you can add watercolor washes, ink illustrations, or even use stamps. Just ensure any subsequent media are compatible with the dried coffee stain.
What if I want to make the color darker after it’s dry?
You can re-apply another layer of coffee dye to the dried paper. Allow it to dry completely again for a deeper, richer hue.
What this page does NOT cover (and where to go next)
- Advanced techniques like using coffee for resist dyeing or creating specific artistic textures beyond basic blotting or salt effects.
- The chemical properties of coffee dyes and their interaction with various types of inks and pigments over very long periods (archival permanence).
- Commercial availability of pre-dyed paper or specialized art supplies for coffee-themed projects.
- Specific brand recommendations for coffee beans, papers, or writing instruments.