Creating A Stunning Resin Coffee Table: A Guide
Quick Answer
- Gather your materials: a mold, resin, pigment, wood slab, and safety gear.
- Prep your wood. Sand it smooth, then seal it to prevent bubbles.
- Mix your resin carefully, following the manufacturer’s instructions precisely.
- Add your desired pigments for color.
- Pour the resin in layers, allowing each to cure partially before adding the next.
- Allow the entire piece to cure fully, which can take several days.
- Sand and polish the cured resin for a glass-like finish.
Who This Is For
- DIY enthusiasts looking for a statement furniture piece.
- Woodworkers wanting to add a modern twist to their projects.
- Anyone craving a unique, custom coffee table that reflects their style.
What To Check First
Your Wood Slab
This is the foundation of your table. Make sure it’s dry, stable, and free of rot. Check for any large cracks or knots that might cause issues during the pour. You’ll want to sand it down really smooth, like, buttery smooth. This helps the resin adhere and look its best.
For the foundation of your stunning resin coffee table, consider a high-quality wood slab for table that is dry, stable, and free of rot to ensure the best results.
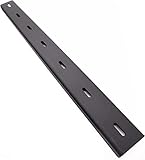
- AMERICAN-MADE: Proudly crafted by Bidwell Wood & Iron in the USA, these 18” long 1/2” steel c channel table top stiffeners ensure your live edge table is well-supported and protected from cupping.
- MANUFACTURED FOR PERFECTION:Bidwell uses CNC technology for flawless, laser cut C channels. Perfect for custom and production projects, ensuring consistency with table leg brackets and metal supports.
- SELECT THE PERFECT FIT:Our 18"x1/2" C channels, laser cut with 5 slotted holes for 1/4" hardware, suit materials 1-1.5" thick. Over 100 sizes available, ensuring perfect fit for any table top slab!
- PROTECTION & PEACE OF MIND: Our versatile C channel brackets support live edge and glued wood projects. With a black powder coat finish, they resist scuffs, wear and tear to ensure lasting durability.
- MAKE WITH CONFIDENCE: Bidwell Wood & Iron offers quality, precision, and reliability. Our C channel metal supports your projects with strength. Our customer service team is ready to assist!
Your Resin System
Resin isn’t just one thing. There are casting resins and coating resins. For a thick pour like a coffee table, you need a casting resin. It’s designed to cure without overheating and cracking. Read the instructions for your specific brand. Seriously, don’t skip this. It’s the most important part.
Your Mold
Your mold needs to be sturdy and leak-proof. Think melamine, MDF, or even thick plastic. It has to hold the weight of the resin. Make sure the inside surfaces are super smooth. Any imperfections in the mold will show up on your finished piece.
Safety Gear
This stuff is non-negotiable. Resin fumes can be rough. You’ll need a respirator with organic vapor cartridges. Gloves are a must – nitrile is good. Eye protection, too. And work in a well-ventilated area. Your lungs will thank you.
Step-by-Step: Your Resin Coffee Table Workflow
1. Prepare Your Wood Slab: Sand the wood until it’s perfectly smooth. Wipe away all dust with a tack cloth.
- Good looks like: A surface that feels like silk. No rough spots at all.
- Common mistake: Leaving dust. It’ll get trapped in the resin and look like dirt specks. Always tack cloth it.
2. Seal the Wood: Apply a thin coat of epoxy resin or a wood sealer to the wood. This prevents air bubbles from escaping the wood into your main pour.
- Good looks like: A thin, even coat that soaks into the wood grain.
- Common mistake: Not sealing enough. You’ll get tiny bubbles everywhere.
3. Build and Seal Your Mold: Construct your mold around the wood slab. Use silicone caulk to seal all the seams from the inside. Make sure it’s completely watertight.
- Good looks like: A perfectly sealed box with no gaps.
- Common mistake: Leaky seams. You’ll have resin seeping out. Double-check those corners.
4. Measure Your Resin: Carefully measure Part A and Part B of your resin according to the manufacturer’s ratio. Use accurate digital scales.
- Good looks like: Exact measurements. No guessing.
- Common mistake: Incorrect ratio. This is the fastest way to ruin your pour. It won’t cure right.
5. Mix the Resin: Stir Part A and Part B together slowly and thoroughly for the recommended time (usually 3-5 minutes). Scrape the sides and bottom of the mixing container.
- Good looks like: A uniform, clear mixture. No streaks of unmixed resin.
- Common mistake: Not mixing enough. This leads to sticky spots and incomplete curing.
6. Add Pigment (Optional): If you’re coloring your resin, add your pigment now. Stir gently until the color is evenly distributed.
- Good looks like: Consistent color throughout the mixture.
- Common mistake: Over-mixing pigment. It can sometimes affect the resin’s curing properties.
7. First Pour (Flood Coat): Pour a thin layer of resin over the wood to seal any remaining imperfections and further prevent bubbles.
- Good looks like: A thin, even coat covering the entire surface.
- Common mistake: Pouring too thick. This can cause overheating and stress on the wood.
8. Allow to Partially Cure: Let this initial layer cure until it’s tacky, not fully hardened. This helps the next layer bond better.
- Good looks like: The resin is firm enough to touch without sticking badly.
- Common mistake: Pouring the next layer too soon or too late. Timing is key here.
9. Main Pour(s): Pour your main resin layers. If you’re doing multiple colors or effects, do them one at a time, allowing each to partially cure.
- Good looks like: Smooth, even pours with no major waves or dips.
- Common mistake: Pouring too fast. This introduces air bubbles.
10. Degas (Bubble Removal): Use a heat gun or a propane torch (briefly and with caution!) to pop any surface bubbles. Work quickly and keep the heat source moving.
- Good looks like: A smooth, bubble-free surface.
- Common mistake: Holding the torch too long in one spot. You can scorch the resin.
11. Full Cure: Let the entire table cure undisturbed for the time specified by the resin manufacturer (often 72 hours or more).
- Good looks like: A hard, solid surface that doesn’t dent or flex.
- Common mistake: Rushing the cure. The resin might remain soft or sticky. Patience is a virtue.
12. Demold and Sand: Once fully cured, carefully remove the mold. Begin sanding with progressively finer grits (from 80 up to 2000 or higher).
- Good looks like: A smooth surface, free of mold lines and imperfections.
- Common mistake: Skipping grits. You’ll have deep scratches that are hard to remove later.
13. Polish: Use a polishing compound and a buffer to achieve a high-gloss, glass-like finish.
- Good looks like: A mirror-like shine that makes the colors pop.
- Common mistake: Not polishing enough. The finish will look dull.
Common Mistakes (and What Happens If You Ignore Them)
| Mistake | What It Causes | Fix |
|---|---|---|
| Incorrect Resin Ratio | Resin won’t cure, remains sticky or soft | Remake the batch with the correct ratio. You might need to remove the bad pour and start over. |
| Insufficient Mixing | Sticky spots, incomplete curing, cloudy resin | Scrape sides and bottom thoroughly. If uncured spots appear, you may need to sand and re-pour. |
| Trapped Air Bubbles | Pitted surface, looks unprofessional | Use a heat gun or torch carefully to pop bubbles. Ensure wood is sealed well. |
| Leaky Mold | Resin spills, wasted material, mess | Re-seal mold seams with silicone caulk. Ensure the mold is placed on a level, protected surface. |
| Pouring Too Thick (in one go) | Overheating, cracking, exothermic reaction | Pour in multiple thin layers, allowing partial cure between pours. Check resin specs for max pour depth. |
| Wood Not Sealed Properly | Bubbles rising from wood, pinholes | Apply multiple thin coats of sealant or a flood coat of resin. Let each coat cure fully. |
| Not Using a Heat-Resistant Mold | Mold warps or melts | Use melamine, HDPE, or thick plywood. Avoid thin plastics or foam board for large pours. |
| Rushing the Cure Time | Soft spots, dents, incomplete hardening | Wait the full curing time recommended by the manufacturer, even if it seems hard. Patience pays off. |
| Skipping Sanding Grits | Visible scratches, dull finish | Start with a coarse grit (e.g., 80-120) and work up to very fine grits (2000+). |
| Uneven Surface During Pour | Waves, dips, and high spots | Ensure your mold is perfectly level. Pour resin slowly and evenly. |
Decision Rules
- If your resin is still sticky after 48 hours, then it’s likely an issue with the ratio or mixing because these directly affect the chemical reaction.
- If you see tiny bubbles consistently rising from the wood, then the wood wasn’t sealed adequately because air is still escaping.
- If your resin starts smoking or cracking during a pour, then you’ve poured too thick for the resin type because of excessive heat buildup.
- If the mold feels excessively hot to the touch during curing, then the exothermic reaction is too strong, indicating a potential issue with the pour depth or ambient temperature.
- If you want a perfectly clear, glass-like finish, then you must sand through all the grits and use a polishing compound because this is how you remove sanding marks.
- If you’re unsure about the pigment amount, then start with less and add more because you can always add color, but you can’t easily take it away.
- If you notice a warped section in your cured resin, then it might be due to uneven curing or a reaction with the wood; check your wood moisture content and resin type.
- If you’re working with a live edge slab, then pay extra attention to sealing the bark and any crevices because these are prime spots for bubbles and debris.
- If the ambient temperature is below 70°F, then your resin might cure slower or incompletely because chemical reactions are temperature-dependent.
- If you are pouring over a dark wood with a light-colored resin, then ensure excellent sealing, as any bleed-through will be very noticeable.
FAQ
Q: Can I use any wood for a resin table?
A: It’s best to use dried hardwood. Softwoods can release sap, and unseasoned wood can warp or crack, messing up your pour.
Q: How thick can I pour resin at once?
A: This varies by resin. Most casting resins have a max pour depth of 1-2 inches. Check your product’s datasheet. Pouring thicker can cause overheating.
Q: What’s the best way to get rid of bubbles?
A: A quick pass with a propane torch or a heat gun works well for surface bubbles. For bubbles trapped in the bulk of the resin, you might need to let it cure and sand them out.
Q: How long does it take for resin to cure fully?
A: Typically 72 hours, but it can take up to a week or more for a full hard cure, especially in cooler temperatures. Always check the manufacturer’s instructions.
Q: Can I put anything into the resin besides color?
A: Absolutely! You can embed objects like shells, rocks, or even small toys, but make sure they are completely dry and sealed if they are porous.
Q: My resin is cloudy. What happened?
A: This could be from improper mixing, moisture in the air, or using the wrong type of resin. Ensure your environment is dry and you’re using a casting resin.
Q: How do I clean up uncured resin?
A: Use denatured alcohol or acetone. Once it’s cured, it’s much harder to remove and usually requires sanding.
Q: What kind of mold material is best?
A: Melamine-coated particleboard is a popular choice because it’s rigid, smooth, and easy to work with. High-density polyethylene (HDPE) is also great.
Q: Can I repair a scratch on my cured resin table?
A: Yes, you can sand out scratches and re-polish the area to match the rest of the surface.
What This Page Does Not Cover (And Where to Go Next)
- Detailed wood preparation techniques beyond basic sanding and sealing. (Look into wood stabilization and epoxy sealing methods).
- Advanced resin art techniques like petri dishes, metallic pigments, or creating deep ocean effects. (Search for specific resin art tutorials).
- Building a complete table base or legs for your resin slab. (Explore woodworking furniture plans).
- Specific product recommendations or brand comparisons. (Consult user reviews and forums for current market options).