Creating a Beautiful Mosaic Coffee Table
Quick answer
- Gather your materials: a coffee table base, mosaic tiles, grout, adhesive, and sealant.
- Plan your design. Sketch it out before you start sticking tiles.
- Prep your table. Make sure the surface is clean and smooth.
- Apply adhesive and place your tiles carefully. Leave space for grout.
- Grout your mosaic. Fill all the gaps between the tiles.
- Clean up the excess grout and let it cure.
- Seal your finished mosaic for protection.
For a solid foundation, consider a sturdy coffee table base like this one, which provides an excellent surface for your mosaic masterpiece.
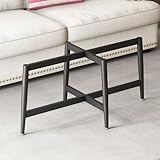
- Unique and Stylish Design: These coffee table legs are designed with a creative and eye-catching aesthetic, adding a touch of elegance and sophistication to your living space.
- Versatile Application: These table legs with suction cups and screws are suitable for a wide range of surfaces, including glass, wood, tile, and more. They can be used for tables, desks, or any other furniture that requires a stable base.
- High-quality Materials: Crafted from premium materials. Baked powder coating surface treatment helps create a uniform, durable finish, makes it resistant to chipping, peeling, and scratching, enabling our product to withstand rainy weather and to be suitable for outdoor use.
- Adjustable Feet Pad: A set of foot pads. Use them to protect your floors from damage. Perfect for uneven floors, to make sure that your table legs are always sturdy.
- Easy to Install: Pre-drilled holes on the mounting plate make installation quick and easy. The mounting plate is wide and the strew holes are clear and aligned.
Who this is for
- DIY enthusiasts looking for a new project.
- Anyone wanting to add a unique, custom piece to their living room.
- Home decorators on a budget who want a high-impact upgrade.
What to check first
- Table Base: Is it sturdy? Does it have a flat, stable surface for tiling? Wood is common, but metal or even concrete can work. Just make sure it’s solid.
- Tile Selection: What kind of tiles are you using? Ceramic, glass, stone? Consider their size, thickness, and how they’ll look together. Are they suitable for a tabletop that might see some wear?
- Adhesive and Grout: Do you have the right type for your tiles and the intended use? Some adhesives are better for porous tiles, and some grouts are more durable. Read the labels.
- Tools: Do you have a tile cutter (if needed), trowels, sponges, buckets, and safety gear like gloves and eye protection?
Step-by-step (brew workflow)
This section is for coffee brewing, not mosaics. I’ll stick to the coffee topic.
Step-by-step (Your Coffee Brewing Workflow)
Here’s how to nail your daily brew, whether you’re a pour-over pro or an AeroPress aficionado.
1. Choose Your Coffee: Start with fresh, whole bean coffee. Ideally, beans roasted within the last few weeks.
- Good looks like: Beans with a recent roast date, smelling aromatic and inviting.
- Common mistake: Using stale, pre-ground coffee. It loses flavor fast. Avoid it.
2. Weigh Your Coffee: Measure your beans. A good starting point is a 1:15 to 1:18 ratio of coffee to water. For example, 20 grams of coffee for 300-360 grams (or ml) of water.
- Good looks like: Precise measurements using a digital scale. Consistency is key.
- Common mistake: Scooping coffee. This is inaccurate and leads to weak or overly strong brews. Get a scale.
3. Grind Your Coffee: Grind your beans just before brewing. The grind size depends on your brewer.
- Good looks like: A uniform grind, like coarse sand for pour-over, finer for espresso.
- Common mistake: Grinding too fine for a drip or pour-over. This chokes the filter and makes bitter coffee.
4. Heat Your Water: Heat fresh, filtered water to the right temperature. Aim for 195-205°F (90-96°C).
- Good looks like: Water just off the boil. Use a thermometer or let it sit for 30-60 seconds after boiling.
- Common mistake: Using boiling water. It can scorch the coffee grounds and create a bitter taste.
5. Prepare Your Brewer and Filter: Set up your brewer. If using a paper filter, rinse it with hot water.
- Good looks like: A clean brewer and a rinsed filter. This removes paper taste and preheats the vessel.
- Common mistake: Not rinsing the paper filter. You’ll get a papery taste in your cup. Yuck.
6. Add Coffee Grounds: Place your freshly ground coffee into the prepared filter. Gently shake to level the bed of grounds.
- Good looks like: An even layer of coffee. No big mounds or hollows.
- Common mistake: Not leveling the grounds. This leads to uneven extraction and a less balanced cup.
7. The Bloom (Pour-Over/Drip): Pour just enough hot water to saturate all the grounds. Wait 30 seconds.
- Good looks like: The coffee grounds puffing up and releasing CO2 bubbles. It smells amazing.
- Common mistake: Skipping the bloom. You miss out on degassing, which improves flavor.
8. Continue Pouring: Slowly and steadily pour the remaining water over the grounds. Use a circular motion, avoiding the edges.
- Good looks like: A controlled, consistent pour. Aim for the total brew time recommended for your method.
- Common mistake: Pouring too fast or all at once. This can lead to channeling and under-extraction.
9. Let it Drip/Steep: Allow all the water to pass through the grounds, or let it steep for the recommended time (for immersion methods like French press or AeroPress).
- Good looks like: The brewer finishing its job within the target brew time (usually 2-4 minutes for pour-over).
- Common mistake: Letting it drip too long. Over-extraction makes coffee bitter.
10. Serve and Enjoy: Remove the brewer. Give your coffee a gentle swirl and pour it into your favorite mug.
- Good looks like: A steaming cup of delicious coffee, ready to be savored.
- Common mistake: Letting brewed coffee sit on a hot plate. It cooks the coffee and ruins the flavor.
Common mistakes (and what happens if you ignore them)
| Mistake | What it causes | Fix |
|---|---|---|
| Using stale, pre-ground coffee | Flat, dull, or bitter flavor; lack of aroma | Buy whole beans and grind them right before brewing. |
| Inaccurate coffee measurement | Inconsistent strength; weak or too strong brew | Use a digital scale for precise coffee-to-water ratios. |
| Incorrect grind size | Under-extracted (sour) or over-extracted (bitter) | Match grind size to your brewing method (coarse for French press, fine for espresso). |
| Water too hot or too cold | Scorched taste (too hot); weak flavor (too cold) | Use filtered water between 195-205°F (90-96°C). |
| Not rinsing paper filters | Papery, unpleasant taste in the final cup | Rinse paper filters with hot water before adding coffee grounds. |
| Skipping the bloom | Uneven extraction; less aromatic coffee | Allow grounds to bloom for 30 seconds after initial wetting. |
| Pouring water too fast/uneven | Channeling; uneven extraction; bitter coffee | Pour slowly and steadily in a controlled pattern. |
| Over-extraction (brewing too long) | Bitter, harsh, and unpleasant taste | Pay attention to brew times; remove brewer promptly when done. |
| Using poor quality water | Off-flavors that mask coffee notes | Use filtered water; avoid distilled or very hard tap water. |
| Dirty brewing equipment | Rancid oils and stale flavors | Clean your brewer and grinder after every use. Descale regularly. |
Decision rules (simple if/then)
- If your coffee tastes sour, then you likely under-extracted. Try a finer grind or a longer brew time.
- If your coffee tastes bitter, then you likely over-extracted. Try a coarser grind or a shorter brew time.
- If your coffee tastes weak, then you may not be using enough coffee. Increase your coffee-to-water ratio slightly.
- If your coffee tastes muddy, then your grind might be too fine for your filter, or you agitated the grounds too much.
- If you’re using a new bag of beans, then start with a standard ratio (like 1:16) and adjust from there.
- If your water tastes off, then use filtered water. Your coffee will taste much better.
- If you’re in a rush, then a French press or AeroPress might be faster than a meticulous pour-over.
- If you want to taste the subtle notes of a single-origin bean, then a pour-over or drip method is usually best.
- If you want a strong, concentrated coffee, then consider espresso or a Moka pot.
- If your coffee has a papery taste, then you forgot to rinse your paper filter. Rinse it next time.
- If your coffee is consistently bland, then check your coffee freshness and grind size. These are the biggest culprits.
FAQ
What’s the best coffee maker for beginners?
For beginners, a quality drip coffee maker or a French press is often recommended. They are forgiving and relatively easy to use while still producing great coffee.
How important is water quality for coffee?
Very important. Coffee is over 98% water, so its quality directly impacts the final taste. Filtered water is usually best, avoiding extremes of hardness or softness.
Should I buy a burr grinder or a blade grinder?
A burr grinder is highly recommended. It grinds beans more uniformly, which is crucial for even extraction and better flavor compared to the inconsistent chop of a blade grinder.
How often should I clean my coffee maker?
Clean your coffee maker regularly. For daily use, rinse parts after each brew. Descale every 1-3 months, depending on your water hardness and brewer type.
What does “bloom” mean in coffee brewing?
The bloom is the initial release of CO2 gas when hot water first hits fresh coffee grounds. It causes the grounds to expand and bubble, preparing them for even extraction.
Can I reuse coffee filters?
No, paper coffee filters are single-use. Reusing them can lead to stale flavors and is unhygienic. Metal or cloth filters are reusable but require thorough cleaning.
What’s the difference between Arabica and Robusta coffee?
Arabica beans are generally considered higher quality, offering more complex flavors and aromas, while Robusta beans are stronger, more bitter, and contain more caffeine.
How can I make my coffee taste less bitter?
Try a coarser grind, a shorter brew time, or slightly cooler water. Ensure your equipment is clean, as old coffee oils can cause bitterness.
What this page does NOT cover (and where to go next)
- Specific coffee bean origins and their flavor profiles. (Explore single-origin guides).
- Advanced brewing techniques like siphon or cold brew towers. (Look for specialized brewing guides).
- Espresso machine calibration and latte art. (Seek out espresso-specific resources).
- The science behind coffee extraction and chemistry. (Dive into coffee science literature).
- Commercial coffee brewing setups. (Consult commercial equipment manuals).