Can You Brew Coffee with a Tea Strainer? Yes!
Quick answer
- Yes, you absolutely can brew coffee with a tea strainer.
- It’s a resourceful method for when you’re short on gear.
- You’ll need a fine-mesh tea strainer and a way to hold it over your mug.
- A coarser grind is usually better to prevent sediment.
- Expect a lighter body and potentially more fines than a traditional brew.
- It’s a bit of a hack, but it works in a pinch.
Who this is for
- The traveler who forgot their portable brewer.
- The minimalist who wants fewer gadgets.
- Anyone curious about low-tech coffee brewing.
What to check first
Brewer type and filter type
You’re using a tea strainer as your brewer and filter. This means a fine-mesh metal strainer is your primary tool. It’s designed for loose leaf tea, so it’ll catch most coffee grounds, but don’t expect perfection.
Water quality and temperature
Good coffee starts with good water. If your tap water tastes off, your coffee will too. Filtered water is always a safe bet. Aim for water just off the boil, around 195-205°F (90-96°C). Too hot and you’ll scorch the grounds. Too cool and you won’t extract enough flavor.
Grind size and coffee freshness
This is crucial. A medium-coarse to coarse grind is your friend here. Think sea salt, not powder. Too fine a grind will clog your strainer and pass through, leaving you with mud. Freshly roasted beans, ground just before brewing, will always give you the best flavor.
For the best results, use freshly roasted whole coffee beans and grind them just before brewing. This ensures the freshest flavor possible for your tea strainer brew.
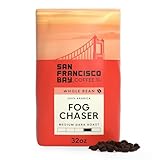
- Our iconic Fog Chaser is a blend of dark and medium roasted beans which results in a enjoyable medium dark roast coffee. It's a great combination of flavor, balance and smoothness that will chase away even the thickest morning fog.
- For finest taste, store in a cool, dark place and grind beans just berfore brewing
- QUALITY COFFEE: San Francisco Bay Coffee uses only 100% arabica coffee and certified Kosher coffee beans. Hand picked and grown in high altitude. We're so confident you'll love it, we back it with a satisfaction guarantee.
- SUSTAINABLY AND ECO- FARMED COFFEE: We offer a wide selection of sustainably grown, sourced, and packaged coffee from whole bean to ground, flavored to decaf, and much more.
- SF BAY COFFEE is a family owned, American made company with a rich tradition. Our reputation reflects on us as a family so if you're ever not happy with your purchase, call us and we'll make it right.
Coffee-to-water ratio
A good starting point is about 1:15. That means 1 gram of coffee for every 15 grams of water. For an 8 oz mug (roughly 240g water), you’d use about 16g of coffee. You can adjust this to your taste.
Cleanliness/descale status
Make sure your tea strainer is clean. Any residual tea flavors or old coffee oils will mess with your brew. Since you’re not dealing with a complex machine, a good wash with soap and water is usually all you need.
Step-by-step (how to make coffee with a tea strainer)
1. Heat your water. Get your water to the right temperature, 195-205°F (90-96°C).
- What “good” looks like: Water is steaming but not violently boiling.
- Common mistake: Boiling water straight from the kettle. Let it sit for 30-60 seconds.
2. Prepare your coffee. Grind your beans to a medium-coarse consistency.
- What “good” looks like: Grounds resemble coarse sand or small pebbles.
- Common mistake: Using pre-ground coffee that’s too fine. You’ll get sludge.
3. Set up your station. Place your mug on a stable surface. Drape the tea strainer over the rim, ensuring it’s secure.
- What “good” looks like: The strainer sits firmly without tipping.
- Common mistake: Overfilling the strainer. It’ll spill.
4. Add coffee grounds. Spoon your measured coffee grounds into the tea strainer.
- What “good” looks like: Grounds are evenly distributed in the strainer.
- Common mistake: Packing the grounds down. Keep it loose.
5. Bloom the coffee. Pour just enough hot water to saturate the grounds. Wait 30 seconds.
- What “good” looks like: The grounds puff up and release CO2 (the “bloom”).
- Common mistake: Skipping the bloom. You miss out on better flavor extraction.
6. Pour the main brew. Slowly pour the remaining hot water over the grounds in a circular motion.
- What “good” looks like: A steady stream of coffee drips into your mug.
- Common mistake: Pouring too fast. This can agitate the grounds and lead to bitterness.
7. Let it drip. Allow all the water to filter through the grounds and strainer.
- What “good” looks like: The flow slows to a trickle and stops.
- Common mistake: Rushing the process. Patience yields a better cup.
8. Remove the strainer. Carefully lift the tea strainer, letting any last drips fall into the mug.
- What “good” looks like: The strainer is empty of grounds, and your mug has brewed coffee.
- Common mistake: Shaking the strainer too hard. You’ll send fines into your coffee.
9. Serve and enjoy. Your coffee is ready!
- What “good” looks like: A pleasant aroma and a drinkable cup of coffee.
- Common mistake: Drinking too quickly. Let it cool slightly.
Common mistakes (and what happens if you ignore them)
| Mistake | What it causes | Fix |
|---|---|---|
| Using a grind that’s too fine | Cloudy, silty coffee; grounds pass through the strainer into your cup. | Switch to a medium-coarse or coarse grind (like sea salt). |
| Using boiling water | Scorched, bitter coffee flavor. | Let water cool for 30-60 seconds after boiling (aim for 195-205°F). |
| Not blooming the coffee | Under-extracted, flat, or sour coffee; uneven flavor. | Pour a small amount of water to wet grounds, wait 30 seconds for CO2 to release. |
| Pouring water too quickly | Over-extraction, bitterness; grounds can overflow the strainer. | Pour slowly and steadily in a circular motion. |
| Overfilling the tea strainer | Grounds spill over the sides, making a mess and potentially getting into your mug. | Use less coffee or a larger strainer. Brew in batches if needed. |
| Not securing the strainer properly | Strainer falls into the mug, spilling hot water and grounds everywhere. | Ensure the strainer is stable and fits snugly over the mug rim. |
| Using stale coffee beans | Flat, dull, or cardboard-like flavor. | Use freshly roasted beans and grind them just before brewing. |
| Not cleaning the tea strainer | Off-flavors from old tea or coffee residue. | Wash thoroughly with soap and water after each use. |
| Not letting the coffee fully drip | Weak coffee; you might leave good flavor behind. | Be patient and let gravity do its work until the dripping stops. |
| Using a strainer with large holes | Too many fines and sediment in your final cup. | Use a fine-mesh tea strainer specifically designed for small particles. |
Decision rules
- If your coffee tastes bitter, then try a coarser grind because fine grinds over-extract.
- If your coffee tastes weak or sour, then try a finer grind (but not too fine!) or use more coffee because under-extraction leads to sourness.
- If you see a lot of sediment, then use a more coarse grind or ensure your strainer is fine-mesh because fine particles are passing through.
- If your coffee has an off-flavor, then clean your tea strainer thoroughly because residue can taint the taste.
- If the water is boiling rapidly, then wait 30-60 seconds before pouring because boiling water will scorch the coffee.
- If the grounds are overflowing the strainer, then use less coffee or a bigger strainer because you’ve overloaded it.
- If you’re using pre-ground coffee, then check the grind size and opt for coarser grinds if possible because most pre-ground is too fine for this method.
- If you want a cleaner cup, then try pouring the water in slower, more controlled pulses because this can help settle the grounds.
- If the brew is taking too long and looks muddy, then your grind might be too fine, or the strainer is clogged.
- If you want a stronger brew, then increase your coffee-to-water ratio slightly, but be mindful of grind size.
FAQ
Can I use a regular kitchen sieve?
Probably not. Most kitchen sieves have holes that are too large. You’ll end up with a very gritty cup. A fine-mesh tea strainer is key.
Will it taste as good as a pour-over?
Honestly, probably not. A tea strainer lacks the control of a dedicated pour-over device. Expect a simpler, less nuanced cup. But it’s still coffee!
How much coffee should I use?
Start with a ratio of about 1:15 (coffee to water by weight). For a standard 8 oz mug, that’s around 16 grams of coffee. Adjust to your preference.
What if I don’t have a way to measure coffee weight?
Use tablespoons as a rough guide. About 2 level tablespoons of whole beans per 6 oz of water is a common starting point. Grind those beans!
Can I use paper filters with a tea strainer?
Not easily. You’d have to get creative to make a paper filter fit and stay put without collapsing. Metal mesh is the way to go here.
What kind of coffee beans work best?
Medium roasts tend to be forgiving. Avoid very dark roasts, which can become overly bitter, or very light roasts, which might not extract well with this method.
How do I clean the coffee grounds out of the strainer?
Tap the used grounds into your compost or trash. Then, rinse the strainer under running water and wash with a little soap and a soft brush if needed.
Is this method safe for my mug?
Yes, as long as your mug is sturdy and can handle the weight of the strainer and grounds. Avoid thin or delicate mugs.
What this page does NOT cover (and where to go next)
- Advanced extraction theory for achieving the perfect bloom.
- Specific recommendations for coffee bean origins and roast profiles.
- Detailed comparisons to other brewing methods like Aeropress or Chemex.
- Troubleshooting complex issues like channeling or uneven extraction in espresso.
If you’re looking to dive deeper, explore guides on pour-over techniques, understanding coffee-to-water ratios, and the science of coffee grinding.