Brewing Large Batches Of Cold Brew Coffee
Quick answer
- Use a coarse grind, similar to breadcrumbs, to avoid over-extraction and bitterness.
- Maintain a coffee-to-water ratio between 1:4 and 1:8 by weight for a concentrated brew.
- Brew at room temperature for 12-18 hours, adjusting based on desired strength.
- Use cold, filtered water for the best flavor and to prevent off-notes.
- Filter thoroughly using multiple stages for a smooth, sediment-free concentrate.
- Store concentrate in an airtight container in the refrigerator for up to two weeks.
- Dilute with water, milk, or ice to taste when serving.
Who this is for
- Busy individuals who want to prepare coffee in advance for the week.
- Cold brew enthusiasts looking to scale up their brewing process for convenience.
- Anyone seeking a less acidic, smoother coffee experience than traditional hot brewing.
What to check first
Brewer type and filter type
For large batches, you’ll need a large vessel. This could be a food-grade bucket, a large pitcher, or a dedicated cold brew maker designed for volume. Ensure your chosen vessel has a lid for steeping.
For large batches, you’ll need a substantial vessel. A food-grade bucket is an excellent and affordable option for brewing large quantities of cold brew.

- Suitable Size: the food grade plastic buckets with lid have a convenient size of 8.27 x 8.27 x 11.22 inches/ 21 x 21 x 28.5 cm, offering ample space to store various items without taking up too much room; Whether you need to organize your kitchen supplies, store toys, or manage your cleaning supplies, these buckets provide the suitable size for your storage needs
- Safe Material: made from quality plastic, these food grade plastic buckets with lid ensure safety and durability; The material is free from harmful contents, making it safe for storing food, pet supplies, or even baby essentials; Whether you need to store dry ingredients, paint, cleaning supplies, or gardening tools, these buckets provide a versatile storage option to meet your needs
- Practical Design: with their square shape, these food grade square containers are designed for practicality; The flat surfaces allow for easy stacking, saving space in your storage area; Their sturdy handles ensure a secure grip, enabling effortless transportation and convenient handling; The design also includes a lid to protect your stored items from dust, dirt
- Storage Function: the food grade square buckets offer storage capabilities; The sizable interior allows you to store beans, rice, flour, sugar, salt, pasta, honey, pet food, poultry feed, bird food; Also applied for safe storage of charcoal, mulch, grass seed, paint, cement slurry, liquid, powder, oil, agricultural products, fertilizers, garden hose and other products
- Wide Application: these food grade square buckets with lid have a versatile nature, making them suitable for various applications; They can be applied for kitchens, garages, bathrooms, offices, or even outdoor spaces; Whether you need to store dry ingredients, paint, cleaning supplies, or gardening tools, these buckets provide a versatile storage option to meet your needs
The filter type is crucial for a clean cold brew. Options include fine-mesh strainers, nut milk bags, cheesecloth, or paper filters. Many large-scale brewers use a combination, starting with a coarser filter and refining with a finer one.
The type of filter you use is critical for a clean cold brew. Investing in a good cold brew coffee filter, or a set of them, will ensure you get a smooth, sediment-free concentrate.
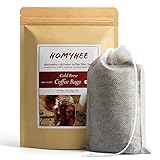
- Easy Use Cold Brew Coffee Filter Bags - over 1 cup capacity bags (4" x 6"), Recommended 100g grounds in 32oz mason jar. Use with your favorite cold brew coffee grounds, the cold brew bags filter well all kinds of coffee grounds, no matter coarse or fine
- Disposable, Use Without Mess - No need to rinse, wash another nylon mesh or cotton filter! This single use cold brew filter bags are as easy as: put the coffee grounds into this filter, brew with cool water and steeping in the fridge overnight (12-15 hours)
- Durable Material - Our cold brew coffee bags pack are made from natural commercially compostable fine fiber. Filter material is super-strong and resists tearing while filtering similar to paper. Great for use with: common cold brew system and most cold brew coffee maker
- Less Chunks - Each package contians 100 pcs of bags. Ultra fine mesh cold brew coffee bag means less sludge fines ending up in your coffee compared to plastic, cloth coffee sock or metal cold brew filters. The drawstring on each of our cold brew filter closes tight to retain all fine & coarse coffee grounds better than metal or plastic cold brew coffee makers.
Water quality and temperature
Good quality water is essential. Tap water with high mineral content or chlorine can negatively impact the flavor of your cold brew. Consider using filtered water, like from a Brita pitcher or a refrigerator dispenser.
Cold brew, as the name suggests, uses cold or room temperature water for the steeping process. Avoid hot water, as this will lead to a different extraction and potentially a more acidic flavor profile.
Grind size and coffee freshness
The ideal grind for cold brew is coarse, resembling breadcrumbs or sea salt. A finer grind will lead to over-extraction, bitterness, and a muddy final product that’s hard to filter. If your coffee is pre-ground, check its texture; if it’s too fine, you might need to adjust your steeping time or filtration.
Freshly roasted coffee beans, ground just before brewing, will yield the best flavor. Coffee begins to lose its aromatics shortly after grinding. While you can use pre-ground coffee, aim for bags that were recently opened or ground.
Coffee-to-water ratio
This is one of the most important factors for how to make a large batch of cold brew coffee. A common starting point for cold brew concentrate is a 1:4 to 1:8 coffee-to-water ratio by weight. For example, 1 pound of coffee would use between 4 and 8 pounds (approximately 0.5 to 1 gallon) of water. This range allows for dilution later.
Experiment within this range to find your preferred strength. A higher coffee-to-water ratio (e.g., 1:4) will produce a stronger concentrate, while a lower ratio (e.g., 1:8) will be milder.
Cleanliness/descale status
Always start with clean equipment. Any residual coffee oils or scale can impart off-flavors to your cold brew. Wash your brewing vessel, stirring utensils, and filtration equipment thoroughly with soap and water before each use.
While descaling isn’t typically relevant for cold brew makers in the same way it is for hot coffee machines, ensuring all components are free of mineral buildup or old coffee residue is vital for taste and hygiene.
Step-by-step (brew workflow)
1. Gather equipment: Ensure you have a large, clean brewing vessel, a stirring utensil, and your chosen filtration materials ready.
- Good: All items are spotless and food-grade.
- Mistake: Using a container with lingering odors or residue. Avoid by: Washing and rinsing all equipment thoroughly.
2. Measure coffee: Weigh out your coarse-ground coffee according to your desired ratio.
- Good: Accurate weight measurement using a kitchen scale.
- Mistake: Using volume measurements (cups) for coffee. Avoid by: Always using a scale for precise ratios.
3. Add coffee to vessel: Transfer the measured coffee into your brewing container.
- Good: Evenly distributing the coffee in the vessel.
- Mistake: Tightly packing the coffee. Avoid by: Allowing the coffee grounds to sit loosely.
4. Add cold, filtered water: Slowly pour the measured cold, filtered water over the coffee grounds.
- Good: Pouring gently to saturate all grounds.
- Mistake: Using hot water or unfiltered tap water. Avoid by: Using cold, quality filtered water.
5. Stir thoroughly: Use a long spoon or utensil to gently stir the coffee and water mixture.
- Good: Ensuring all coffee grounds are fully saturated and submerged.
- Mistake: Not stirring enough, leaving dry pockets of coffee. Avoid by: Stirring for 1-2 minutes until no dry clumps remain.
6. Cover and steep: Place a lid on your brewing vessel and let it steep at room temperature.
- Good: Steeping for 12-18 hours, away from direct sunlight.
- Mistake: Steeping for too short (weak) or too long (bitter). Avoid by: Setting a timer and tasting as you get closer to the 12-hour mark.
7. Initial filtration: After steeping, strain the concentrate through your primary filter (e.g., a fine-mesh strainer or nut milk bag) into a clean container.
- Good: Removing the bulk of the coffee grounds.
- Mistake: Squeezing the grounds. Avoid by: Letting gravity do the work to prevent extracting bitter compounds and fine sediment.
8. Secondary filtration (optional but recommended): For an even cleaner concentrate, filter the liquid again through a finer filter, such as cheesecloth or a paper filter set in a funnel.
- Good: Achieving a clear, sediment-free concentrate.
- Mistake: Skipping this step, resulting in a cloudy brew. Avoid by: Using a paper filter for the final pass, even if it takes longer.
9. Store concentrate: Transfer the finished cold brew concentrate into an airtight container.
- Good: Storing in glass jars or bottles in the refrigerator.
- Mistake: Leaving the concentrate exposed to air. Avoid by: Using an airtight lid to preserve freshness.
10. Clean up: Immediately clean all brewing equipment to prevent coffee oils from hardening.
- Good: Washing all items with soap and water, then drying.
- Mistake: Letting coffee grounds dry in filters or vessels. Avoid by: Rinsing immediately after use.
Common mistakes (and what happens if you ignore them)
| Mistake | What it causes | Fix |
|---|---|---|
| Using fine grind coffee | Over-extraction, bitterness, muddy texture, difficult filtration. | Use a coarse grind, like breadcrumbs. Grind beans fresh if possible. |
| Incorrect coffee-to-water ratio | Too weak or too strong concentrate, inconsistent flavor. | Use a kitchen scale for precise measurement; start with 1:5 or 1:6 ratio. |
| Not stirring grounds thoroughly | Uneven extraction, some coffee remains dry, weak flavor. | Stir for 1-2 minutes after adding water to fully saturate all grounds. |
| Steeping for too short a time | Weak, underdeveloped flavor, watery cold brew. | Extend steeping time to 12-18 hours; taste periodically. |
| Steeping for too long a time | Over-extraction, bitter taste, sometimes an acrid flavor. | Stick to the 12-18 hour range; shorter for lighter roasts, longer for darker. |
| Using hot or warm water | Extracts more acids and bitter compounds, not true cold brew. | Always use cold or room temperature filtered water for steeping. |
| Squeezing the coffee grounds | Forces out bitter compounds and fine sediment, making it cloudy. | Let gravity drain the concentrate; gently lift the filter bag without squeezing. |
| Not using filtered water | Off-flavors from chlorine or minerals, impacting the final taste. | Use filtered water (e.g., Brita, refrigerator filter) for all cold brew. |
| Poor filtration | Sediment in the final concentrate, gritty texture. | Use a multi-stage filtration process (e.g., nut milk bag then paper filter). |
| Storing concentrate improperly | Loss of freshness, off-flavors, reduced shelf life. | Store in an airtight container in the refrigerator for up to 2 weeks. |
Decision rules (simple if/then)
- If your cold brew tastes too weak, then increase your coffee-to-water ratio (e.g., from 1:8 to 1:6) or extend your steeping time by a few hours, because insufficient coffee or extraction leads to a diluted flavor.
- If your cold brew tastes bitter or overly strong, then decrease your coffee-to-water ratio (e.g., from 1:4 to 1:6) or shorten your steeping time, because over-extraction or too much coffee concentrate flavor.
- If you see a lot of sediment in your final cold brew, then use a finer secondary filter (like a paper filter) or double-filter, because your current filtration method isn’t catching all the fine particles.
- If your cold brew has an “off” or chemical taste, then switch to filtered water and ensure all equipment is meticulously clean, because tap water impurities or dirty equipment can introduce unwanted flavors.
- If your cold brew is taking a long time to filter, then your grind might be too fine or your filter is too dense, because fine particles clog filters and slow down the process.
- If you prefer a lighter, less intense cold brew, then use a lighter roast coffee and a lower coffee-to-water ratio (e.g., 1:8), because roast level and concentration directly impact strength.
- If you want a richer, bolder cold brew, then use a darker roast coffee and a higher coffee-to-water ratio (e.g., 1:4 or 1:5), because these factors contribute to a more pronounced coffee flavor.
- If your cold brew concentrate isn’t lasting as long as you’d like, then ensure it’s stored in an airtight container in the coldest part of your refrigerator, because exposure to air and warmer temperatures degrade freshness faster.
- If your cold brew seems cloudy, then avoid squeezing the coffee grounds during filtration, because squeezing forces out fine solids and oils that contribute to cloudiness.
- If you’re struggling to make a large batch of cold brew coffee consistently, then invest in a dedicated large-capacity cold brew maker with integrated filtration, because these systems are designed for ease and consistency at scale.
FAQ
Q: Can I use pre-ground coffee for large batch cold brew?
A: Yes, you can, but check the grind size. It should be coarse, like breadcrumbs. If it’s too fine, you might get a bitter, muddy brew that’s hard to filter. Freshly ground coffee is always preferred for flavor.
Q: How long does large batch cold brew concentrate last in the refrigerator?
A: When stored in an airtight container in the refrigerator, cold brew concentrate typically lasts for up to two weeks. Some people find it can last a bit longer, but flavor quality may start to diminish.
Q: What’s the best way to dilute cold brew concentrate?
A: The best way is to dilute to taste. Start with a 1:1 ratio of concentrate to water or milk, and adjust from there. You can also pour it over ice, which will dilute it as it melts.
Q: Do I need special equipment to make a large batch of cold brew?
A: Not necessarily. You can use any large, food-grade container with a lid, such as a pitcher, bucket, or stockpot. However, dedicated large-capacity cold brew makers can simplify the process, especially filtration.
Q: What if my cold brew tastes too acidic?
A: Cold brew is naturally less acidic than hot brewed coffee. If yours tastes acidic, ensure you’re using cold water for steeping and a coarse grind. Over-extraction from too fine a grind or too long a steep can sometimes mimic acidity.
Q: Can I use hot water to speed up the cold brew process?
A: No, using hot water would result in a different extraction process, essentially making hot coffee that’s then cooled, not true cold brew. This would extract more acids and bitter compounds, defeating the purpose of cold brewing.
What this page does NOT cover (and where to go next)
- Specific brand recommendations for coffee beans or cold brew makers
- Detailed chemistry of coffee extraction
- Advanced cold brew recipes (e.g., infusing with spices)
- The history of cold brew coffee
- Commercial-scale cold brew production
- How to make cold foam or other coffee shop drinks at home