Brewing Coffee On A Blackstone Griddle
Quick answer
- Yes, you can make coffee on a Blackstone griddle, but it’s not ideal for precision brewing.
- You’ll need a heat-safe pot or kettle and a way to control the heat.
- Expect a more rustic, campfire-style brew.
- It’s best for simple methods like cowboy coffee or heating water for instant coffee.
- Don’t expect gourmet results without a dedicated coffee maker.
- Focus on safety – keep flammable items away and watch out for hot surfaces.
Who this is for
- Campers and outdoor enthusiasts who want a hot drink without a full kitchen setup.
- People who own a Blackstone griddle and are curious about its multi-use potential.
- Anyone looking for a simple, no-fuss way to make coffee in a primitive setting.
What to check first
Brewer type and filter type
This is the big one. You’re not using a fancy pour-over setup out here. Think simple. If you’re heating water for instant coffee, you just need a pot. For cowboy coffee, you just need a pot to boil water and then add grounds. No filters needed for this style, which is part of the charm.
Water quality and temperature
Clean water makes clean coffee. If you’re out camping, use filtered or bottled water if possible. The griddle can get things hot, but it’s harder to control the exact temperature for optimal extraction. Aim for boiling, then let it cool slightly for a smoother cup.
Grind size and coffee freshness
For cowboy coffee, a coarser grind is your friend. It’s easier to separate from the grounds later. Freshly ground beans always taste better, but out in the wild, pre-ground might be your only option. Just know it won’t be as vibrant.
Coffee-to-water ratio
This is where you can experiment. A good starting point for cowboy coffee is about 2 tablespoons of coffee per 6 oz of water. You can adjust this to your taste. Too little coffee, and it’ll be weak. Too much, and it’ll be bitter.
Cleanliness/descale status
Even outdoors, cleanliness counts. Make sure your pot or kettle is clean. Any residue can mess with the flavor. Since you’re not using a complex machine, there’s not much to descale, but a quick rinse goes a long way.
Step-by-step (brew workflow)
This is for a basic “cowboy coffee” style brew on your griddle.
1. Set up your griddle: Make sure it’s on a stable, level surface. Clear away any flammable materials.
- What “good” looks like: The griddle is stable and safe to operate.
- Common mistake: Not checking stability or having flammable items too close. Avoid this by taking a minute to assess your surroundings.
2. Place your pot/kettle: Use a metal pot or kettle that can handle direct heat.
- What “good” looks like: The pot is securely on the griddle, not wobbling.
- Common mistake: Using a pot with a thin or warped bottom, or one that isn’t fully supported. This can lead to uneven heating or spills.
For heating water, a durable metal camping kettle works perfectly on your griddle. This ensures even heating and safety.
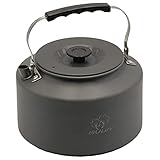
- DIRECTLY USABLE OVER OPEN FIR - This kettle is designed for ultimate flexibility. Whether you’re boiling water directly over an open flame or using a stove, it’s perfect for any outdoor heating situation. Enjoy fast, efficient boiling no matter your setup!
- LARGE 2.2L CAPACITY - With a generous 2.2L volume, this kettle provides ample water for tea, coffee, or cooking, making it ideal for small groups of 2-3 people. Whether you’re camping with friends or family, you’ll have enough to keep everyone refreshed and energized.
- LIGHTWEIGHT & PORTABLE - Weighing just 0.6 lbs, this kettle is incredibly light and easy to carry, making it the perfect companion for any outdoor adventure. It comes with a handy carry bag, so you can effortlessly store and transport it on hikes, camping trips, or picnics.
- ANTI-SCALD HANDLE FOR SAFE USE - Equipped with an insulated, heat-resistant handle, this kettle ensures you can safely pour hot water without risking burns. Its ergonomic design also allows for a comfortable grip, even when the kettle is hot.
- FOOD-GRADE, HARD ANODIZED ALUMINUM - Made from durable, food-grade hard anodized aluminum, this kettle is both lightweight and robust. It’s safe for boiling water and perfect for tea, coffee, or any other hot beverage. Enjoy a safe, non-toxic, and multi-functional outdoor tool that’s built to last.
3. Add water: Fill your pot with the desired amount of water.
- What “good” looks like: The pot is filled to a reasonable level, leaving room for grounds and to avoid boiling over.
- Common mistake: Overfilling the pot, which will cause a mess when it boils.
4. Heat the water: Turn on a burner to medium-high heat.
- What “good” looks like: The water is starting to heat up and will soon reach a boil.
- Common mistake: Blasting the heat too high, which can scorch the pot or make the water boil over violently.
5. Bring water to a boil: Let the water reach a rolling boil.
- What “good” looks like: Vigorous bubbling across the surface of the water.
- Common mistake: Letting it boil too long. This can evaporate too much water and concentrate the coffee too much.
6. Remove from heat (briefly): Take the pot off the direct heat for about 30 seconds to a minute. This lets the temperature drop slightly.
- What “good” looks like: The aggressive boiling subsides, but the water is still very hot.
- Common mistake: Leaving it on the heat, which can lead to a burnt taste when you add the coffee.
7. Add coffee grounds: Stir in your desired amount of coarse coffee grounds.
- What “good” looks like: The grounds are evenly distributed in the hot water.
- Common mistake: Adding grounds while the water is still at a furious boil, which can cause grounds to float and make for a messy brew.
8. Stir gently: Give it a quick, gentle stir to ensure all grounds are wet.
- What “good” looks like: All the coffee grounds are submerged.
- Common mistake: Over-stirring, which can agitate the grounds and make them harder to settle.
9. Let it steep: Place the pot back on the griddle over very low heat, or off to the side if the griddle is still very hot. Let it steep for 3-5 minutes.
- What “good” looks like: The coffee is brewing and developing flavor.
- Common mistake: Letting it boil again, which will over-extract the coffee and make it bitter.
10. Settle the grounds: Remove the pot from the heat. You can add a splash of cold water to help the grounds settle to the bottom.
- What “good” looks like: Most of the grounds are sinking.
- Common mistake: Not letting the grounds settle, leading to gritty coffee.
11. Pour carefully: Slowly pour the coffee into your mug, trying to leave the settled grounds behind.
- What “good” looks like: You have hot coffee in your mug with minimal grounds.
- Common mistake: Pouring too fast, which stirs up the grounds.
Common mistakes (and what happens if you ignore them)
| Mistake | What it causes | Fix |
|---|---|---|
| Using a dirty pot | Off-flavors, stale coffee | Wash pot thoroughly before use. |
| Water boils too vigorously with grounds | Bitter, over-extracted coffee | Remove from heat before adding grounds, let cool slightly. |
| Not letting grounds settle | Gritty, unpleasant texture in your cup | Add a splash of cold water and wait a minute before pouring. |
| Using too fine a grind | Cloudy coffee, grounds in your mug | Use a coarse grind; check manual for grind recommendations if unsure. |
| Overfilling the pot | Messy boil-over, wasted coffee | Leave adequate headspace in the pot. |
| Using stale coffee beans/grounds | Flat, uninspired flavor | Use fresh beans and grind just before brewing if possible. |
| Uneven griddle heat | Hot spots in the water, uneven brewing | Adjust burner settings; consider moving pot around the griddle. |
| Not clearing flammable materials | Fire hazard! | Always maintain a safe zone around the griddle. |
| Using a pot not rated for direct heat | Damaged pot, potential safety issue | Ensure your pot is suitable for direct heat application. |
| Adding grounds to scalding water | Can scorch the grounds, leading to a burnt taste | Let boiling water cool for 30-60 seconds before adding grounds. |
| Pouring too quickly | Grounds get stirred up, ending up in your coffee | Pour slowly and steadily, stopping if grounds start to rise. |
Decision rules (simple if/then)
- If you want a precise brew, then don’t use the Blackstone griddle, because it’s not designed for that level of control.
- If you’re making cowboy coffee, then use a coarse grind, because it’s easier to settle and less likely to end up in your cup.
- If you’re using bottled water, then you’re starting with good quality, because that eliminates one variable for better taste.
- If you see grounds in your cup, then you poured too fast or didn’t let them settle, because those are the main culprits.
- If your coffee tastes burnt, then the water was likely too hot when you added the grounds or it boiled too long, because scorching happens easily.
- If your coffee is weak, then you need more coffee grounds or less water, because the ratio is off.
- If you’re concerned about safety, then always check your surroundings for flammable items before starting, because griddles get hot and can be a fire risk.
- If you want to heat water for instant coffee, then a simple pot is all you need, because no complex brewing is involved.
- If the griddle heat is uneven, then move your pot around, because you can find cooler or hotter spots to manage your brew.
- If you’re unsure about your pot’s heat resistance, then check the manufacturer’s instructions, because safety first.
- If you want to improve flavor, then start with fresh coffee, because freshness makes a huge difference.
- If you’re camping and forgot a filter, then cowboy coffee is a solid backup, because it requires no special equipment.
FAQ
Can I use my Blackstone griddle to make espresso?
No, absolutely not. Espresso requires specific pressure and temperature control that a griddle simply cannot provide. Stick to simpler methods.
Will my coffee taste smoky from the griddle?
It’s possible, especially if you’re cooking other things on the griddle at the same time or if there’s residue. For the cleanest coffee flavor, clean your griddle well and dedicate a burner just for heating your water.
How do I avoid getting coffee grounds in my mug?
The best way is to let the grounds settle completely at the bottom of the pot before pouring. A splash of cold water can help speed this up. Pour slowly and steadily.
Is it safe to boil water for coffee on a Blackstone?
Yes, as long as you use a pot designed for direct heat and place it securely on the griddle. Always be mindful of hot surfaces and potential spills.
What kind of pot should I use?
A sturdy metal pot or kettle is best. Avoid anything with plastic handles or thin bottoms that could warp or melt. Stainless steel or cast iron (if seasoned) are good choices.
Can I use a French press on a Blackstone?
You could heat water for a French press on the griddle, but you can’t brew in a French press directly on the griddle surface. You’d need to heat water separately and then pour it into the French press.
How much coffee should I use?
For cowboy coffee, a good starting point is about 2 tablespoons of coarse grounds per 6 ounces of water. Adjust this based on how strong you like your coffee.
What if my griddle has hot spots?
This is common. You can manage it by moving your pot around to find more even heat or by adjusting your burner settings. It takes a bit of practice.
What this page does NOT cover (and where to go next)
- Specific grind settings for advanced brewing methods. (Next: Explore burr grinders and their settings.)
- The science of coffee extraction and solubility. (Next: Look into brewing guides for specific coffee makers.)
- Using specialized outdoor coffee brewing equipment. (Next: Research portable espresso makers or camping pour-over kits.)
- Detailed maintenance and cleaning procedures for Blackstone griddles. (Next: Consult your griddle’s user manual.)
- Recipes for coffee-based drinks. (Next: Search for outdoor cooking recipe blogs.)