Brewing A Single Cup Of Coffee With A Machine
Quick answer
- Measure your coffee grounds and water precisely.
- Use fresh, quality beans and filtered water.
- Ensure your coffee maker is clean and descaled.
- Grind your beans just before brewing.
- Dial in your grind size for the brew method.
- Don’t overfill the water reservoir if making a single cup.
Who this is for
- The solo coffee drinker who wants a perfect cup.
- Anyone tired of wasting coffee making too much.
- Beginners looking to nail their morning brew.
What to check first
Brewer type and filter type
Most single-cup brewing happens with drip machines or pour-overs. Drip machines usually use paper filters, but some have reusable metal ones. Pour-overs often use specific paper filters. Make sure you have the right filter for your setup. A cone filter won’t fit a flat-bottom basket, and vice-versa.
If you prefer a more hands-on approach and enjoy the nuanced flavors, a pour over coffee maker offers a rewarding brewing experience.

- Pour Over Coffee: Manual Pour Over Coffee Maker allows you to brew an excellent cup of Coffee in minutes
- Stainless steel: Includes a new and improved permanent, stainless steel mesh filter that helps extract your coffee's aromatic oils and subtle flavors instead of being absorbed by a paper filter
- Coffee Carafe: Made of durable, heat-resistant borosilicate glass with Cork Band detailing that is both functional and elegant; single wall
- Quick and Easy: Simply add coarse ground Coffee to filter, pour a small amount of water in a circular motion over ground Coffee until soaked then add the remaining water and let drip
- Servings: Pour Over Coffee Maker makes 8 cups of Coffee, 4 oz each; dishwasher safe
If you’re looking for a dedicated machine to simplify your single-cup brewing, a good single cup coffee maker is an excellent choice.
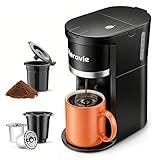
- Brew in Two Ways: Horavie single serve coffee maker supports both k pod and ground coffee, offering flexible brew sizes from 6 to 12oz to meet your varying coffee needs. Whether you want a quick cup or to savor a slow drink, it handles both with ease
- Safe and High-Quality Materials: Made from BPA-free and heat-resistant materials, this single cup coffee maker ensures durability and safety. The built-in water tank with view window allows you to monitor the water level at any time, preventing issues during brewing
- One-Touch Quick Brewing: This coffee machine combines fast brewing technology with one button operation mode that is simple and fast for any user. Simply press the button and enjoy hot coffee in just 120s, perfect for busy mornings or office use
- Compact Size fits Anywhere: Whether at home, in the office, or while traveling, the Horavie small coffee maker seamlessly fits into your lifestyle. Its compact design and light weight make it ideal for small kitchens, office or RVs, especially in space-limited environments
- Descaling Reminder & Self-Cleaning: The mini one cup coffee maker features an automatic descaling reminder that illuminates in red when cleaning is needed. Simply add a descaling solution and press the buttons for 2 seconds to initiate the self-cleaning process. This feature helps prevent clogging and ensures optimal performance, significantly extending the lifespan of your K-Pod coffee maker
Water quality and temperature
Tap water can have funky tastes. Filtered water is usually best. For drip machines, the ideal brewing temperature is between 195-205°F. Your machine should handle this, but if you’re using a pour-over, you’ll need a kettle. Don’t use boiling water; it can scorch the grounds.
Grind size and coffee freshness
Freshly ground beans are king. Pre-ground stuff loses its zing fast. For drip machines, a medium grind is usually good. Think coarse sand. For pour-overs, it might be a bit finer. Check your coffee bag for roast date. Ideally, use beans roasted within the last few weeks.
Coffee-to-water ratio
This is crucial. A common starting point is a 1:15 to 1:18 ratio. That means for every gram of coffee, use 15-18 grams of water. For a single cup, this might look like 15-20 grams of coffee to about 250-300 ml (8-10 oz) of water. Use a scale for accuracy. It makes a huge difference.
For the most consistent and delicious results, investing in a coffee scale is highly recommended to nail your coffee-to-water ratio every time.

- 𝗕𝗮𝗿𝗶𝘀𝘁𝗮-𝗟𝗲𝘃𝗲𝗹 𝗣𝗿𝗲𝗰𝗶𝘀𝗶𝗼𝗻: Featuring a 0.1 g sensor with rapid refresh rates, this coffee weight scale responds instantly to changes, giving you fine control over extraction for consistent pour-over and espresso results.
- 𝗜𝗻𝘁𝗲𝗴𝗿𝗮𝘁𝗲𝗱 𝗕𝗿𝗲𝘄 𝗧𝗶𝗺𝗲𝗿: This espresso weight scale includes a built-in timer to track bloom and extraction with count-up or down control, and auto shutoff extends battery life between sessions.
- 𝗗𝘂𝗿𝗮𝗯𝗹𝗲, 𝗦𝗽𝗶𝗹𝗹-𝗥𝗲𝘀𝗶𝘀𝘁𝗮𝗻𝘁 𝗕𝘂𝗶𝗹𝗱: A heat-resistant, dishwasher-safe silicone cover with an engineered fit shields the platform from spills and hot gear. The grooved surface stabilizes your brewing setup, making it an ideal scale for coffee.
- 𝗩𝗲𝗿𝘀𝗮𝘁𝗶𝗹𝗲 𝗠𝗲𝗮𝘀𝘂𝗿𝗲𝗺𝗲𝗻𝘁 𝗢𝗽𝘁𝗶𝗼𝗻𝘀: Quick-tare and multiple units - g, oz, lb, ml, and fl oz - make this small coffee scale ideal for weighing beans, shots, or everyday kitchen ingredients.
- 𝗜𝗻𝘁𝘂𝗶𝘁𝗶𝘃𝗲, 𝗪𝗼𝗿𝗸𝗳𝗹𝗼𝘄-𝗙𝗼𝗰𝘂𝘀𝗲𝗱 𝗗𝗲𝘀𝗶𝗴𝗻: A bright, easy-to-read display and simple controls keep your brewing routine smooth. Designed for clarity and clean operation, it also serves as a compact matcha scale.
Cleanliness/descale status
Old coffee oils go rancid and make your brew taste bitter or stale. Regularly clean your coffee maker. Descaling removes mineral buildup, which can affect temperature and flow. Most manufacturers recommend descaling every 1-3 months, depending on your water hardness. Check your manual for specific instructions.
Step-by-step (brew workflow)
1. Gather your gear.
- What to do: Get your coffee maker, fresh beans, grinder, scale, filter, and mug ready.
- What “good” looks like: Everything is clean and within easy reach. No fumbling around.
- Common mistake: Starting the process before you have everything. This leads to rushed steps and mistakes.
2. Weigh your coffee beans.
- What to do: Use your scale to measure the desired amount of whole beans. For a single cup, aim for 15-20 grams.
- What “good” looks like: You have an exact measurement, ensuring consistency.
- Common mistake: Eyeballing the amount. This is the fastest way to inconsistent results.
3. Grind your coffee.
- What to do: Grind the beans to the appropriate size for your brewer. Medium for drip, maybe slightly finer for pour-over.
- What “good” looks like: The grounds look uniform and smell amazing.
- Common mistake: Using pre-ground coffee or grinding too far in advance. Flavor fades quickly.
4. Prepare the filter.
- What to do: Place the correct filter in your brewer. If using a paper filter, rinse it with hot water.
- What “good” looks like: The filter is seated properly and rinsed free of paper taste.
- Common mistake: Forgetting to rinse paper filters. This can leave a papery taste in your coffee.
5. Add grounds to the filter.
- What to do: Carefully transfer the freshly ground coffee into the prepared filter.
- What “good” looks like: The grounds are evenly distributed in the filter.
- Common mistake: Tamping down the grounds too much. This can impede water flow.
6. Measure your water.
- What to do: Use your scale or measuring cup to get the right amount of filtered water (e.g., 250-300 ml or 8-10 oz).
- What “good” looks like: You have the precise water volume needed for your coffee ratio.
- Common mistake: Overfilling the water reservoir if your machine has a minimum fill line.
7. Heat the water (if needed).
- What to do: If using a pour-over, heat your water to 195-205°F. For drip machines, this happens automatically.
- What “good” looks like: Water is at the optimal temperature, not boiling.
- Common mistake: Using boiling water. It can burn the coffee grounds and create bitter flavors.
8. Start the brew.
- What to do: For drip machines, turn it on. For pour-overs, begin a slow, controlled pour over the grounds.
- What “good” looks like: Water flows evenly through the grounds, extracting coffee.
- Common mistake: Pouring too fast or unevenly in a pour-over. This leads to uneven extraction.
9. Wait for the brew to finish.
- What to do: Let the coffee maker complete its cycle or finish your pour.
- What “good” looks like: All the water has passed through the grounds.
- Common mistake: Stopping the brew too early or letting it drip too long.
10. Discard the grounds and enjoy.
- What to do: Carefully remove the filter with the used grounds. Pour your fresh coffee into your mug.
- What “good” looks like: A clean brewing area and a delicious cup of coffee.
- Common mistake: Leaving wet grounds in the machine. They can get moldy and cause odors.
Common mistakes (and what happens if you ignore them)
| Mistake | What it causes | Fix |
|---|---|---|
| Using stale coffee beans | Flat, dull, or bitter taste; lack of aroma | Buy freshly roasted beans and grind them right before brewing. |
| Incorrect grind size | Under-extracted (sour) or over-extracted (bitter) | Adjust grind size based on brewer type; medium for drip is a good start. |
| Wrong coffee-to-water ratio | Too weak or too strong; unbalanced flavor | Use a scale to measure coffee and water for a consistent ratio (1:15-1:18). |
| Dirty coffee maker | Bitter, stale, or off-flavors; poor brew performance | Clean your brewer regularly and descale as recommended by the manufacturer. |
| Using poor-quality water | Off-flavors that mask coffee notes | Use filtered water for a cleaner, more accurate coffee taste. |
| Brewing with water that’s too hot/cold | Scorched coffee (bitter) or under-extracted (sour) | Aim for 195-205°F for optimal extraction; avoid boiling water. |
| Rushing the brew process | Uneven extraction; inconsistent flavor | Follow the steps carefully and allow adequate brew time. |
| Not rinsing paper filters | Papery taste in the final cup | Always rinse paper filters with hot water before adding coffee grounds. |
| Overfilling the water reservoir | Potential for overflow or weak brew | Stick to the recommended water amount for the desired cup size. |
Decision rules (simple if/then)
- If your coffee tastes sour, then try a finer grind because finer grinds increase extraction.
- If your coffee tastes bitter, then try a coarser grind because coarser grinds decrease extraction.
- If your coffee is weak, then increase the amount of coffee grounds you use because more coffee means a stronger brew.
- If your coffee is too strong, then decrease the amount of coffee grounds or increase the water because less coffee or more water dilutes the brew.
- If you notice a papery taste, then ensure you are rinsing your paper filter thoroughly before brewing because this removes the paper residue.
- If your machine is brewing slowly, then it likely needs descaling because mineral buildup restricts water flow.
- If your coffee lacks aroma, then you are probably using stale beans or pre-ground coffee because freshness is key to aroma.
- If your coffee tastes metallic, then check your water quality because tap water can sometimes impart off-flavors.
- If your pour-over is channeling (water finds a fast path), then try wetting all the grounds evenly during the bloom phase because this ensures even saturation.
- If your coffee tastes muddy, then your grind might be too fine for your filter, or the filter might be damaged because fine particles are getting through.
FAQ
Q: How much coffee should I use for one cup?
A: A good starting point is 15-20 grams of coffee for about 8-10 ounces (250-300 ml) of water. Always use a scale for best results.
Q: What’s the best way to store coffee beans?
A: Keep them in an airtight container away from light, heat, and moisture. Avoid the refrigerator or freezer for daily use beans.
Q: How often should I clean my coffee maker?
A: Clean it after every use, and descale it every 1-3 months depending on your water hardness. This keeps flavors fresh and the machine working well.
Q: Can I just use the “brew one cup” setting on my machine?
A: Some machines have this, but it might not optimize for a single cup’s extraction. Manual measurement often yields better results.
Q: What if my coffee maker doesn’t have a “single cup” option?
A: You can still make one cup by simply adding the appropriate amount of water and coffee grounds for that single serving, rather than filling the whole reservoir.
Q: Is it okay to reuse a coffee filter?
A: Paper filters are designed for single use. Reusable metal filters can be washed and reused, but ensure they are thoroughly cleaned.
Q: My coffee tastes weak. What am I doing wrong?
A: This usually means your coffee-to-water ratio is off, your grind is too coarse, or your beans are stale. Try adjusting one variable at a time.
What this page does NOT cover (and where to go next)
- Specific cleaning solutions or descaling products (check your brewer’s manual).
- Advanced brewing techniques like espresso or cold brew.
- Detailed comparisons of different coffee maker brands or models.
- The science behind coffee bean roasting and origin profiles.