Brewing a Delicious Mocha Java Coffee
Quick answer
- Use fresh, whole bean coffee. Grind right before brewing.
- Aim for a medium grind size. Think coarse sand.
- Use filtered water. It makes a huge difference.
- Get your water temperature right. Around 200°F is sweet.
- Measure your coffee and water. A 1:15 to 1:17 ratio is a good starting point.
- Keep your gear clean. Old coffee oils are nasty.
- Don’t rush the bloom. Let the CO2 escape.
- Taste and adjust. That’s the fun part.
Who this is for
- Coffee lovers who want to nail a classic blend.
- Home brewers looking to elevate their morning cup.
- Anyone curious about the Mocha Java story and how to brew it right.
What to check first
Brewer type and filter type
Your brewer is the engine. A pour-over, French press, or even a good drip machine can handle Mocha Java. The filter matters too. Paper filters catch more oils, giving a cleaner cup. Metal filters let more through, adding body. Know what you’re working with.
Your brewer is the engine. A pour-over, French press, or even a good drip machine can handle Mocha Java. If you’re new to pour-over, this pour over coffee maker is user-friendly and effective.

- Pour Over Coffee: Manual Pour Over Coffee Maker allows you to brew an excellent cup of Coffee in minutes
- Stainless steel: Includes a new and improved permanent, stainless steel mesh filter that helps extract your coffee's aromatic oils and subtle flavors instead of being absorbed by a paper filter
- Coffee Carafe: Made of durable, heat-resistant borosilicate glass with Cork Band detailing that is both functional and elegant; single wall
- Quick and Easy: Simply add coarse ground Coffee to filter, pour a small amount of water in a circular motion over ground Coffee until soaked then add the remaining water and let drip
- Servings: Pour Over Coffee Maker makes 8 cups of Coffee, 4 oz each; dishwasher safe
Water quality and temperature
This is huge. If your tap water tastes off, your coffee will too. Use filtered water. For temperature, you want hot, but not boiling. Aim for 195-205°F. Too cool and you get sourness; too hot and you scorch the grounds.
Grind size and coffee freshness
Freshness is king. Whole beans ground just before brewing are ideal. For Mocha Java, a medium grind is usually best. Think coarse sand. Too fine and it’ll be bitter; too coarse and it’ll be weak.
Coffee-to-water ratio
This is your recipe. A good starting point is 1:15, meaning 1 gram of coffee for every 15 grams of water. For a standard 12 oz mug (about 350 ml), that’s roughly 23 grams of coffee. Play around from 1:15 to 1:17 to find your sweet spot.
This is your recipe. A good starting point is 1:15, meaning 1 gram of coffee for every 15 grams of water. To ensure accuracy, using a coffee scale is highly recommended.

- Barista-Level Precision: A 0.1g high-precision sensor with a rapid refresh rate responds instantly to changes in weight, helping you achieve consistent results across espresso, pour over, drip coffee, Chemex, V60, and filter coffee brewing.
- Integrated Brew Timer: A built-in count-up and count-down timer tracks bloom, extraction, and espresso shots. Ideal for dialing in espresso, timing Chemex and V60 pour over recipes, or steeping tea. Auto-shutoff helps preserve battery life between brews.
- Durable Waterproof Silicone Cover: The heat-resistant, dishwasher-safe silicone cover helps protect the coffee scale's spacious 5.25" x 5.25" weighing surface from splashes, spills, and hot equipment. The grooved surface provides added stability and makes cleanup quick and easy.
- Versatile Measurement Options: Quick-tare and 6 unit options make it easy to weigh coffee beans, espresso shots, matcha portions, and more. Choose from g, ml, lb, lb:oz, oz, and fl oz for added flexibility in the kitchen and coffee bar.
- Intuitive Design: A bright dual-color LCD display clearly separates weight and timer readings, while simple controls make daily brewing easy. Includes 3 AAA batteries and is backed by 5 years of coverage, with support from our St. Louis-based team whenever you need a hand.
Cleanliness/descale status
Seriously, clean your gear. Coffee oils build up and go rancid. This will ruin even the best beans. Descale your machine regularly if you use a drip or espresso maker. A clean brewer is a happy brewer.
Step-by-step (brew workflow)
Here’s a general workflow. Adapt it to your specific brewer.
1. Gather your beans and gear.
- What to do: Get your fresh Mocha Java beans, grinder, brewer, filter, scale, and kettle ready.
- What “good” looks like: Everything is clean and within easy reach.
- Common mistake: Grabbing stale beans or a dirty brewer. Avoid this by prepping ahead.
Start with high-quality Mocha Java coffee beans for the best flavor. If you’re looking for a classic blend, this Mocha Java coffee beans is a great choice.
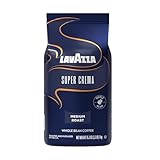
- SUPER CREMA: A 2.2 lb whole bean coffee bag ideal for espresso preparation
- INTENSITY AND ROAST: This full-bodied medium roast offers a bold and creamy finish
- BLEND: Made from Arabica and Robusta beans, this naturally caffeinated blend is sourced from 15 coffee-growing countries around the world
- PREPARATION: Ideal for espresso preparation.
- BREWING GUIDE FOR SINGLE ESPRESSO: 0.28 oz of ground espresso delivers a 1 oz espresso shot
2. Heat your water.
- What to do: Heat filtered water to 195-205°F.
- What “good” looks like: Water is at the right temperature, not boiling aggressively.
- Common mistake: Pouring boiling water directly onto the grounds. Let it sit for 30 seconds after boiling.
3. Weigh and grind your coffee.
- What to do: Weigh out your desired amount of whole beans (e.g., 23g for 350ml water). Grind them to a medium consistency.
- What “good” looks like: Uniformly sized grounds, like coarse sand.
- Common mistake: Grinding too fine or too coarse. This messes up extraction.
4. Prepare your brewer and filter.
- What to do: Place the filter in your brewer. If it’s a paper filter, rinse it with hot water to remove papery taste and preheat the brewer. Discard the rinse water.
- What “good” looks like: Filter is seated properly, brewer is warm.
- Common mistake: Forgetting to rinse paper filters. Hello, cardboard coffee.
5. Add coffee grounds.
- What to do: Add your freshly ground coffee to the brewer. Gently shake to level the bed of grounds.
- What “good” looks like: An even bed of coffee, no major humps or valleys.
- Common mistake: Leaving grounds clumped up. This leads to uneven extraction.
6. Tare your scale.
- What to do: Place your brewer (with grounds) on the scale and zero it out.
- What “good” looks like: The scale reads 0.0g.
- Common mistake: Forgetting to tare. You’ll be guessing your water amount.
7. Start the bloom (first pour).
- What to do: Start a timer. Gently pour just enough hot water (about twice the weight of your coffee, e.g., 46g for 23g coffee) to saturate all the grounds.
- What “good” looks like: All grounds are wet, and the coffee starts to bubble and expand.
- Common mistake: Pouring too much water too fast. You’ll lose precious CO2 too quickly.
8. Wait for the bloom.
- What to do: Let it sit for 30-45 seconds.
- What “good” looks like: The coffee bed has risen and is degassing.
- Common mistake: Skipping this step. The bloom releases CO2, which can hinder extraction and cause sourness.
9. Continue pouring.
- What to do: Slowly pour the remaining water in stages, keeping the water level consistent and avoiding pouring directly down the sides of the filter. Aim for your target water weight.
- What “good” looks like: A steady, controlled pour that keeps the grounds saturated.
- Common mistake: Pouring too aggressively or all at once. This can create channels and lead to under-extraction.
10. Let it drip.
- What to do: Allow all the water to pass through the coffee bed.
- What “good” looks like: The dripping slows to an occasional drop. Total brew time depends on your method, but often 2-4 minutes for pour-over.
- Common mistake: Pulling the brewer too early or letting it drip forever. Check your brewer’s typical brew time.
11. Serve and enjoy.
- What to do: Remove the brewer. Swirl the coffee gently in the carafe or mug.
- What “good” looks like: A fragrant, rich-looking coffee ready to be savored.
- Common mistake: Drinking it immediately without letting it cool slightly. Flavors develop as it cools.
Common mistakes (and what happens if you ignore them)
| Mistake | What it causes | Fix |
|---|---|---|
| Using stale or pre-ground coffee | Flat, dull flavor; loss of aroma and complexity | Buy fresh, whole beans and grind right before brewing. |
| Incorrect grind size (too fine) | Bitter, astringent coffee; slow drip time | Coarsen your grind. Aim for medium, like coarse sand. |
| Incorrect grind size (too coarse) | Weak, sour, watery coffee; fast drip time | Fine your grind. Aim for medium, like coarse sand. |
| Water temperature too low | Under-extracted, sour, weak coffee | Heat water to 195-205°F. Use a thermometer if needed. |
| Water temperature too high | Over-extracted, bitter, burnt-tasting coffee | Let boiling water sit for 30-60 seconds before pouring. |
| Using unfiltered or poor-quality water | Off-flavors in the coffee; mineral buildup in brewer | Use filtered or bottled water. |
| Inconsistent coffee-to-water ratio | Inconsistent strength and flavor | Weigh both coffee and water using a scale. Start with 1:15-1:17. |
| Skipping the bloom | Sour, uneven extraction; gassy coffee | Allow 30-45 seconds for the bloom after the first pour. |
| Rushing the pour/brew time | Under-extracted, weak coffee | Pour slowly and steadily; allow adequate contact time for extraction. |
| Dirty brewer or stale coffee oils | Rancid, unpleasant, “old coffee” taste | Clean your brewer thoroughly after each use. Descale regularly. |
| Pouring water too aggressively | Creates channels, uneven extraction, weak coffee | Pour gently and controlled, saturating grounds evenly. |
| Brewing too much coffee at once | Can lead to uneven extraction and poor flavor | Brew in batches appropriate for your brewer’s capacity. |
Decision rules (simple if/then)
- If your coffee tastes bitter, then try a coarser grind because a finer grind can lead to over-extraction.
- If your coffee tastes sour, then try a finer grind because a coarser grind can lead to under-extraction.
- If your coffee tastes weak, then increase your coffee-to-water ratio (use more coffee) because you might be under-dosing.
- If your coffee tastes too strong, then decrease your coffee-to-water ratio (use less coffee) or add a splash of hot water after brewing because you might be over-dosing.
- If your coffee has a “papery” taste, then rinse your paper filter with hot water before brewing because this removes residual paper taste.
- If your coffee has off-flavors that aren’t bitter or sour, then check your water quality because tap water can introduce unwanted tastes.
- If your coffee tastes “old” or stale, then ensure you’re using fresh beans and grinding them right before brewing because pre-ground coffee loses flavor fast.
- If your pour-over is draining too fast, then grind finer because a finer grind will slow down the flow rate.
- If your pour-over is draining too slow, then grind coarser because a coarser grind will speed up the flow rate.
- If your drip machine coffee is consistently weak, then check the water reservoir and coffee basket for clogs or scale buildup because a clean machine brews better.
- If your French press coffee is muddy, then try a coarser grind and a gentler plunge because a fine grind can pass through the metal filter.
- If your coffee extraction is uneven (some grounds look pale, some dark), then focus on a more even pour and ensure the coffee bed is level before brewing because this promotes uniform water flow.
FAQ
What exactly is Mocha Java coffee?
It’s a classic blend traditionally made from Ethiopian Mocha (or Yemen Mocha) beans and Indonesian Java beans. The Mocha brings fruity, wine-like notes, while the Java adds a rich, chocolatey depth.
Can I make Mocha Java with just one type of bean?
While the classic is a blend, you can certainly enjoy either Ethiopian or Indonesian beans on their own. They offer distinct profiles that are delicious in their own right.
How important is the specific origin of the beans?
Very important for the authentic Mocha Java experience. The unique terroir of Yemen and Indonesia creates the characteristic flavors. However, you can still make a great coffee using any good quality beans from these regions.
What kind of roast level is best for Mocha Java?
Medium to medium-dark roasts often highlight the best qualities of both beans. A dark roast might overpower the delicate fruity notes of the Mocha, while a light roast might not bring out the Java’s richness fully.
Do I need a special coffee maker for Mocha Java?
No, not at all. A pour-over, French press, Aeropress, or even a quality drip coffee maker will work well. The brewing method is less critical than the quality of your beans and your technique.
How can I tell if my coffee is fresh?
Fresh coffee beans will have a strong aroma and might even show signs of degassing (tiny bubbles) when you grind them. They shouldn’t smell dusty or stale. Look for a roast date on the bag.
What if I can’t find specific Mocha or Java beans?
Don’t sweat it. You can create a similar profile by blending other coffees. Try a fruity Ethiopian bean with a rich, chocolatey Indonesian or Central American bean. Experimentation is key!
Is there a specific “Mocha Java” blend I can buy?
Yes, many roasters offer pre-blended Mocha Java. If you buy one, follow the brewing recommendations on the bag, as roasters often tailor their blends to specific brewing methods.
What this page does NOT cover (and where to go next)
- Specific roast profiles for every single varietal of Mocha and Java beans.
- Advanced latte art techniques using Mocha Java as a base.
- Detailed chemical analysis of coffee extraction and flavor compounds.
- Comparisons of specific commercial Mocha Java blends.
- Espresso extraction parameters for Mocha Java.