Transforming K-Cup Coffee Into Iced Coffee
Quick answer
- Brew a K-Cup directly over ice.
- Use less water for a stronger brew.
- Chill your brewed coffee before adding ice.
- Consider K-Cups designed for iced coffee.
- Experiment with ice-to-coffee ratios.
- Make sure your K-Cup brewer is clean.
Who this is for
- Anyone who loves the convenience of K-Cups but craves iced coffee.
- Busy mornings when you need a quick, cold caffeine fix.
- Campers or dorm dwellers with limited space and equipment.
What to check first
Brewer type and filter type
You’re using a single-serve pod brewer, likely a Keurig or similar. The filter is built into the K-Cup itself. No need to worry about paper filters here. Just make sure the needle assembly on your brewer isn’t clogged.
Water quality and temperature
Good coffee starts with good water. If your tap water tastes funky, your iced coffee will too. Filtered water is your friend. For iced coffee, the initial brew temperature is less critical than for hot coffee, but your machine will heat it anyway.
Grind size and coffee freshness
The K-Cup is pre-ground. Freshness is key, though. Older K-Cups can taste stale. Look for recent roast dates if you can find them. The grind size is already set by the manufacturer, so you can’t tweak this.
Coffee-to-water ratio
This is where you have a little control. Most brewers have a “brew size” option (like 6 oz, 8 oz, 10 oz). For iced coffee, you’ll want to use a smaller brew size to concentrate the coffee. Think of it like making a coffee concentrate.
Cleanliness/descale status
A dirty brewer makes bad coffee, period. If you haven’t descaled your machine in a while, do it. Mineral buildup can affect taste and flow. Give the K-Cup holder a quick wipe too.
Step-by-step (brew workflow)
1. Gather your supplies. You’ll need your K-Cup brewer, a K-Cup of your choice, a tall glass, and plenty of ice.
- What “good” looks like: Everything is within reach and ready to go.
- Common mistake: Forgetting to grab the ice or a glass. Avoid this by prepping everything before you hit the brew button.
Make sure you have plenty of ice on hand. If you’re running low, consider investing in some good ice cube trays to ensure you always have enough for your iced coffee.
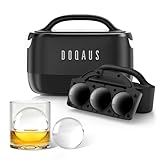
- ✅ Achieve Bar-Quality Clarity with Directional Freezing: Stop settling for cloudy, bubble-filled ice. Our clear ice cube maker utilizes advanced physics to push impurities away, creating 3 crystal-clear spheres and 4 cubes per cycle. It is the secret weapon for the home mixologist wanting presentation-ready drinks without expensive machinery.
- ✅ Preserve Complex Flavors with Slow Dilution: Designed for the purist, this whiskey ice cubes mold produces dense, 2.5-inch ice that melts 40% slower than standard ice. Enjoy your single malt or bourbon chilled but undiluted, ensuring the aromatic profile remains distinct from the first sip to the last.
- ✅ Effortless Release with Premium Hybrid Design: Unlike rigid plastic trays that crack, our flexible silicone ice ball maker mold ensures smooth removal. The non-stick material lets you pop out perfect shapes instantly, making drink preparation seamless for relaxing solo evenings or busy gatherings.
- ✅ Versatile 2-in-1 Capacity for Entertaining: Hosting a cocktail night? This round ice cube mold creates 7 pieces simultaneously, catering to different glass styles. Whether serving an Old Fashioned (sphere) or a Negroni (cube), you will have the right ice shape ready for every guest's preference.
- ✅ The Sophisticated Choice for Gifting: More than just a standard ice mold, this clear ice system is an essential upgrade for any wet bar. Packaged to impress, it creates a tangible experience, making it an ideal gift for fathers, partners, or enthusiasts who value the ritual of a perfectly poured drink.
2. Fill your glass with ice. Pack it good. You want enough ice to chill the coffee quickly without diluting it too much.
- What “good” looks like: A glass filled to the brim with ice cubes.
- Common mistake: Not using enough ice. This leads to lukewarm, watery coffee. Don’t be shy with the ice.
3. Select a smaller brew size. On your brewer, choose the smallest option available (e.g., 6 oz). This makes a stronger coffee concentrate.
- What “good” looks like: The brewer display shows your chosen small brew size.
- Common mistake: Brewing at the standard size. This will make your iced coffee too weak. Always go smaller for iced.
4. Insert your K-Cup. Place your chosen K-Cup into the brewer as usual.
- What “good” looks like: The K-Cup is seated correctly and the lid closes smoothly.
- Common mistake: Not fully seating the K-Cup. This can cause brewing issues or leaks. Make sure it clicks into place.
5. Place the glass on the drip tray. Make sure it’s centered under the spout.
- What “good” looks like: The glass is stable and positioned to catch all the coffee.
- Common mistake: Using a mug that’s too short. A tall glass is essential for holding enough ice and coffee.
6. Start the brew cycle. Press the brew button.
- What “good” looks like: Coffee starts flowing into the glass.
- Common mistake: Accidentally hitting the wrong button. Double-check your selection before pressing brew.
7. Observe the brew. Watch as the hot coffee hits the ice. It will melt some, but the goal is rapid chilling.
- What “good” looks like: The coffee is cooling down fast as it mixes with the melting ice.
- Common mistake: Letting the coffee sit too long before brewing. Brew directly over the ice for best results.
8. Remove the K-Cup. Once brewing is complete, carefully remove the used K-Cup.
- What “good” looks like: The K-Cup is removed and can be discarded.
- Common mistake: Forgetting to remove the K-Cup. It can get stuck or make a mess.
9. Stir well. Give your iced coffee a good stir to ensure it’s thoroughly chilled and mixed.
- What “good” looks like: The coffee is cold and evenly mixed.
- Common mistake: Not stirring enough. You might end up with a hot layer at the bottom and cold on top.
10. Add optional additions. Now’s the time for milk, cream, sugar, or your favorite syrup.
- What “good” looks like: Your customizations are added to your liking.
- Common mistake: Adding too much at once. Start small and add more if needed.
11. Enjoy! Sip your homemade K-Cup iced coffee.
- What “good” looks like: You’re enjoying a refreshing, cold beverage.
- Common mistake: Rushing the enjoyment. Take a moment to savor your creation.
Common mistakes (and what happens if you ignore them)
| Mistake | What it causes | Fix |
|---|---|---|
| Brewing a full cup and then icing it | Watery, diluted coffee | Brew directly over ice and use a smaller brew size. |
| Not using enough ice | Lukewarm coffee that quickly becomes watery | Pack your glass to the brim with ice. |
| Using a standard brew size | Weak, flavorless iced coffee | Select the smallest brew size option on your machine. |
| Not cleaning the brewer regularly | Off-flavors, slower brewing, potential clogs | Descale your machine and wipe down the K-Cup holder often. |
| Using old, stale K-Cups | Flat, dull, or even bitter taste | Check for roast dates or buy K-Cups from reputable sources. |
| Not stirring the coffee after brewing | Uneven temperature (hot bottom, cold top) | Stir thoroughly to ensure consistent chilling. |
| Using filtered water with bad taste | The bad taste transfers to your coffee | Use good-tasting filtered or bottled water. |
| Ignoring the brewer’s maintenance | Reduced performance, potential damage, bad coffee | Follow the manufacturer’s recommendations for cleaning and descaling. |
Decision rules (simple if/then)
- If your iced coffee tastes weak, then reduce the brew size because you’re likely diluting it too much.
- If your iced coffee is too watery, then use more ice because you need faster chilling.
- If your K-Cup is not brewing properly, then check the needle assembly for clogs because debris can block the flow.
- If your coffee tastes stale or bitter, then try a fresher K-Cup because freshness significantly impacts flavor.
- If your brewer is making strange noises, then it might need descaling because mineral buildup can impede function.
- If you want a stronger coffee base, then brew directly over ice and select the smallest water volume.
- If you’re adding milk or cream, then consider brewing an extra-strong cup to account for the dilution.
- If your iced coffee isn’t cold enough, then ensure your glass is packed with ice before brewing.
- If you’re experimenting with K-Cups, then try different roasts or flavor profiles to see what works best iced.
- If you notice sediment in your cup, then the K-Cup might be faulty or old, so try a different one.
FAQ
Can I brew a K-Cup and then put it in the fridge to chill?
While you can do this, it’s not ideal. The coffee will cool down, but it won’t chill as rapidly as brewing directly over ice, which is better for preserving flavor and preventing oxidation.
What’s the best type of K-Cup for iced coffee?
Medium to dark roasts generally hold up well to ice. Avoid very light roasts, as their delicate flavors can get lost. Some brands even offer K-Cups specifically marketed for iced coffee.
How much ice should I use?
Pack your glass as full as possible with ice. The goal is to chill the coffee quickly. You’ll lose some ice to melting, but starting with a full glass minimizes dilution.
Does the water temperature matter for K-Cup iced coffee?
Your brewer heats the water to an optimal brewing temperature regardless. The key is getting that hot coffee onto the ice as quickly as possible to shock it into chilling.
My iced coffee tastes bitter. What did I do wrong?
This could be from an old K-Cup, a dirty brewer, or brewing too small a size, leading to over-extraction. Try a fresher K-Cup, clean your machine, or slightly increase the brew size.
Can I use filtered water in my K-Cup machine?
Absolutely. Using filtered water is highly recommended for better-tasting coffee and can also help reduce mineral buildup in your machine.
What if I don’t have a lot of ice?
If you’re short on ice, brew a smaller amount of coffee (like 6 oz) and add it to whatever ice you have. You might need to accept a slightly more diluted result.
Is it better to brew a strong hot coffee and add ice, or brew directly over ice?
Brewing directly over ice is generally preferred. It chills the coffee more rapidly, which helps maintain a fresher flavor profile compared to letting hot coffee sit and cool slowly.
What this page does NOT cover (and where to go next)
- Detailed comparisons of specific K-Cup brands or flavors. (Next: Explore coffee blogs or review sites for specific K-Cup recommendations.)
- Advanced brewing techniques for other coffee methods. (Next: Look into pour-over, French press, or espresso guides.)
- Troubleshooting complex K-Cup brewer malfunctions. (Next: Consult your brewer’s manual or the manufacturer’s support website.)
- Recipes for elaborate iced coffee drinks beyond simple additions. (Next: Search for “iced coffee recipes” for creative ideas.)