The Best Method for Cold Brew Coffee
Quick answer
- Use a coarse grind. Like sea salt.
- Stick to a 1:4 to 1:8 coffee-to-water ratio. Stronger is usually better for cold brew concentrate.
- Let it steep for 12-24 hours. Room temp or fridge works.
- Filter it twice. Start with a coarse filter, then a finer one.
- Dilute your concentrate. Add water or milk to taste.
- Use good beans. Freshly roasted, whole beans make a difference.
- Keep it clean. A clean brewer means clean taste.
Who this is for
- The iced coffee lover who wants a smoother, less acidic drink.
- Anyone tired of watery, bitter cold brew from a cafe.
- Home brewers looking to master a simple, delicious coffee technique.
What to check first
Brewer type and filter type
Most folks use a French press, a dedicated cold brew maker, or even a mason jar. The key is how you filter. Paper filters can clog easily with cold brew grounds. Cloth filters or fine mesh strainers are often best. Some makers come with built-in filters. Check what yours has.
Cloth filters or fine mesh strainers are often best for cold brew, as paper filters can clog easily. Consider using reusable cloth coffee filters for a sustainable and effective filtering solution.
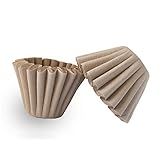
- HIGHT QUILTY - Sturdy sides won't collapse during brewing. This minimizes coffee grounds getting into your coffee.
- SIZE - Made to fit coffee makers from 1 cup up to 4 cup. The dimensions of this filter are: Base Diameter 1.99", Side Height 2.75".
- WIDE COMATIBILITY RANGE-Value pack of 50 counts disposable basket coffee filters.
- EASY CLEAN UP - Disposable filters mean that you can easily throw away without needing to clean out a metal filter.
- APPLICATION - Great for Food Service or office and home use.bring your creativity to DIY beautiful coffee filter flowers.
Water quality and temperature
Tap water can mess with your flavor. If your tap water tastes off, your coffee will too. Use filtered water. For temperature, cold brew literally means cold water. But some experiment with slightly cooler-than-room-temp water. Room temperature is standard and works great.
Grind size and coffee freshness
This is huge for cold brew. You want a coarse grind, like chunky sea salt. Too fine, and you’ll get sludge and over-extraction. Too coarse, and it’ll be weak. Freshness matters too. Ideally, use beans roasted within the last few weeks. Grind them right before you brew.
Coffee-to-water ratio
This is where you control the strength. For concentrate, aim for a ratio between 1:4 and 1:8 (coffee to water by weight). For example, 1 cup of coffee grounds to 4 cups of water. You can always dilute it later. A weak ratio means weak brew.
Cleanliness/descale status
Coffee oils build up. If your gear isn’t clean, your cold brew will taste stale or bitter. Give everything a good wash after each use. If you have a machine, descale it according to the manufacturer’s instructions. It’s a simple step that pays off.
Step-by-step (brew workflow)
1. Measure your coffee beans.
- What “good” looks like: Accurate measurement ensures consistent results. Use a scale for best results.
- Common mistake: Guessing the amount. This leads to weak or overly strong brew. Use a scale.
2. Grind your coffee beans.
- What “good” looks like: A coarse, even grind, like coarse sea salt.
- Common mistake: Using a fine grind. This will make your cold brew muddy and hard to filter. Use a burr grinder set to coarse.
3. Add coffee grounds to your brewer.
- What “good” looks like: All grounds are in the brewing vessel.
- Common mistake: Leaving grounds stuck to the sides or grinder. Tap the grinder to get all the coffee out.
4. Add filtered water.
- What “good” looks like: Water saturates all the grounds evenly.
- Common mistake: Not fully saturating the grounds. You might need to stir gently to ensure all coffee is wet.
5. Stir gently (optional but recommended).
- What “good” looks like: All grounds are submerged and evenly mixed with water.
- Common mistake: Over-stirring or vigorous stirring. This can break up the grounds and lead to bitterness. A gentle swirl or a few slow stirs is plenty.
6. Cover and let steep.
- What “good” looks like: The brewer is sealed to prevent contamination and evaporation.
- Common mistake: Leaving it uncovered. This lets in dust and can affect the flavor. Use a lid or plastic wrap.
7. Steep for 12-24 hours.
- What “good” looks like: The coffee has had ample time to extract flavor. Longer steeping equals stronger flavor.
- Common mistake: Steeping for too short a time. This results in weak, underdeveloped coffee. Try 18 hours as a starting point.
8. Prepare your filtering setup.
- What “good” looks like: You have your chosen filters ready over a clean container.
- Common mistake: Not having filters ready or a clean vessel. You don’t want to rush filtering.
9. Filter the coffee concentrate.
- What “good” looks like: The liquid is mostly clear, with minimal sediment.
- Common mistake: Trying to filter too quickly. Let gravity do its work. Rushing can push fine particles through.
10. Filter again (optional but recommended).
- What “good” looks like: The concentrate is very clear, almost like brewed coffee.
- Common mistake: Skipping this step if your first filter wasn’t fine enough. A second pass with a finer filter (like a paper coffee filter in a pour-over cone) removes more sediment.
11. Dilute to taste.
- What “good” looks like: The final drink is smooth, flavorful, and at your preferred strength.
- Common mistake: Drinking the concentrate straight. It’s usually too strong. Start with a 1:1 ratio of concentrate to water or milk.
12. Serve and enjoy.
- What “good” looks like: A refreshing, smooth cold brew over ice.
- Common mistake: Not serving it cold. Cold brew is meant to be chilled.
Common mistakes (and what happens if you ignore them)
| Mistake | What it causes | Fix |
|---|---|---|
| Using a fine grind | Muddy coffee, difficult to filter, bitter taste | Use a coarse grind (like sea salt). |
| Incorrect coffee-to-water ratio | Weak, watery coffee or overly concentrated | Start with 1:4 to 1:8 ratio for concentrate and dilute later. |
| Insufficient steeping time | Under-extracted, weak, sour coffee | Steep for 12-24 hours. Experiment to find your sweet spot. |
| Over-steeping | Bitter, astringent coffee | Stick to the 12-24 hour range. Taste it to check progress. |
| Using dirty equipment | Stale, off-flavors, bitter coffee | Clean your brewer and filters thoroughly after each use. |
| Using poor quality water | Off-flavors, dull coffee | Use filtered water. |
| Not fully saturating grounds | Uneven extraction, weak spots, sourness | Gently stir to ensure all grounds are wet. |
| Not filtering thoroughly | Gritty, muddy coffee, sediment at the bottom | Use multiple filters or a finer filter for the second pass. |
| Storing concentrate improperly | Loss of flavor, potential spoilage | Store in an airtight container in the fridge for up to 1-2 weeks. |
| Not diluting concentrate | Overpowering, bitter taste | Dilute with water, milk, or ice to your preferred strength. |
Decision rules (simple if/then)
- If your cold brew tastes weak, then increase the coffee-to-water ratio or steep for longer, because these factors determine extraction strength.
- If your cold brew tastes bitter, then check your grind size (too fine?) or steeping time (too long?), because these are common causes of bitterness.
- If your cold brew is muddy, then you likely used too fine a grind or didn’t filter it well enough, because coarse grounds and good filtration are key.
- If your cold brew has a sour taste, then it might be under-extracted, so try a slightly finer grind or a longer steep time.
- If you’re making cold brew for the first time, then start with a 1:5 ratio and 18 hours of steeping, because this is a good baseline for a strong concentrate.
- If you notice off-flavors, then check your water quality and the cleanliness of your equipment, because these are the most likely culprits.
- If you want a stronger flavor without more caffeine, then steep for longer within the 12-24 hour window, because longer contact time extracts more solubles.
- If you prefer a less intense coffee, then use a more diluted ratio (e.g., 1:8) or dilute your concentrate more, because this controls the final strength.
- If your cold brew concentrate is too acidic, then ensure your grind is coarse enough and your steeping time is adequate, as under-extraction can sometimes lead to sourness.
- If you’re in a hurry, then cold brew isn’t your best bet, because it requires significant steeping time.
FAQ
Q: How long does cold brew coffee last?
A: Cold brew concentrate can last in an airtight container in the fridge for about one to two weeks. Always smell it before you drink it, though.
Q: Can I use any coffee beans for cold brew?
A: You can, but medium to dark roasts often shine in cold brew. They tend to have lower acidity and richer, chocolatey notes that work well with the brewing method.
Q: Do I need a special cold brew maker?
A: Nope. A French press, a mason jar with a lid, or even a simple pitcher with a strainer can work just fine. The key is the coarse grind and proper filtering.
Q: Why is my cold brew so bitter?
A: Bitterness usually comes from over-extraction. This can be caused by a grind that’s too fine, steeping for too long, or using water that’s too hot.
Q: Is cold brew less acidic than hot coffee?
A: Yes, generally. The cold water extraction process pulls out fewer of the acidic compounds compared to hot water brewing. That’s why many people find it smoother.
Q: How much caffeine is in cold brew?
A: It depends on the ratio and steep time, but cold brew concentrate is typically very high in caffeine. However, you dilute it, so your final cup might have a similar amount to hot coffee.
Q: What’s the best ratio for cold brew?
A: For concentrate, a common starting point is 1 part coffee to 4 parts water by weight. You can adjust from there, going up to 1:8 for a lighter concentrate or down to 1:3 for something super strong.
Q: Can I use pre-ground coffee?
A: You can, but it’s not ideal. Pre-ground coffee is usually too fine for cold brew and will result in a muddy, bitter cup. If you must, look for the coarsest grind available.
Q: How do I get rid of sediment in my cold brew?
A: Double filtering is the best approach. Use a coarse filter first (like a mesh strainer or cheesecloth) and then a finer filter (like a paper coffee filter in a pour-over cone) to catch the smallest particles.
What this page does NOT cover (and where to go next)
- Specific coffee bean recommendations (explore different origins and roast levels).
- Detailed comparisons of commercial cold brew makers (research brands based on your budget and needs).
- Advanced techniques like Japanese-style iced coffee (which involves brewing hot coffee over ice).
- The science behind coffee extraction (dive into coffee chemistry if you’re curious).
- Recipes for cold brew cocktails or other mixed drinks (get creative with your concentrate!).